Web Categories
This document provides a step-by-step guide for managing Web Product Categories in the Exigo Admin portal.
Overview
Web Categories allow you to organize products into hierarchical groupings for different web storefronts. Each "web" represents a distinct storefront or product catalog, and within each web you can create categories and subcategories to structure how products are displayed to customers.
Accessing Web Categories
Navigation Path
- Log in to the Exigo Admin portal.
- Navigate to Administration > Settings.
- On the Company Settings tab, scroll down to the Web Product Categories section.
- Click MODIFY PRODUCT CATEGORIES to open the Web Categories manager.
Viewing Existing Web Categories
When the Web Categories popup opens, you will see:
- A Web Categories tab (selected by default) displaying a tree view of all configured webs and their categories.
- A Properties tab for configuring sort options.
- An ADD WEB button to create a new web storefront.
- An ADD CATEGORY button to add a category under a selected web (enabled after selecting a node in the tree).
Each entry in the tree shows the category name followed by its numeric ID in parentheses.
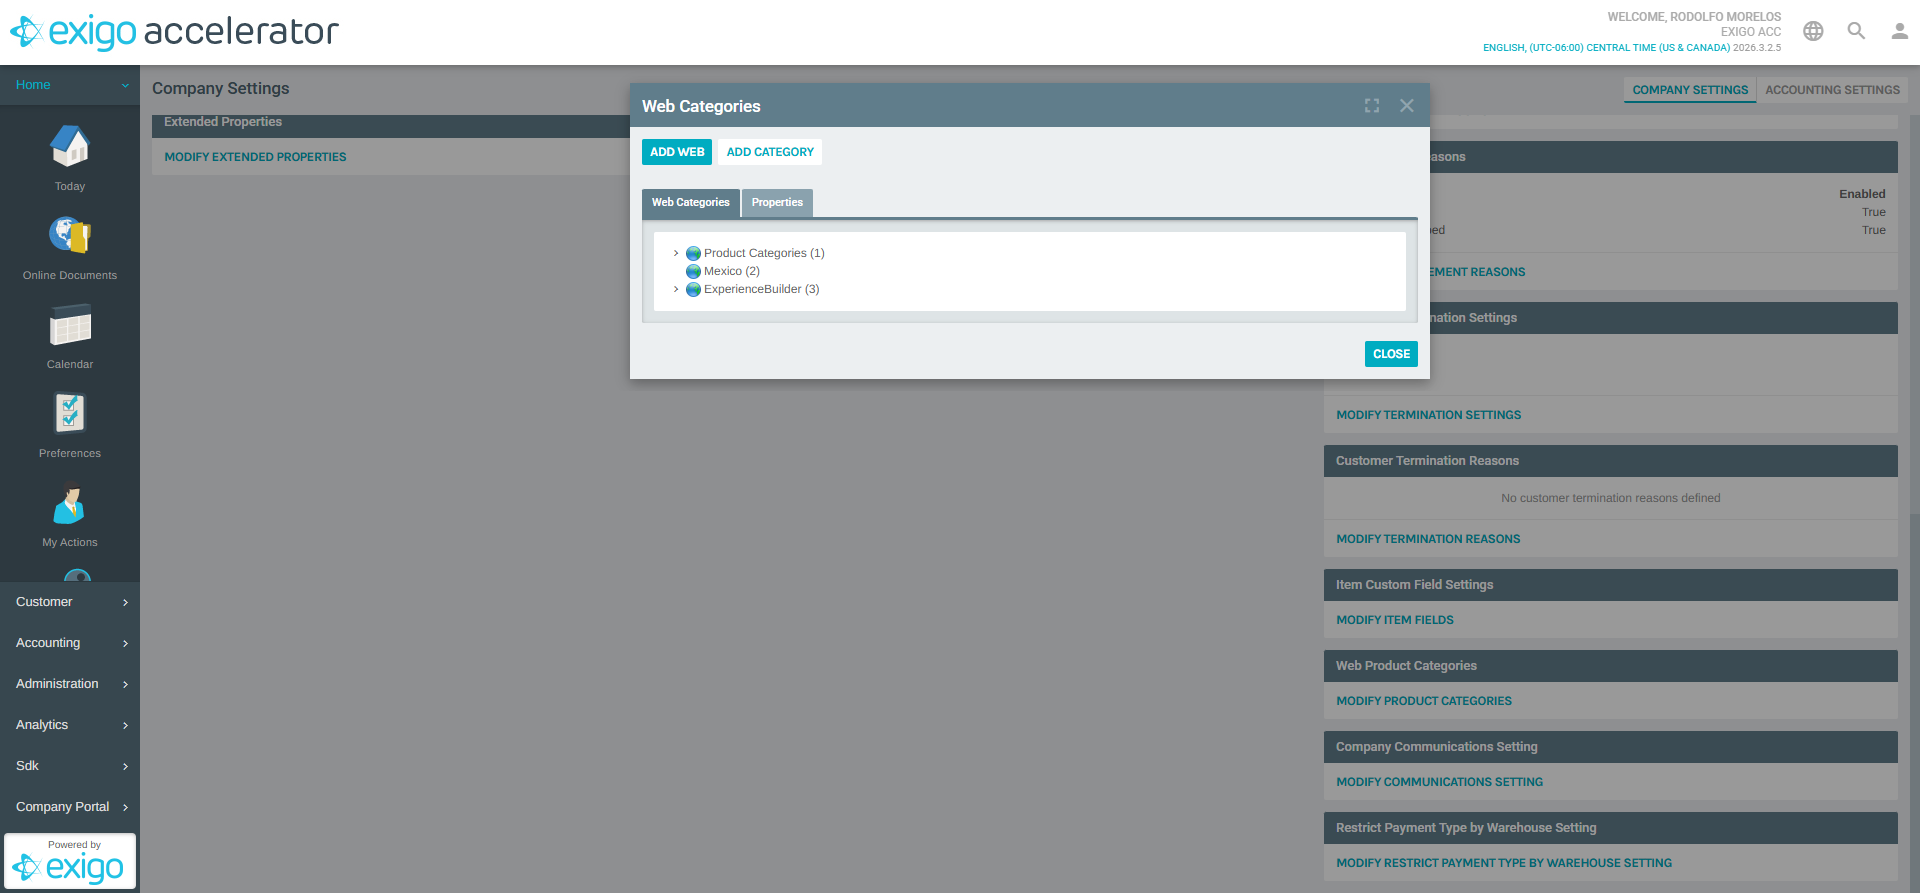
Category Tree Structure
The tree view displays a hierarchical list of webs and their categories. In the example above, three top-level entries are shown:
| Web Name | ID |
|---|---|
| Product Categories | 1 |
| Mexico | 2 |
| ExperienceBuilder | 3 |
Click the chevron (>) icon next to any entry to expand it and view its subcategories.
Properties Tab
The Properties tab provides sorting configuration for the selected web:
- Sort Categories — Controls how categories are ordered within the tree. Options include "Manual Sort" (drag-and-drop ordering) and other automatic sorting methods.
- List Products — Controls how products are listed within categories. Options include "Manual Sort" and other automatic sorting methods.

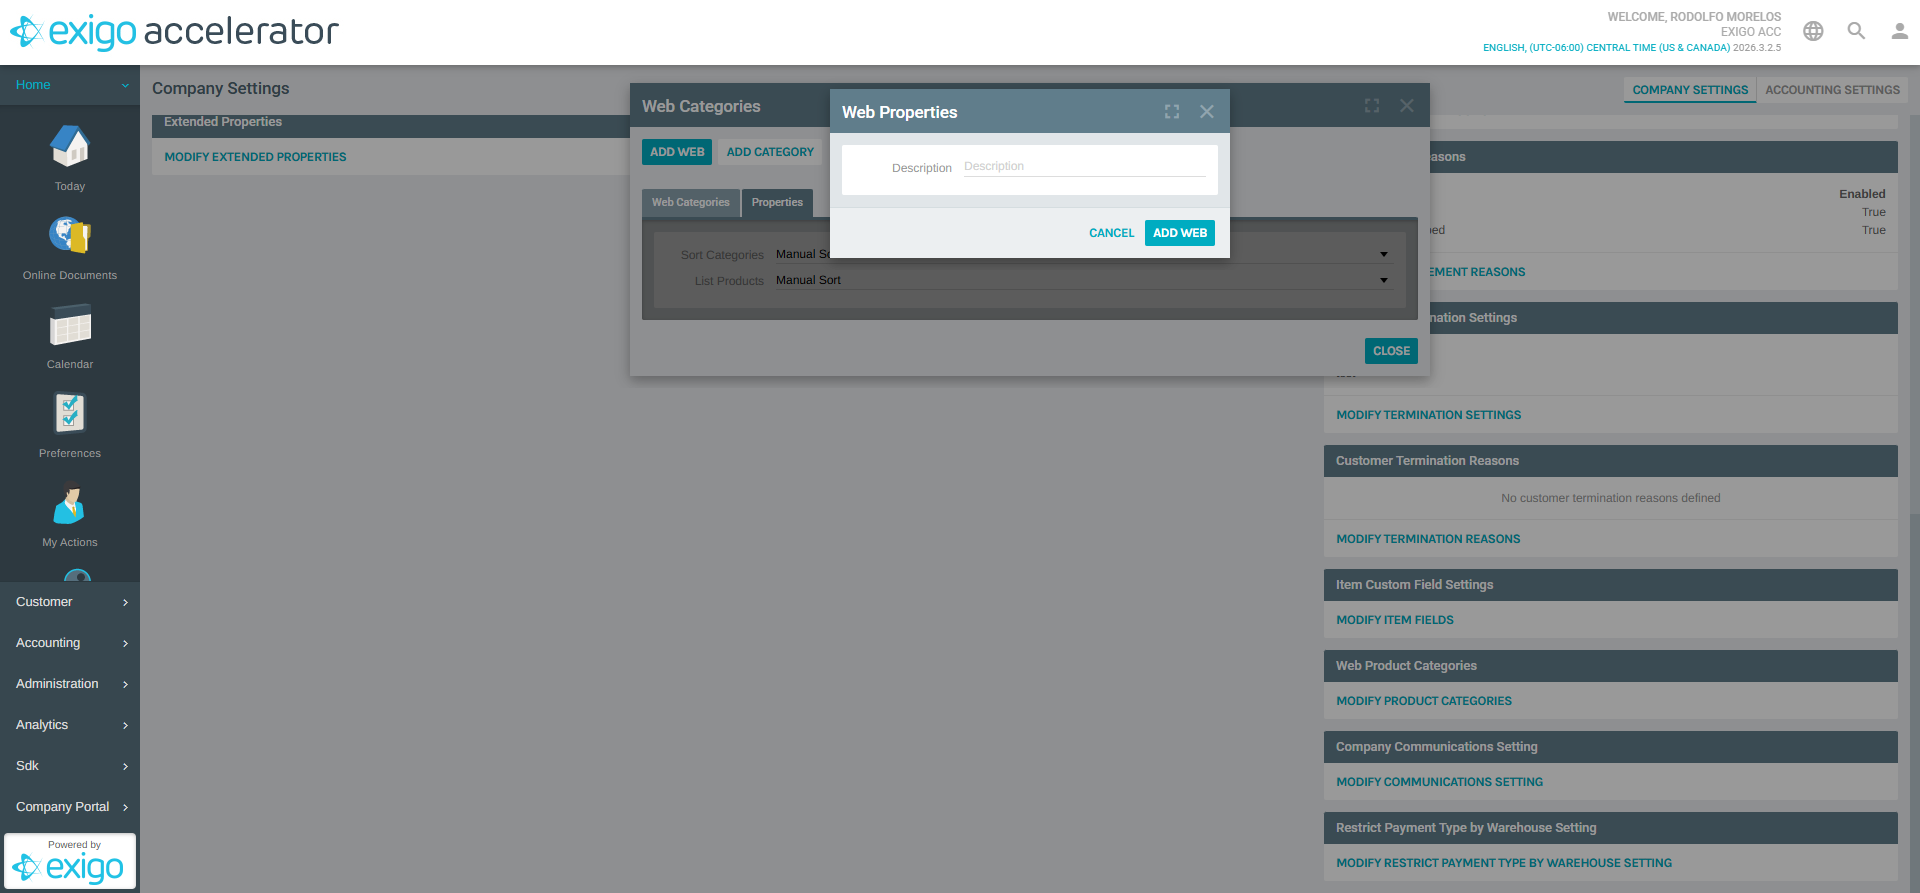
Adding a New Web
To create a new web storefront:
- Click the ADD WEB button at the top of the Web Categories popup.
- A Web Properties dialog will appear with the following field:
- Description (required) — Enter a descriptive name for the new web storefront (e.g., "US Store", "Canada Store").
- Click ADD WEB to save, or CANCEL to discard.
Adding a New Category
To add a category under an existing web:
- Select a web or category node in the tree by clicking on it.
- Click the ADD CATEGORY button (becomes active after selecting a node).
- Fill in the category details in the dialog that appears.
- Click Save to create the category.
Categories can be nested to create a multi-level hierarchy for organizing products.
Best Practices
- Use descriptive names for both webs and categories to make navigation intuitive for administrators and customers.
- Plan your category hierarchy before creating entries — a well-organized structure makes product management easier.
- Use separate webs for different storefronts, regions, or product lines to keep catalogs independent.
- Leverage manual sort when the display order of categories or products matters for marketing or user experience purposes.
System Notes
- Each web and category is assigned a unique numeric ID automatically by the system.
- Web Categories are accessed from Administration > Settings > Company Settings > Web Product Categories.
- Changes to web categories may affect product visibility on customer-facing storefronts.