Configuring Price Types (Admin)
This guide explains how to configure Price Types in Exigo Admin. Price Types define different pricing tiers for products, enabling you to offer different prices to different customer segments (e.g., Retail, Wholesale, Employee).
Overview
Price Types allow you to:
- Define distinct pricing tiers for your product catalog (e.g., Retail, Wholesale, Preferred, Employee)
- Assign a default Price Type to each Customer Type, so customers automatically receive the correct pricing
- Set individual prices per Price Type on each item, including Price, Tax on Price, Ship on Price, BV, and CV values
Where to Find Price Types
Price Types are managed from Administration > Settings > Accounting Settings.
Screenshot (Accounting Settings – Price Type section):
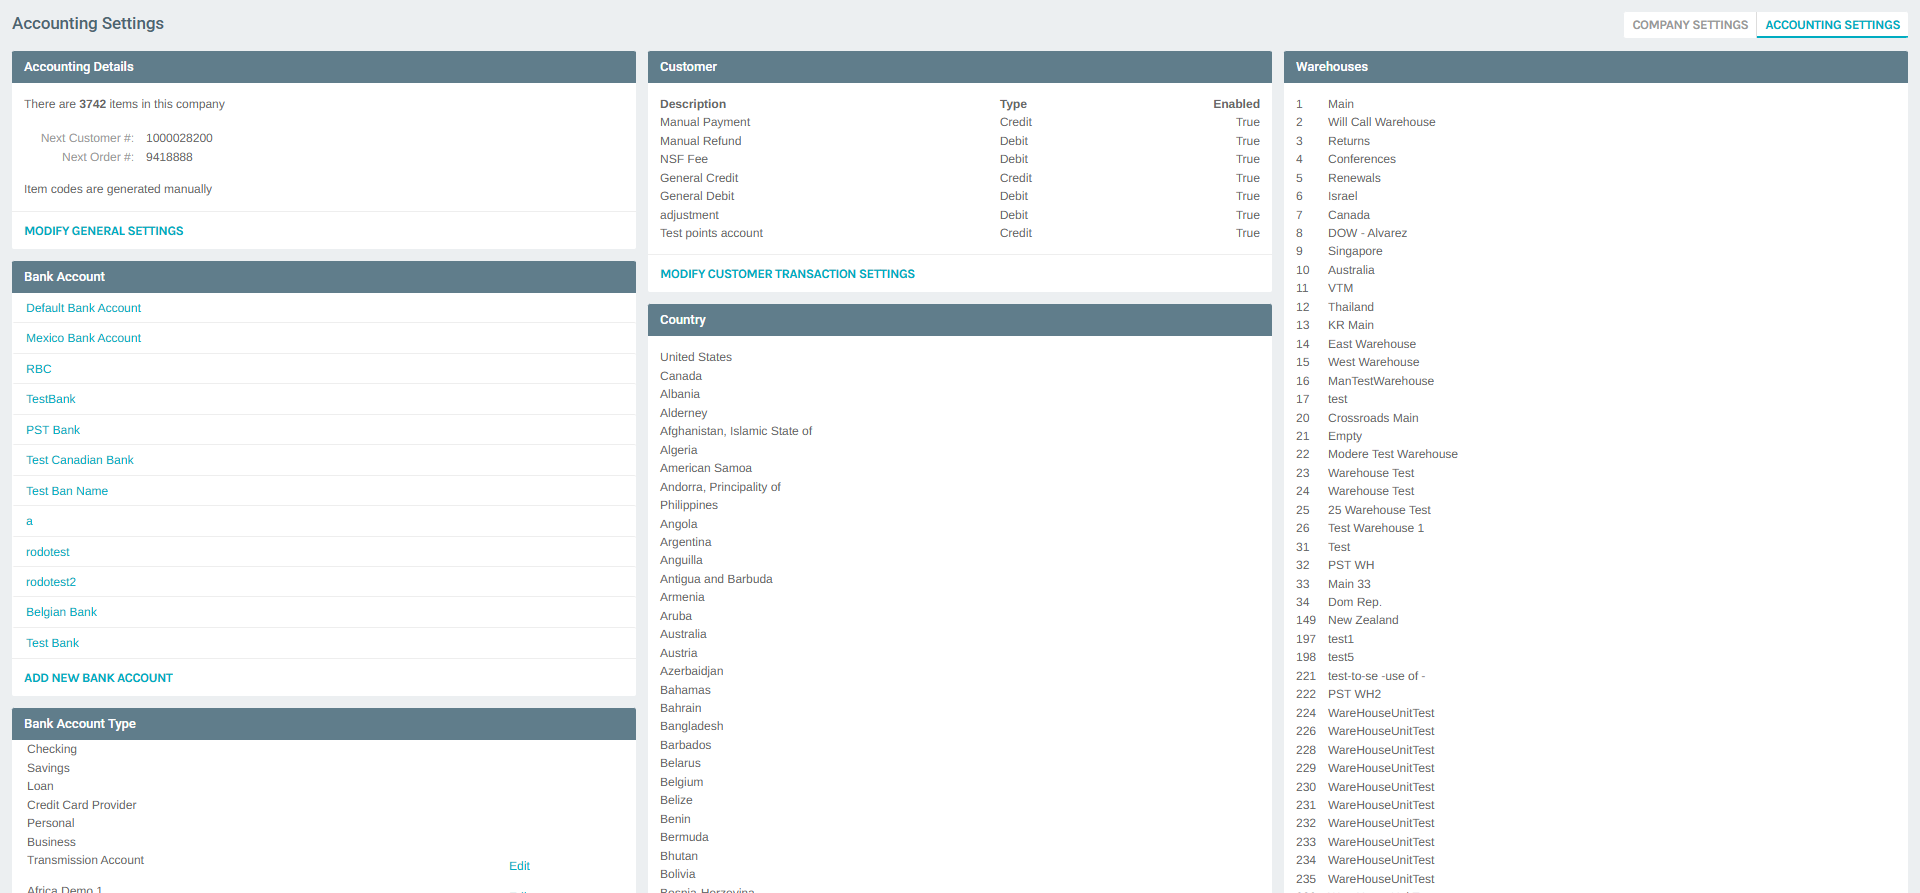
The Accounting Settings page shows the current Price Types configured for the company. Each entry displays its numeric ID and description.
Step-by-step: Manage Price Types
1) Navigate to Accounting Settings
- In the left navigation panel, expand Administration
- Click Settings
- On the Company Settings page, click the ACCOUNTING SETTINGS tab at the top
Screenshot (Accounting Settings – Price Types section visible):
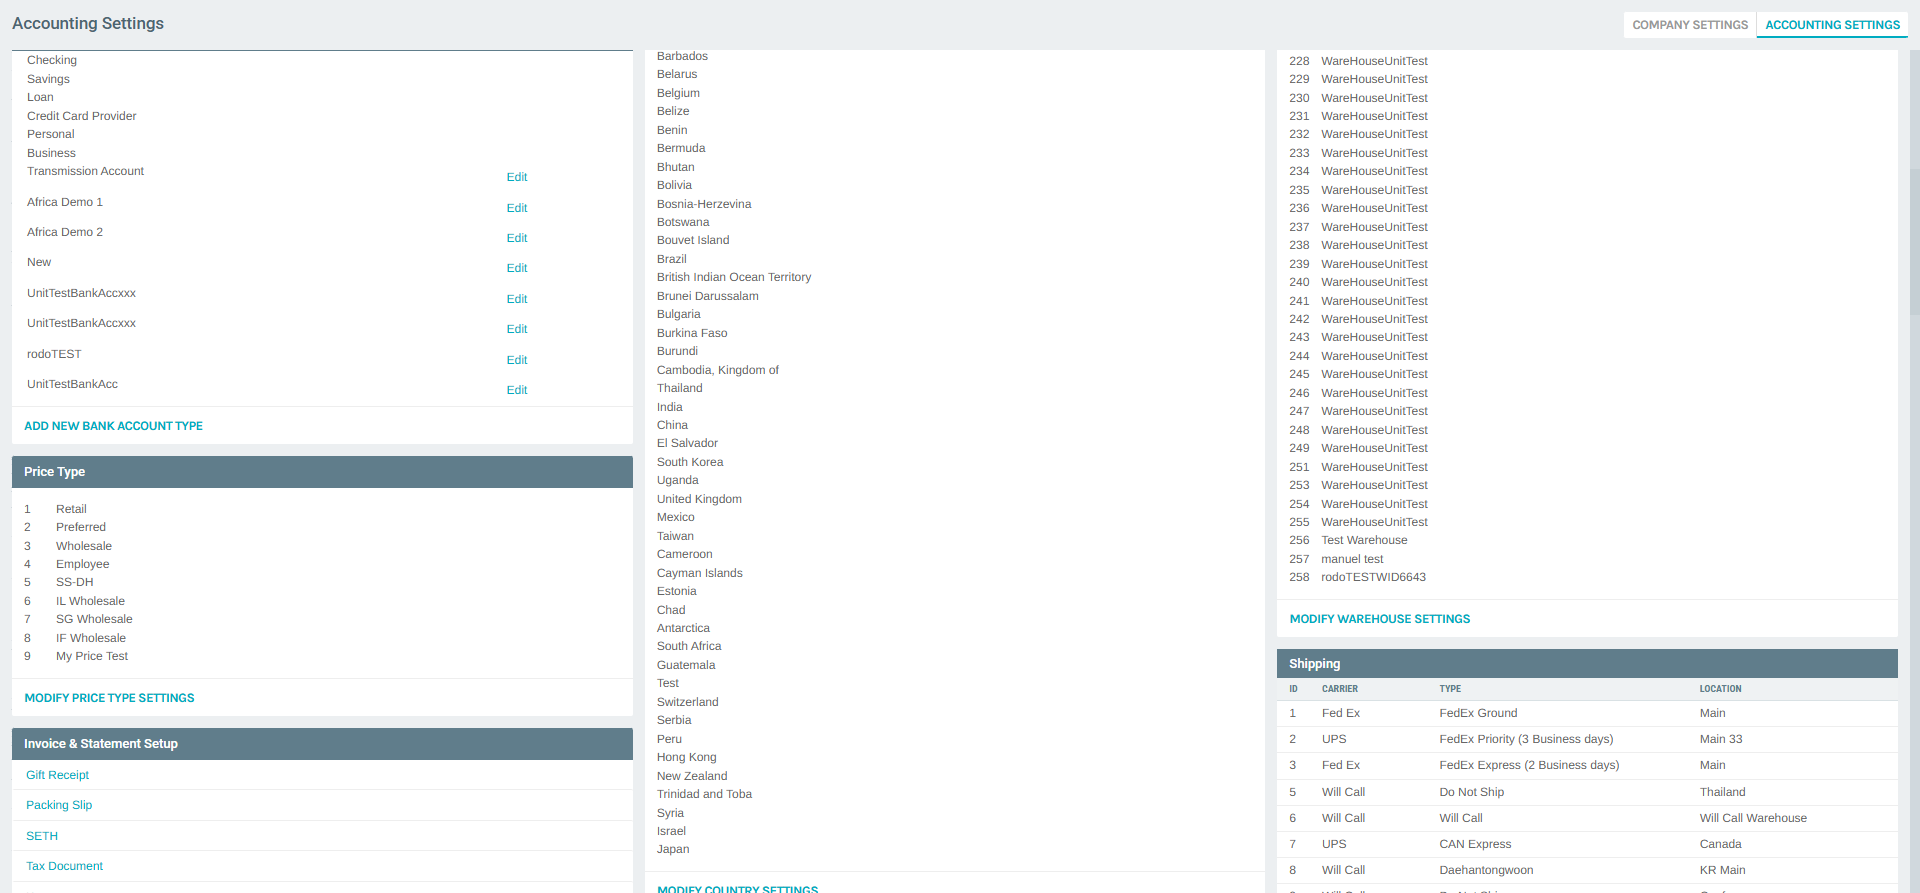
You will see the Price Type section in the Accounting Settings page, listing all configured price types and a MODIFY PRICE TYPE SETTINGS button.
2) Open Price Type Settings
- Scroll down to the Price Type section
- Click MODIFY PRICE TYPE SETTINGS
Screenshot (Price Types list):
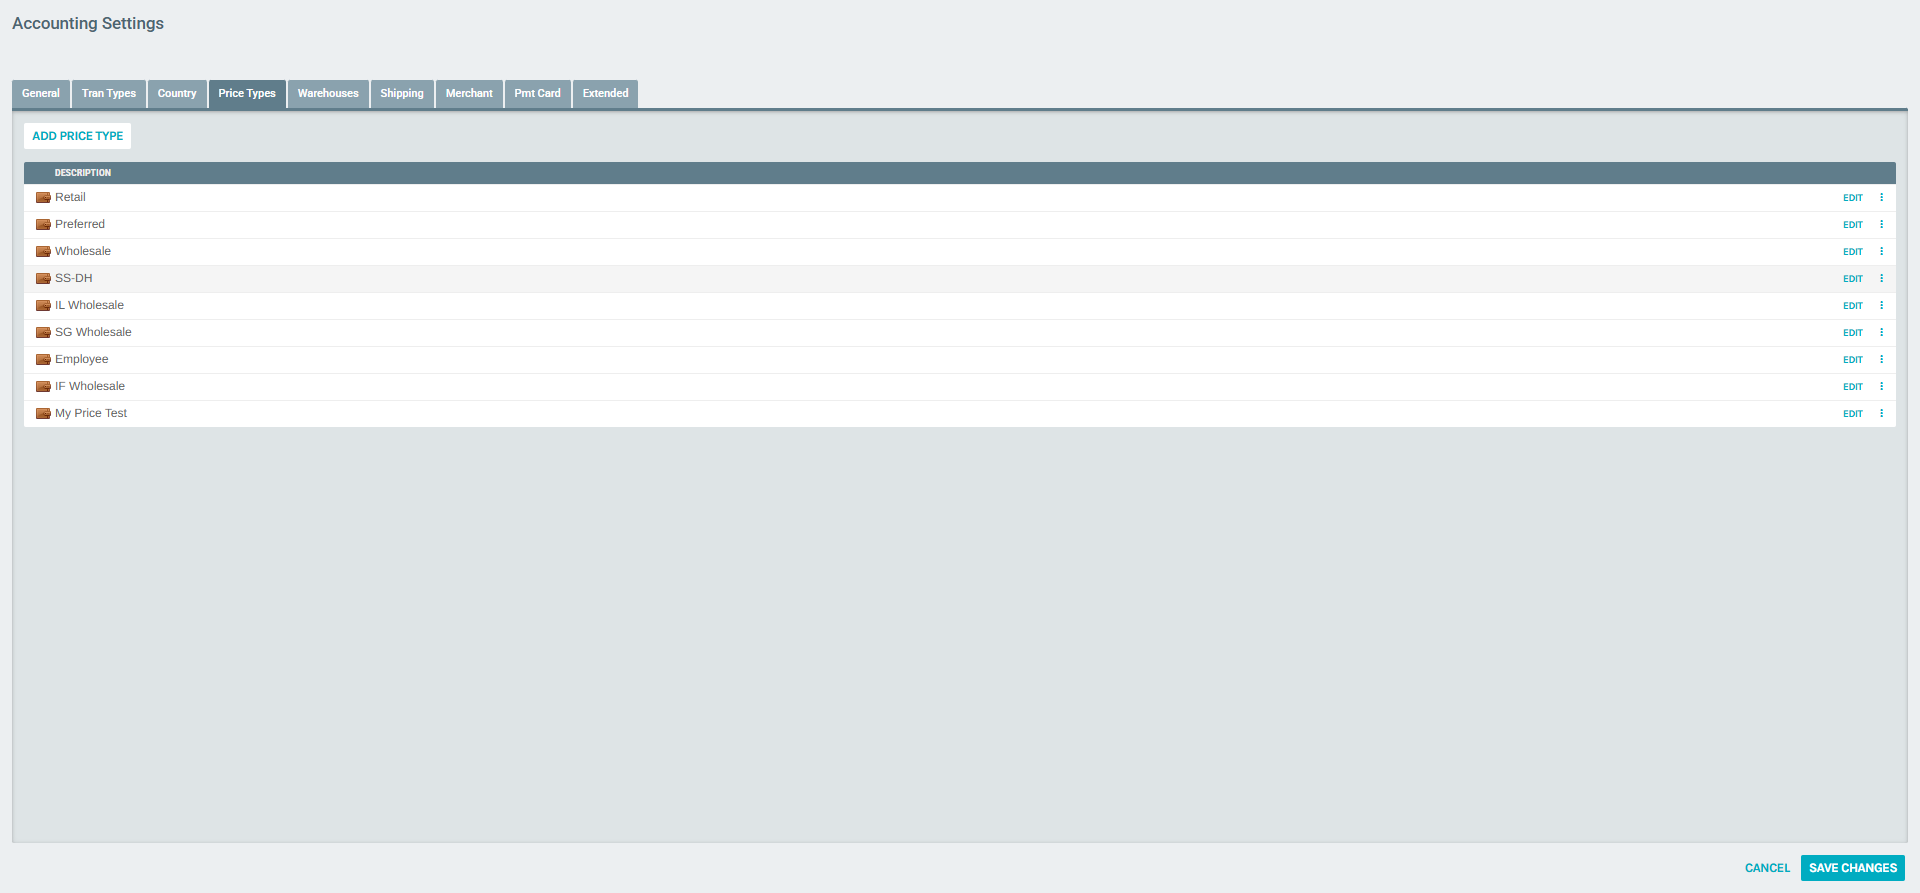
The Price Types tab in the Accounting Settings popup displays:
- DESCRIPTION column: Name of each price type
- EDIT link: Opens the edit form for the price type
- ⋮ (more options) button: Provides Edit and Delete options
- ADD PRICE TYPE button at the top: To create a new price type
The following Price Types are available by default in the demo environment:
| ID | Description |
|---|---|
| 1 | Retail |
| 2 | Preferred |
| 3 | Wholesale |
| 4 | Employee |
| 5 | SS-DH |
| 6 | IL Wholesale |
| 7 | SG Wholesale |
| 8 | IF Wholesale |
| 9 | My Price Test |
3) Add a New Price Type
- Click the ADD PRICE TYPE button at the top of the list
Screenshot (Add Price Type popup):
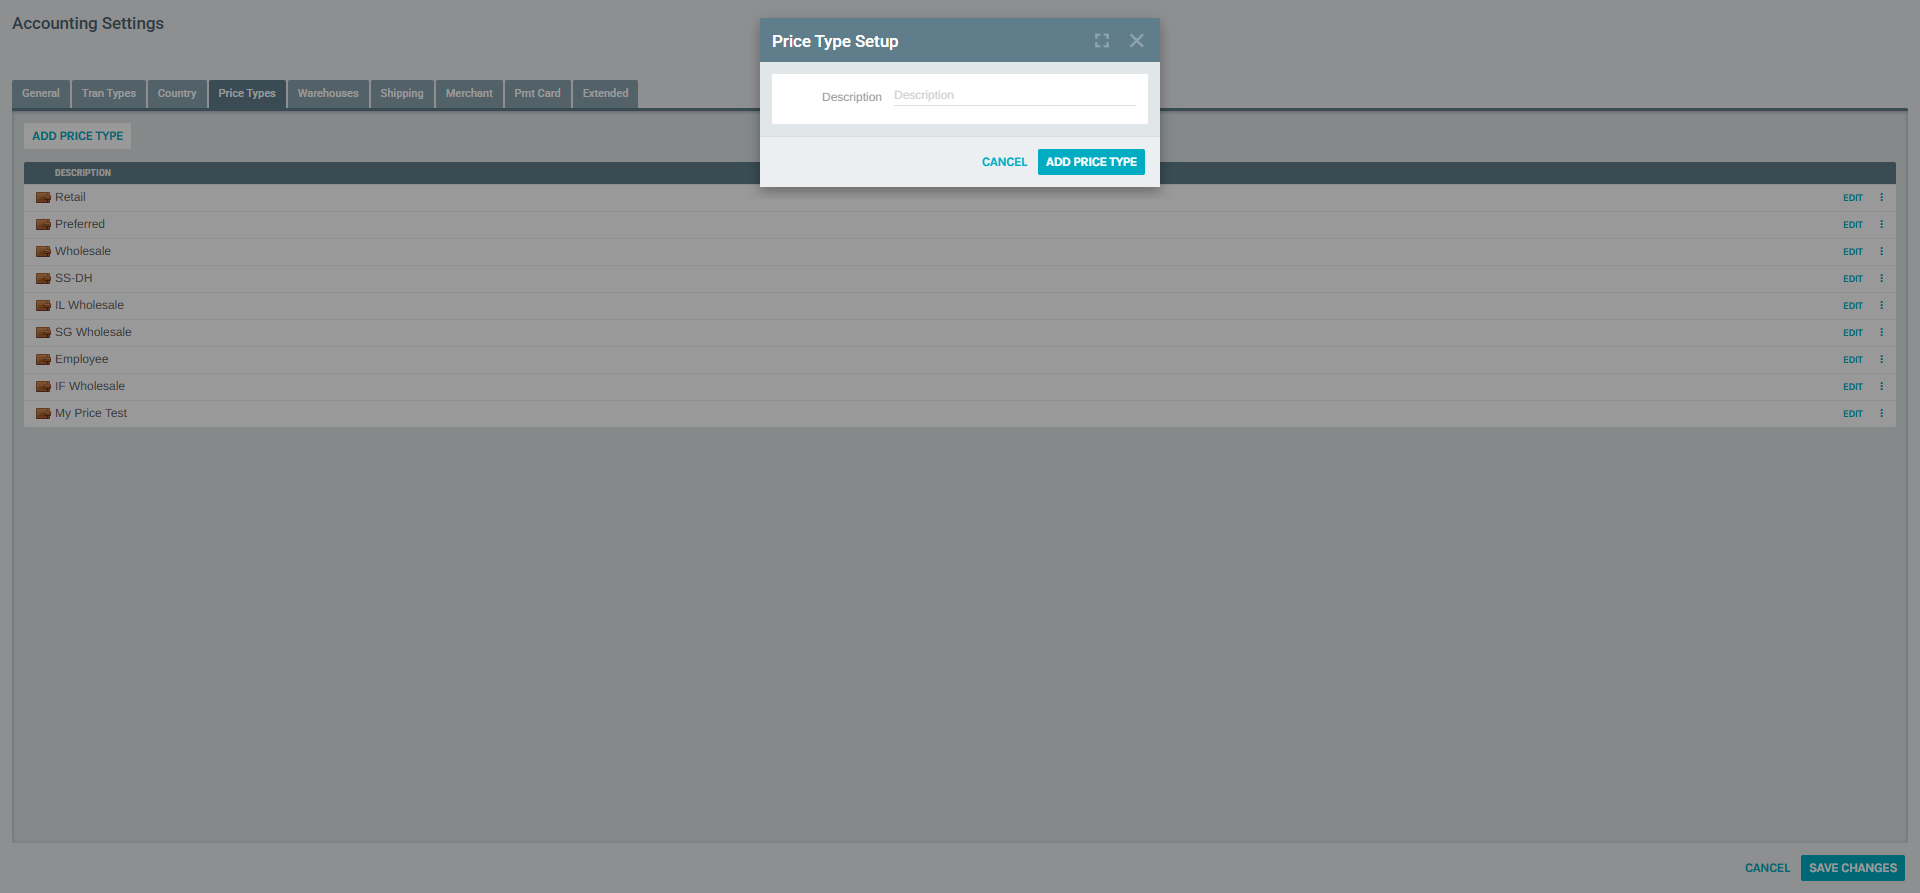
The Price Type Setup form opens with:
- Description (required): The name for the new price type (e.g., "VIP", "Partner")
- ADD PRICE TYPE button: Saves and adds the new price type
- CANCEL button: Closes without saving
Fill in the description and click ADD PRICE TYPE to save.
4) Edit an Existing Price Type
- Click EDIT next to any price type in the list, or click the ⋮ button and select Edit
Screenshot (Edit Price Type popup):

The Price Type Setup edit form contains:
- Description (required): Modify the price type name
- SAVE CHANGES button: Updates the price type
- Delete (trash icon link): Permanently removes the price type
- CANCEL button: Closes without saving
5) Price Type Context Menu (Edit / Delete)
Clicking the ⋮ (more options) button on any price type row reveals a context menu:
Screenshot (Price Type context menu):

Options available:
- Edit – Opens the Price Type Setup form to modify the description
- Delete – Permanently removes the price type
Warning
Deleting a Price Type that is actively assigned to Customer Types or Items may cause pricing issues. Verify usage before deleting.
Assigning Price Types to Customer Types
Each Customer Type has a Price Type field that determines which pricing tier customers of that type will receive when placing orders.
How to assign a Price Type to a Customer Type
- Go to Administration > Settings (Company Settings)
- Click MODIFY CUSTOMER SETTINGS
- In the Customer Types tab, click EDIT next to the desired Customer Type
Screenshot (Customer Type Setup – Price Type field):
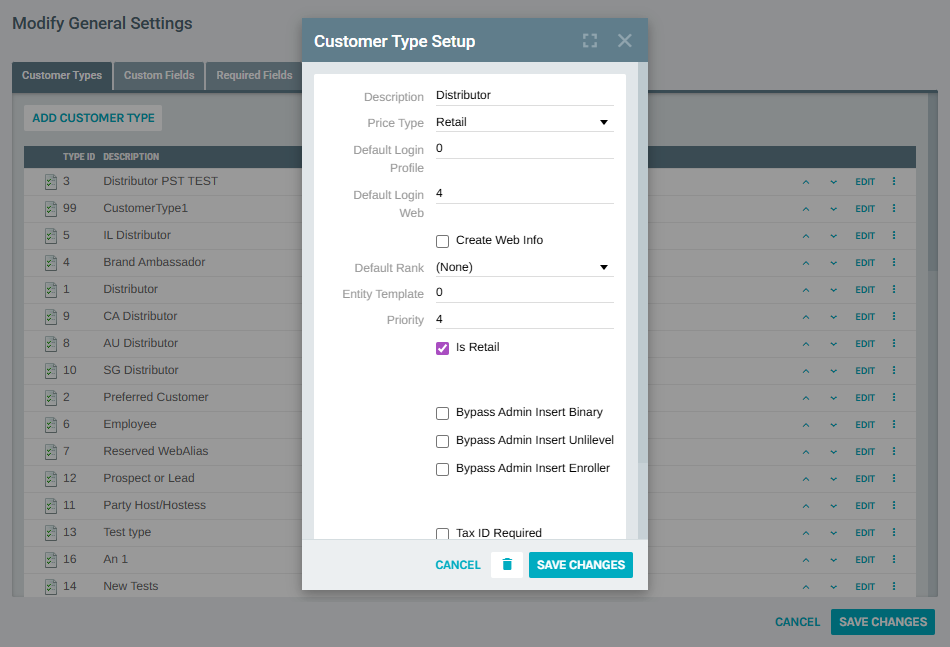
The Customer Type Setup form includes a Price Type dropdown. Set this to the desired Price Type for customers of this type. For example:
- Distributor → Price Type: Retail
- Preferred Customer → Price Type: Preferred
- Employee → Price Type: Employee
Setting Prices by Price Type on Items
Each item in your catalog has a Pricing tab where prices are configured for each Price Type.
How to view/edit item pricing by Price Type
- Go to Accounting > Items
- Find the item and click EDIT
- Click the Pricing tab
Screenshot (Item Pricing by Price Type):
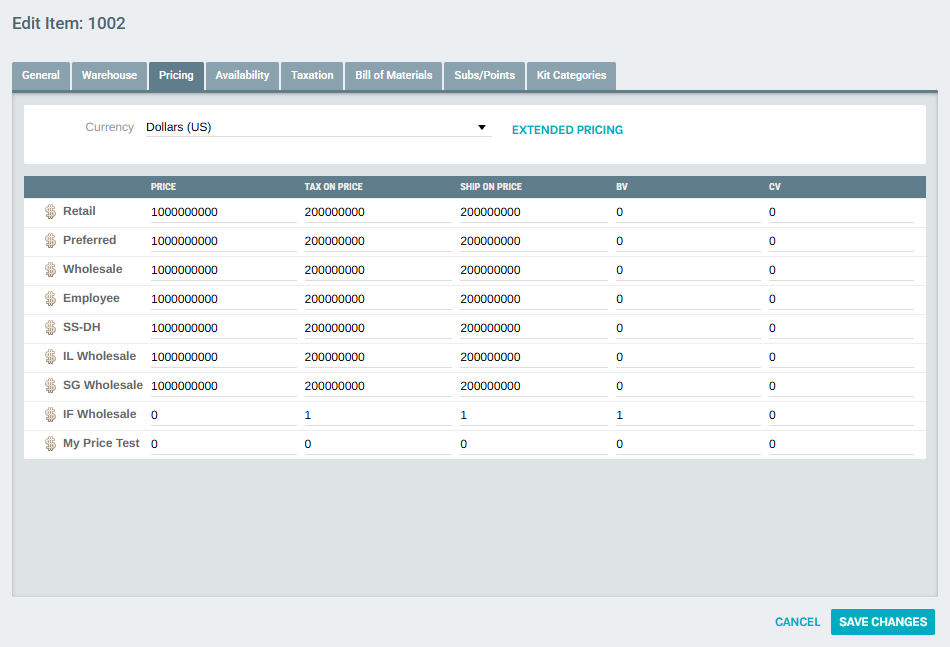
The Pricing tab shows a matrix of all Price Types with the following columns per row:
| Column | Description |
|---|---|
| Price Type | Name of the price tier (e.g., Retail, Preferred) |
| Price | The sale price for this pricing tier |
| Tax on Price | Amount that is taxable |
| Ship on Price | Amount used to calculate shipping |
| BV | Business Volume (used in commission calculations) |
| CV | Commission Volume (used in commission calculations) |
You can also filter by Currency using the dropdown at the top of the Pricing tab to configure prices for different markets.
Notes
- Price Types are global and apply across all warehouses and currencies
- Each item can have a different price per Price Type and per currency
- Price Types are referenced by Customer Types to automatically apply the correct pricing tier
- Changes to Price Type names are reflected immediately across the platform
- BV and CV values are used in the commissions engine; ensure they are set correctly for compensation plan calculations