Creating a Page in Elements
Tutorials are learning-oriented articles that help users to go through a process and achieve a deliverable. This tutorial is designed for developers and content creators who want to create a new page using the Elements interface in Experience Builder. By following this tutorial, you will learn how to create a page element, configure its properties, and save your changes.
Why should I follow this? This tutorial provides a step-by-step guide for creating pages using the Elements interface, which is the visual way to manage page elements in Experience Builder. It will help you understand how to navigate the Elements interface and create pages efficiently.
Outline
In this tutorial, you will learn how to: * Navigate the Elements interface * Create a new page element * Configure page properties including layout selection * Save your changes throughout the process * View the JSON code preview of your page * Configure route attributes including path, HTTP method, and advanced settings * Add widgets and components to your page using the Add resource button * Create versions of your page element once a layout and resources are configured * Localize fields using existing locale keys when no primary page locale is set * Set a primary page locale and automatically convert fields to locale keys
Before you start
Make sure that: - You have Experience Builder installed and set up in your development environment. - You have access to the Elements interface. - You have basic knowledge of web pages and content management systems.
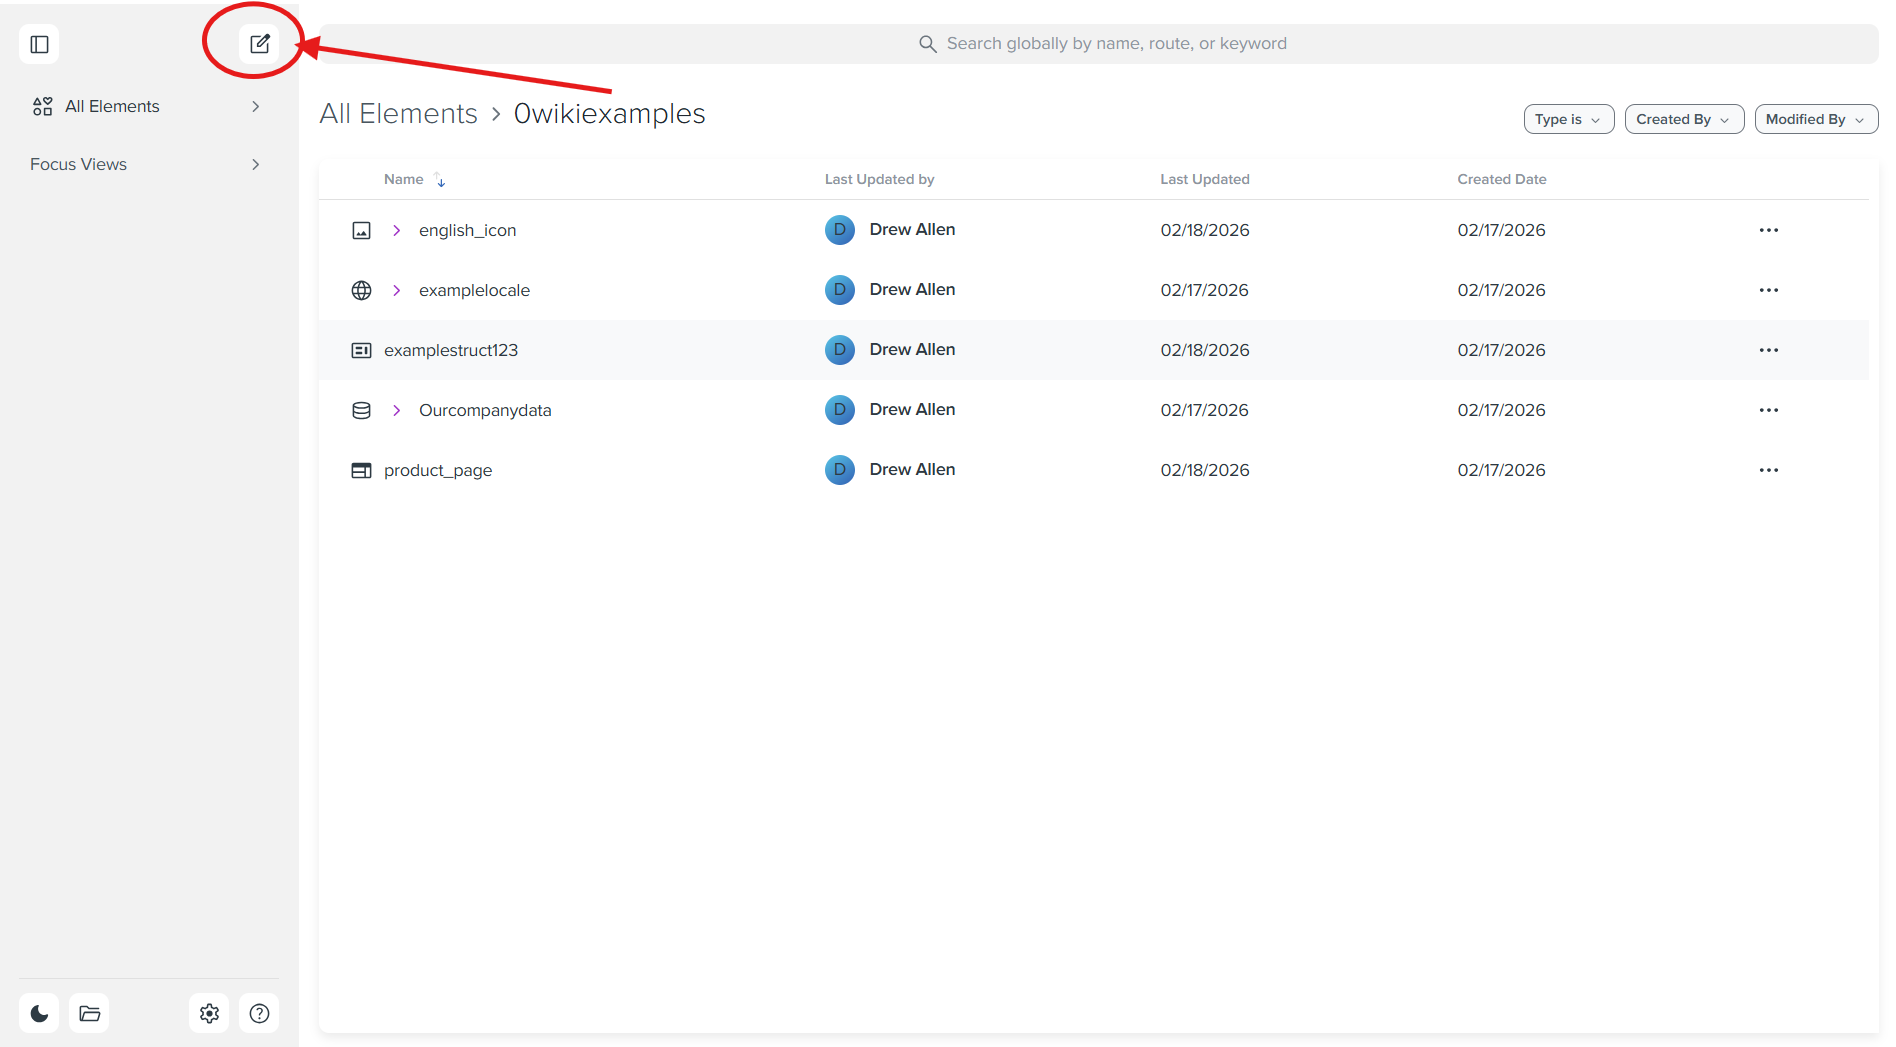
Step 1: Click the Create Element Button
To begin creating a new page, click the create element button located in the top left corner of the Elements interface.
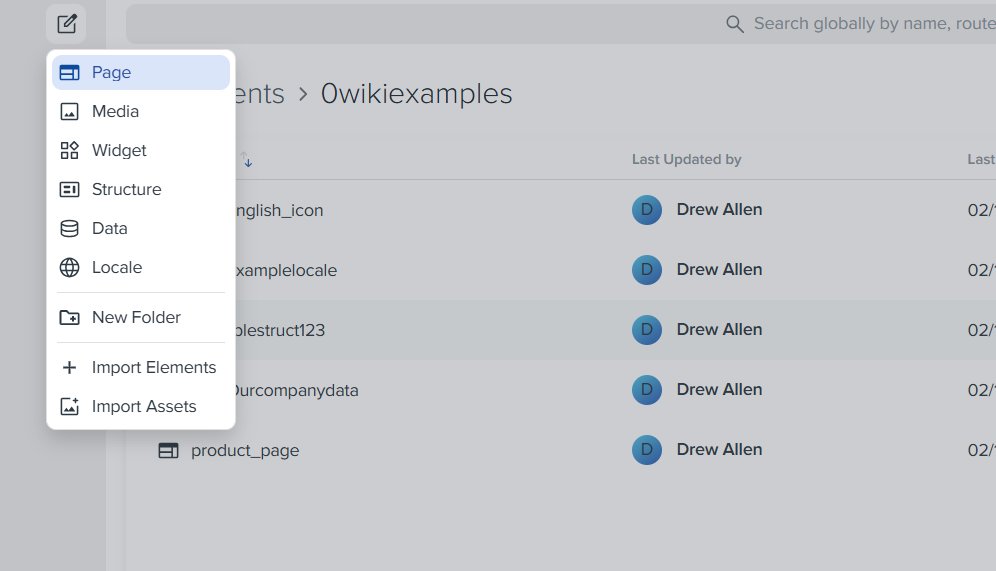
Step 2: Select Page Type
After clicking the create element button, a dropdown menu will appear. From the dropdown menu, select "Page" to create a new page element.
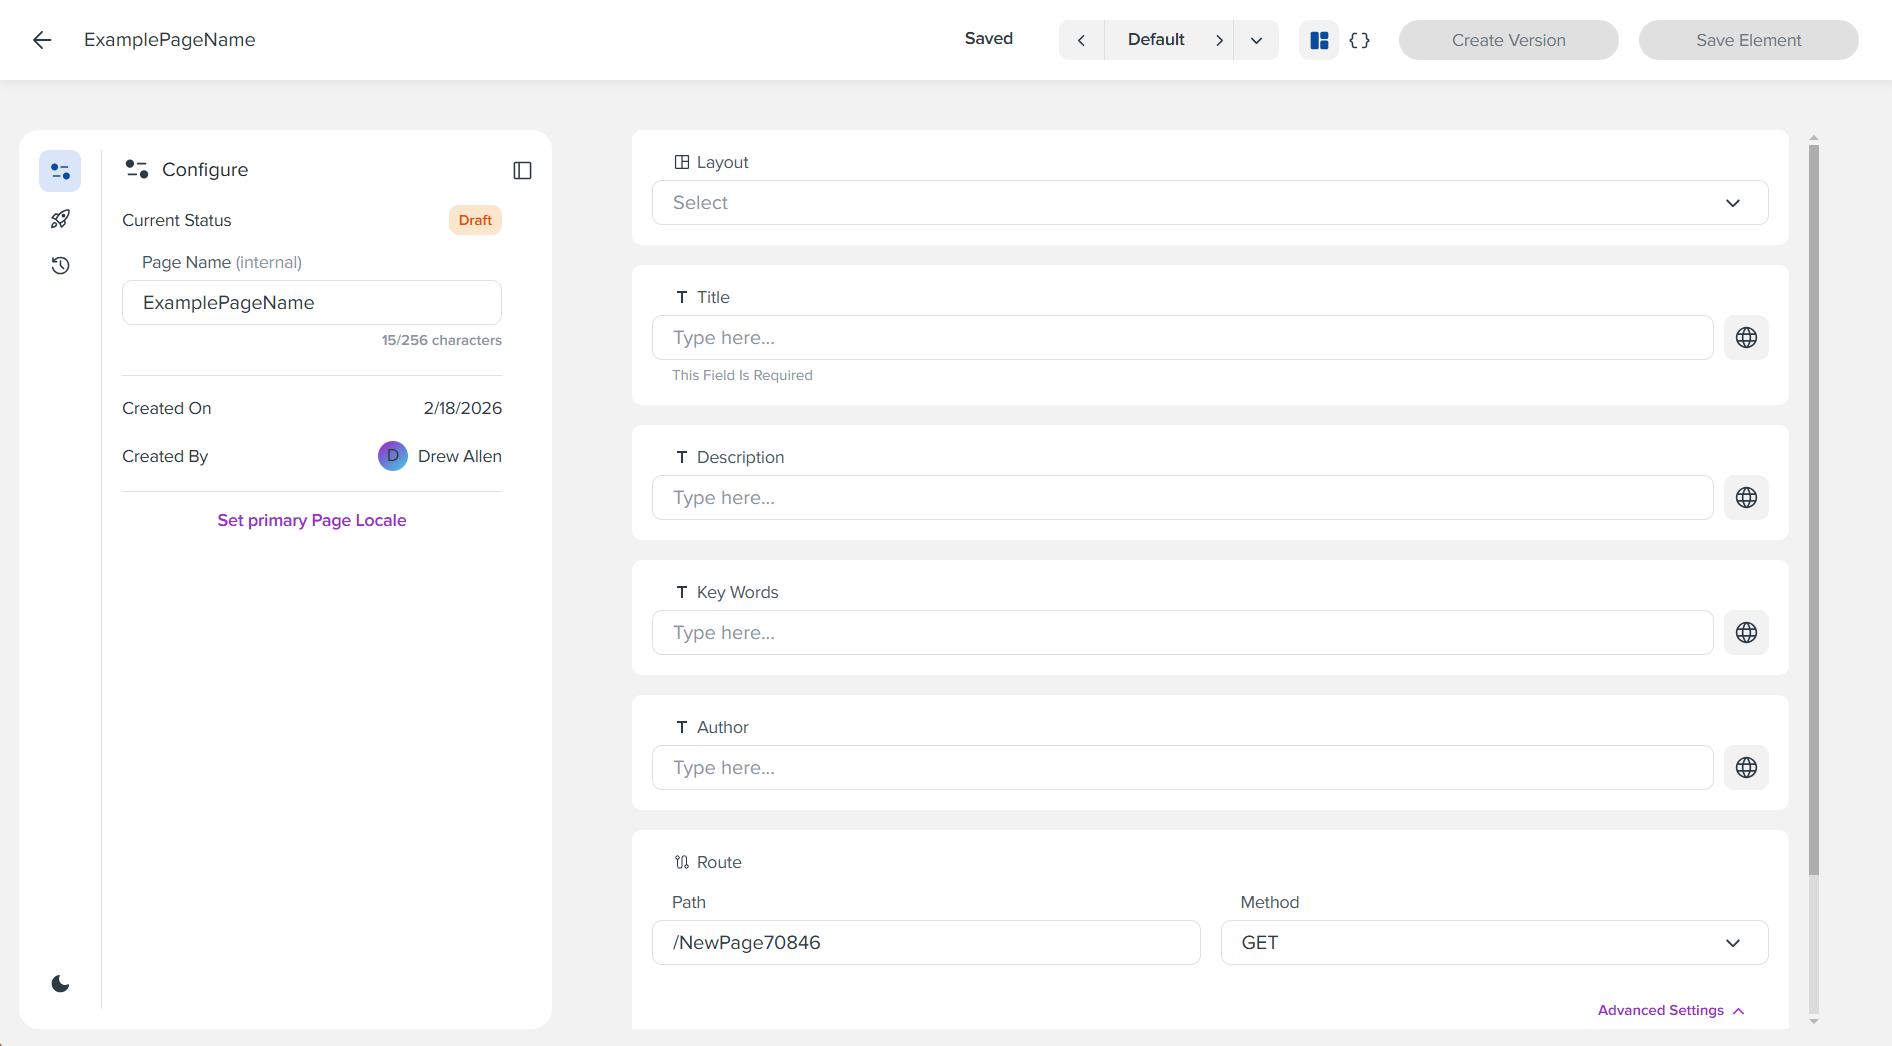
Step 3: Start with a Blank Page
You will now see the page configuration interface. Start with a blank page by entering a name for your page in the "Page Name (internal)" field.
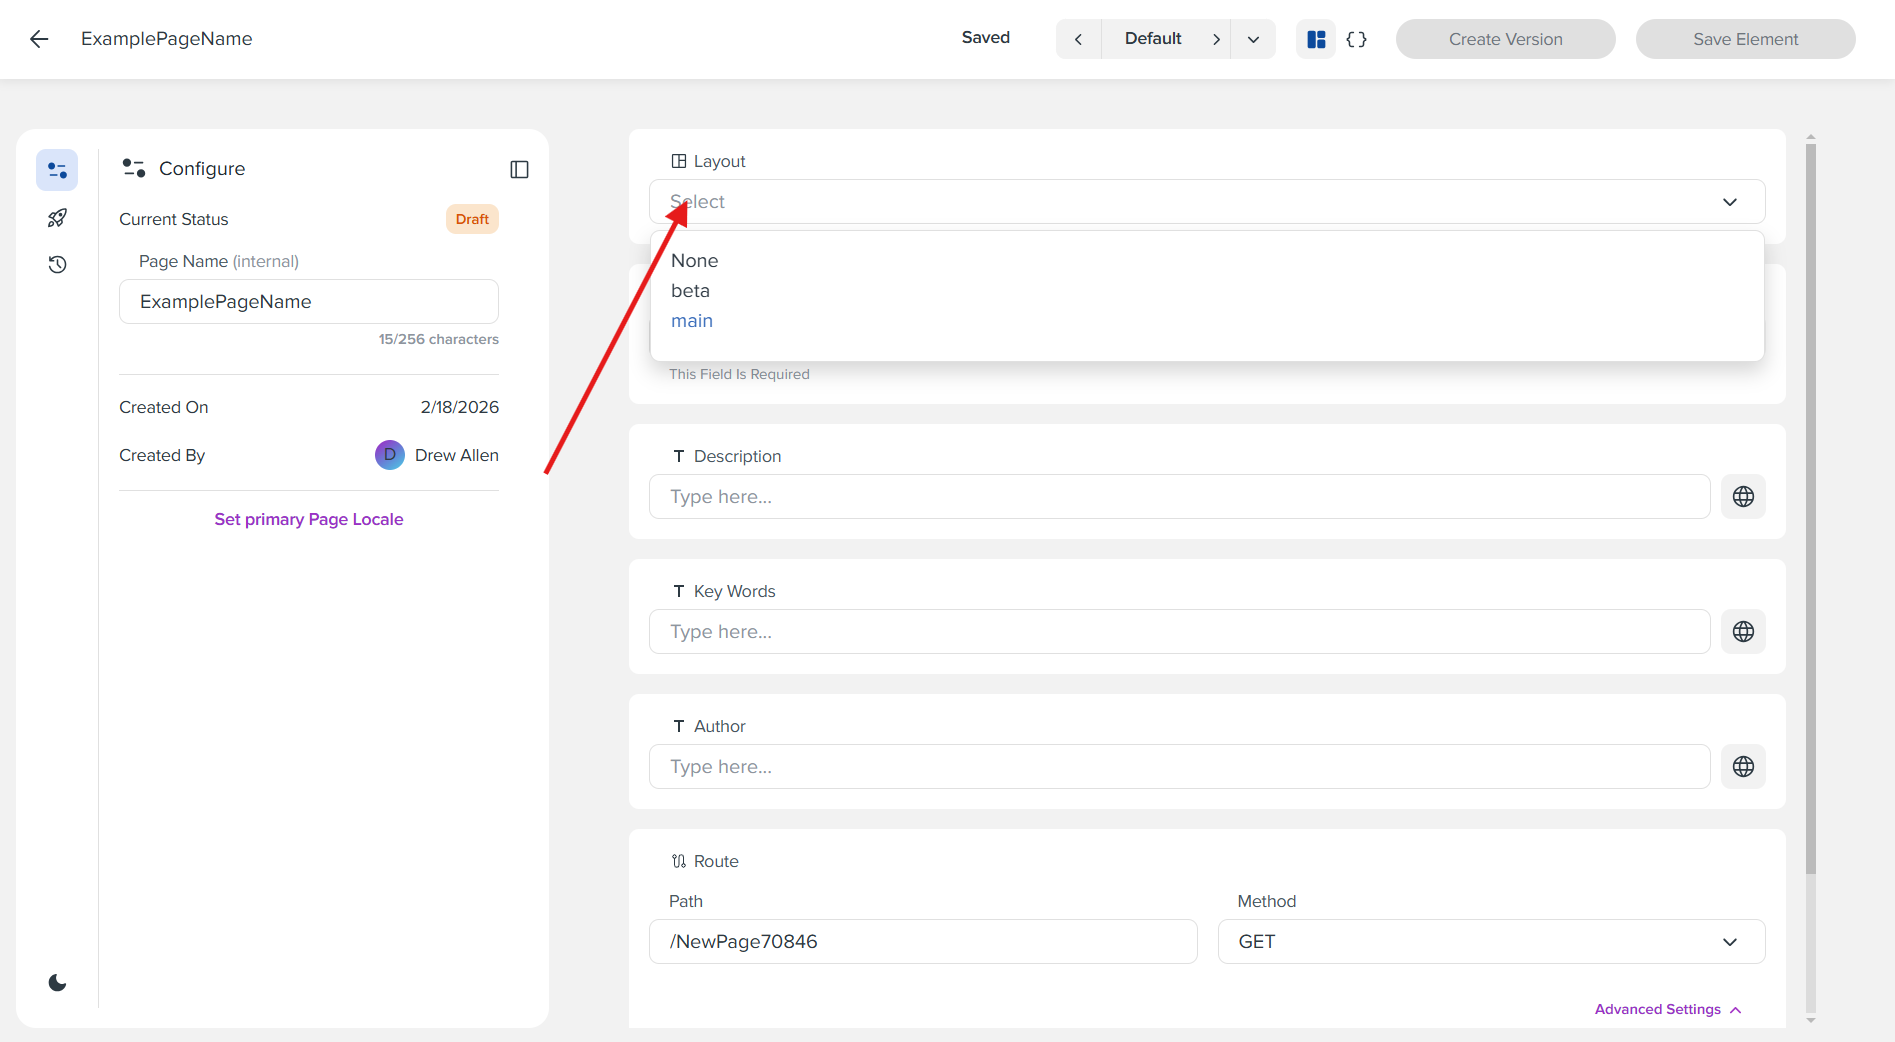
Step 4: Pick a Layout from the Dropdown
In the page configuration panel, locate the "Layout" dropdown field. Click on the dropdown and select an appropriate layout for your page (e.g., "main", "beta", or "None").
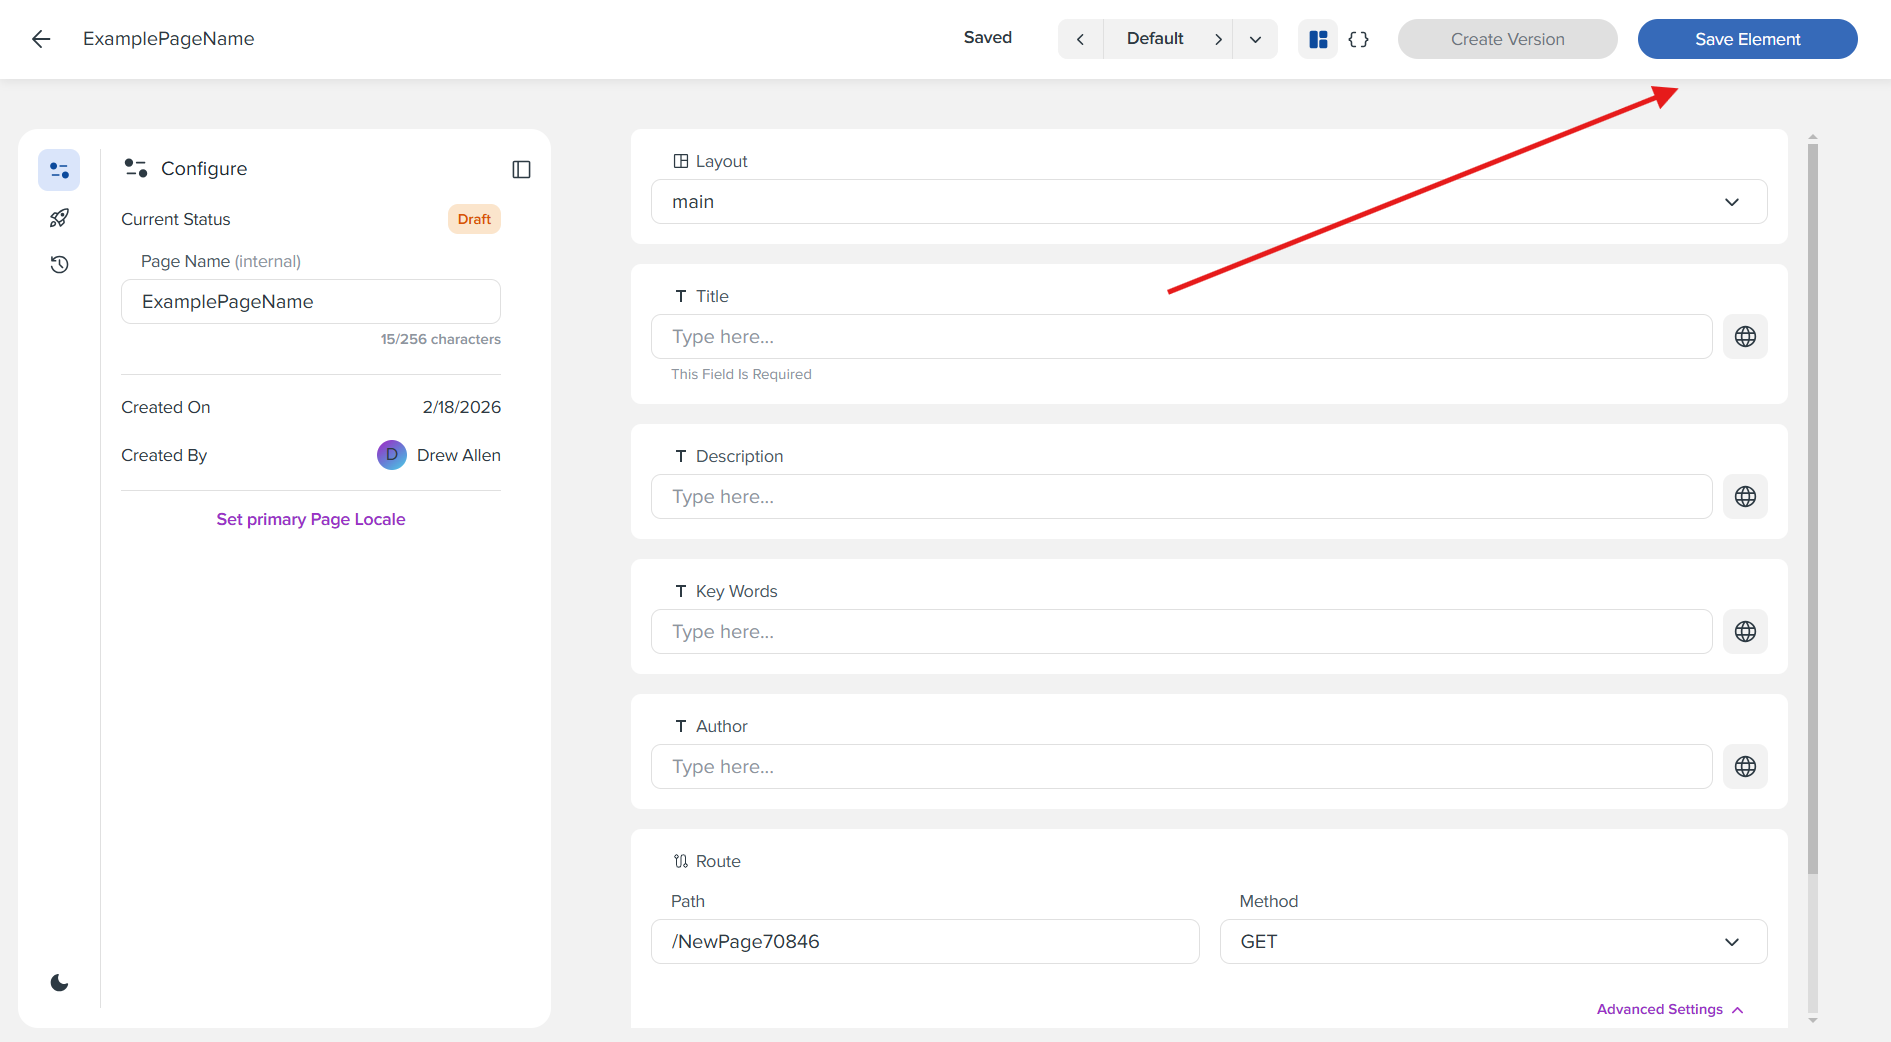
Step 5: Save Your Changes
At each step of the way, you should save your changes using the "Save Element" button located in the top right corner of the interface. This ensures your work is preserved as you progress through the page creation process.
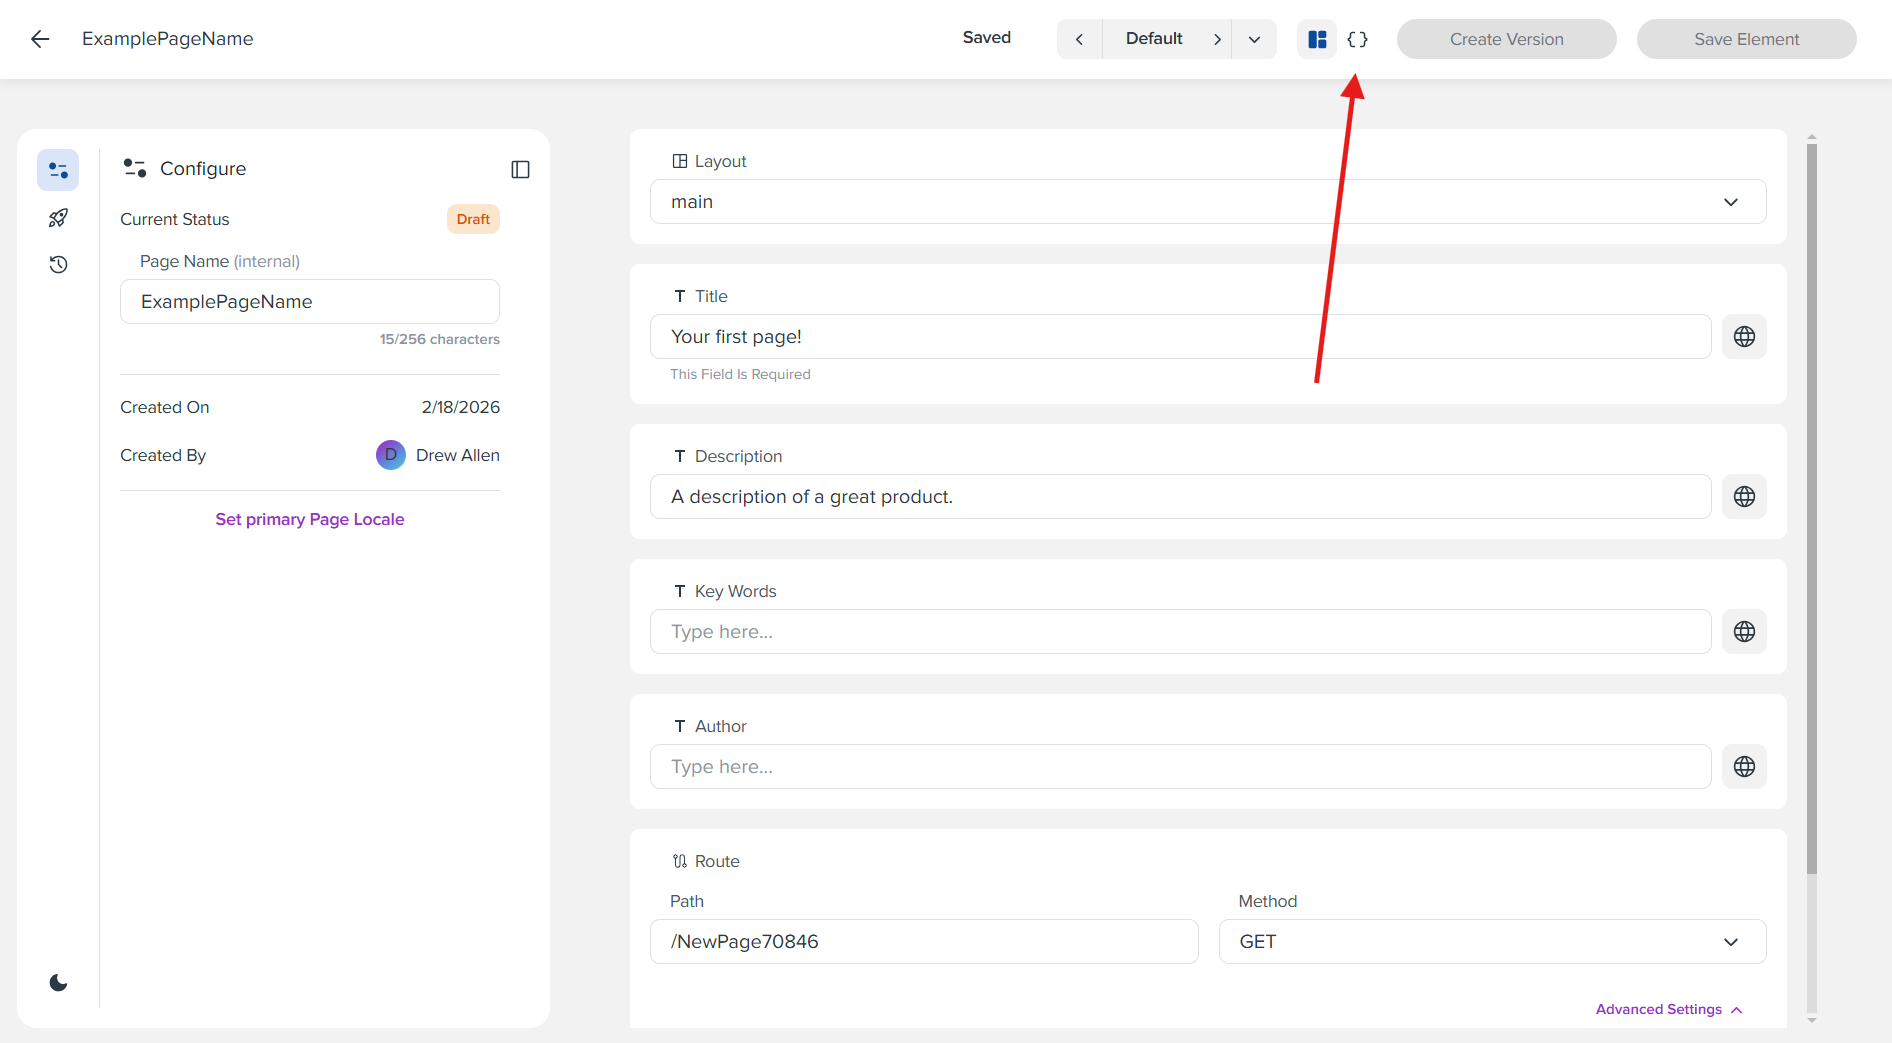
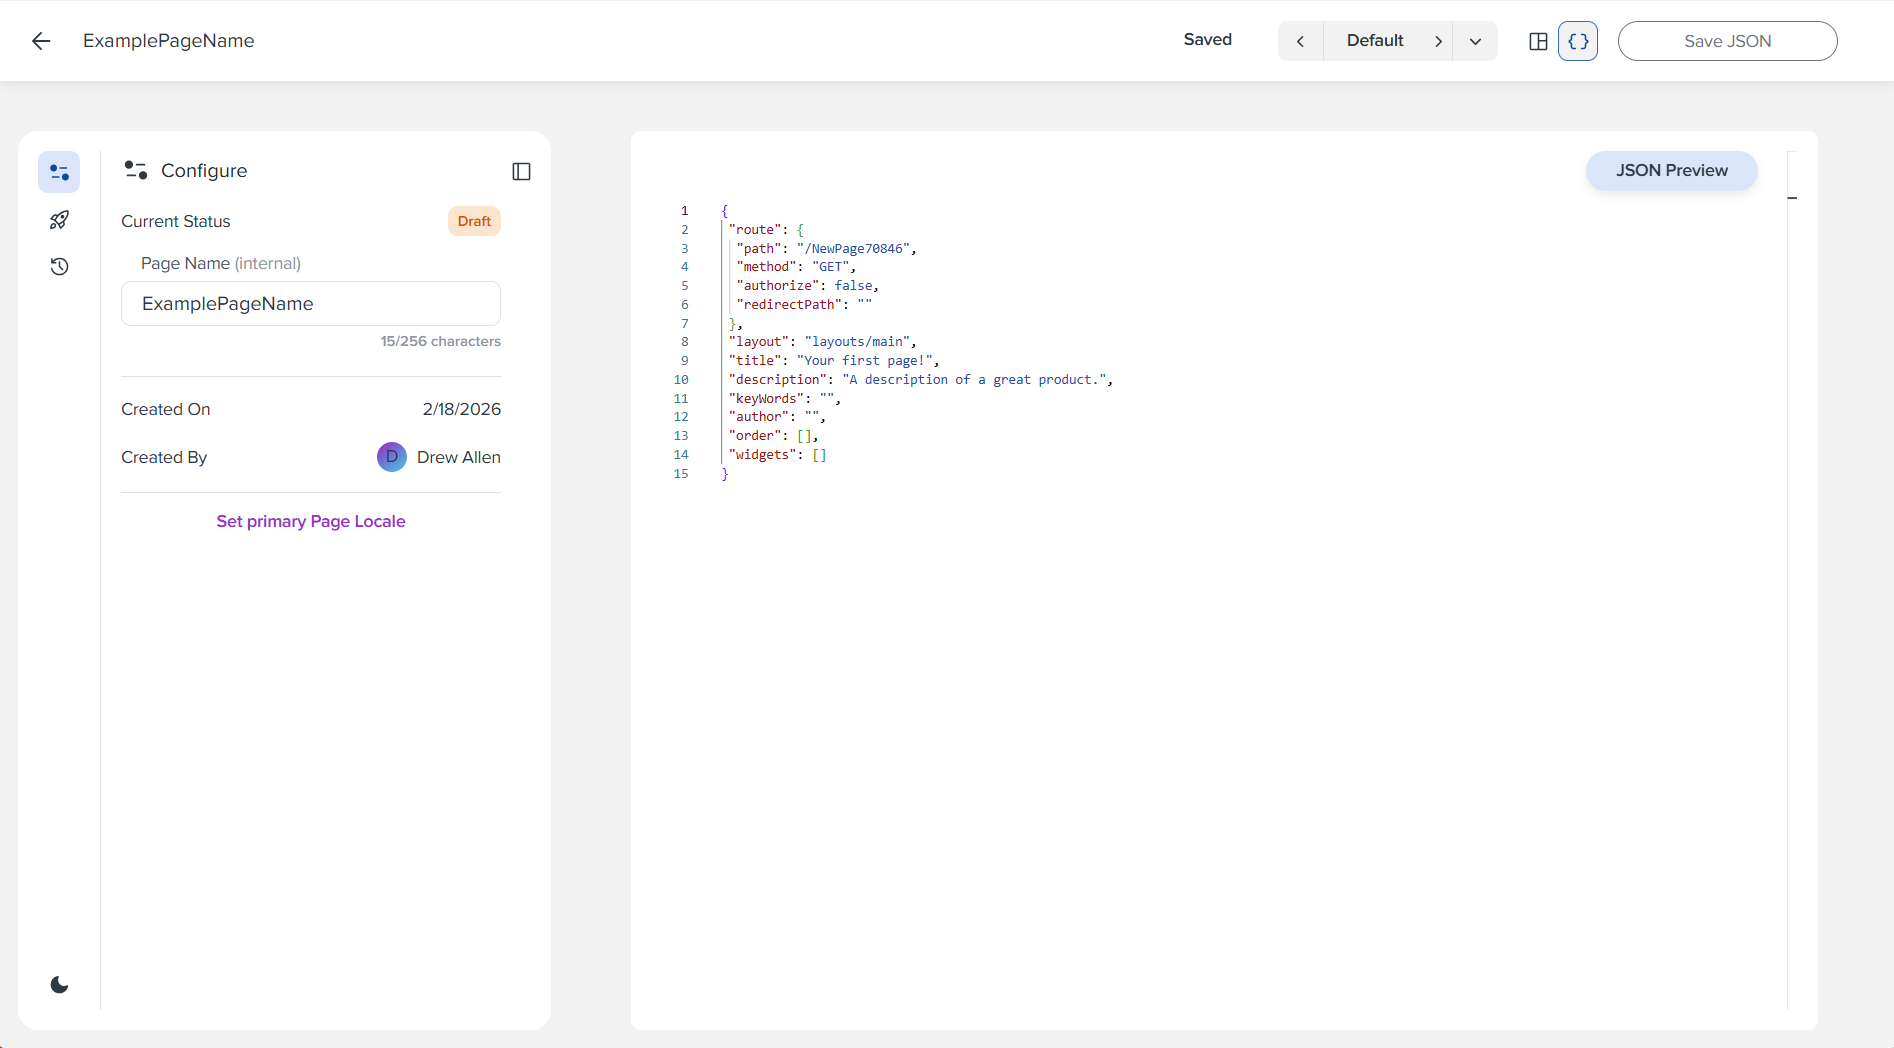
Step 6: View JSON Code Preview
At any time, users can click the code preview button (the curly braces {} icon) in the top right corner to get a view of the page's JSON code. This includes any components or widgets added to the page.
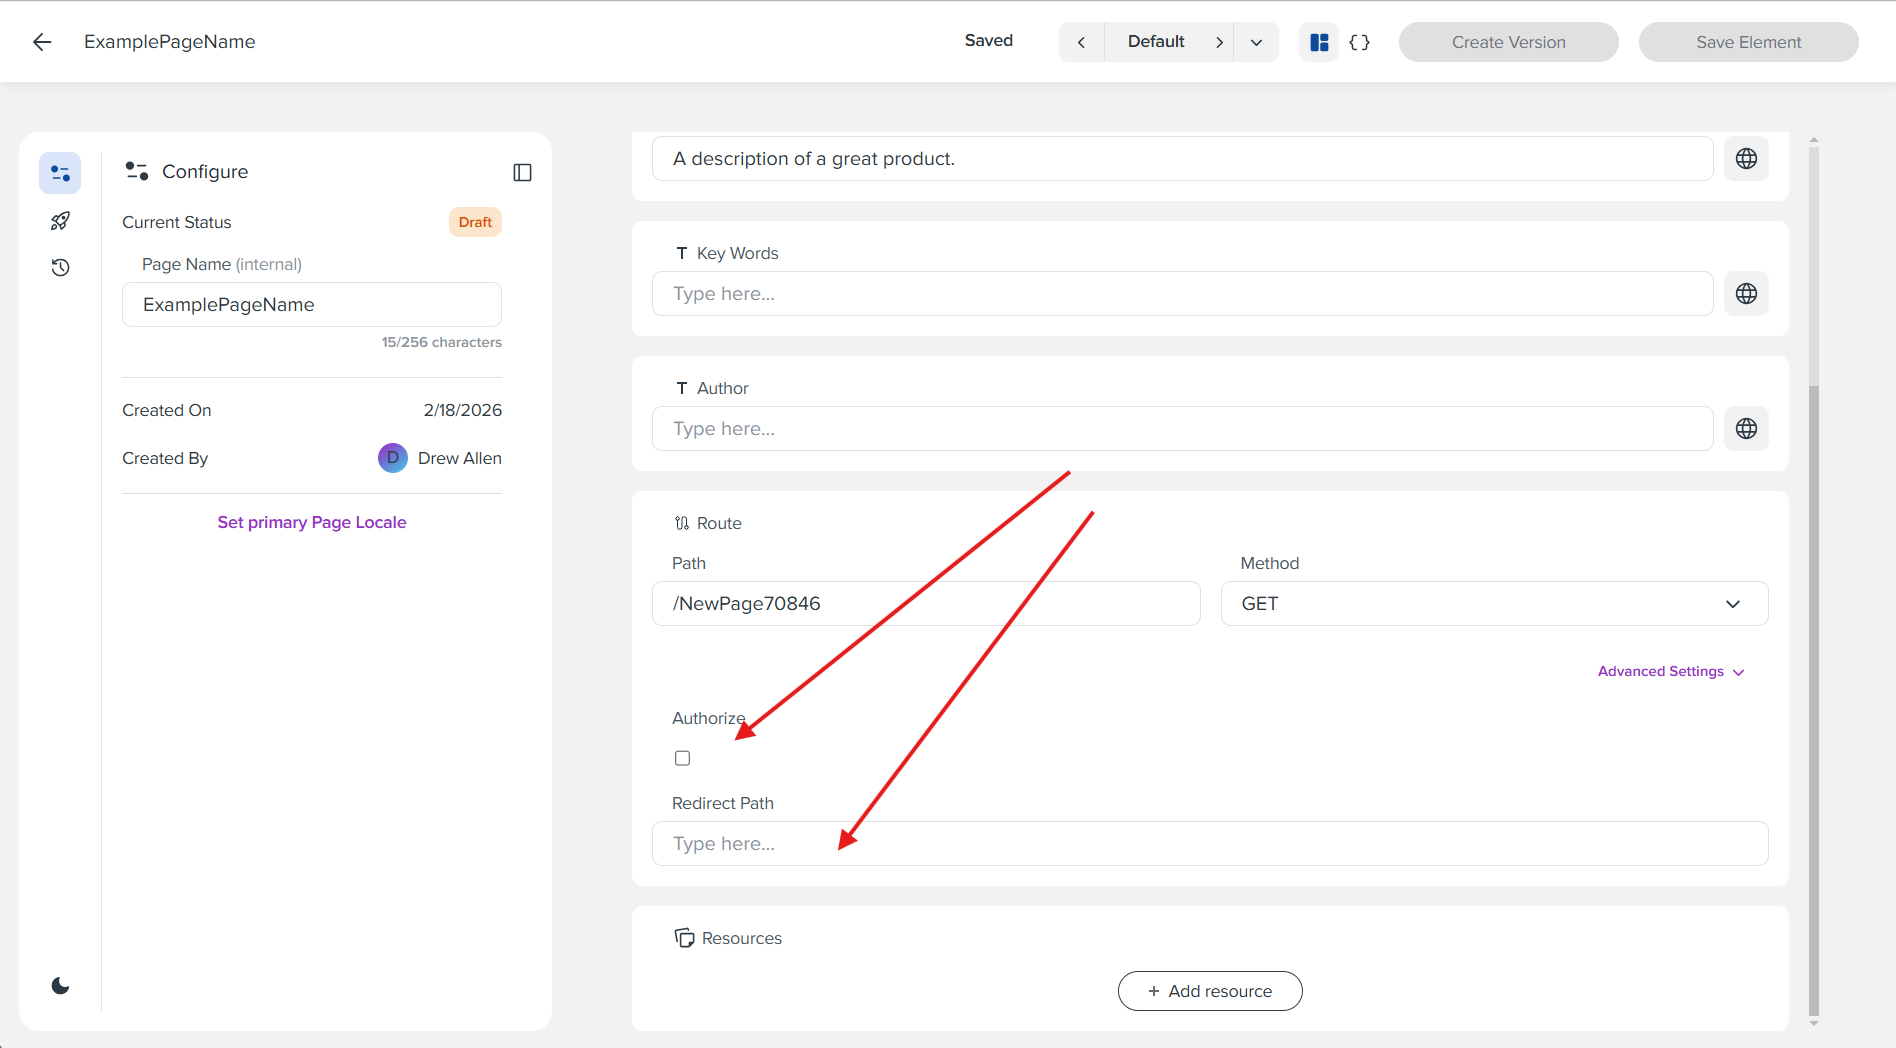
Step 7: Configure Route Attributes
In the Route section, you can change route attributes like the path name and HTTP method. Clicking the Advanced Settings dropdown will reveal additional options like the authorize flag and a Redirect path.
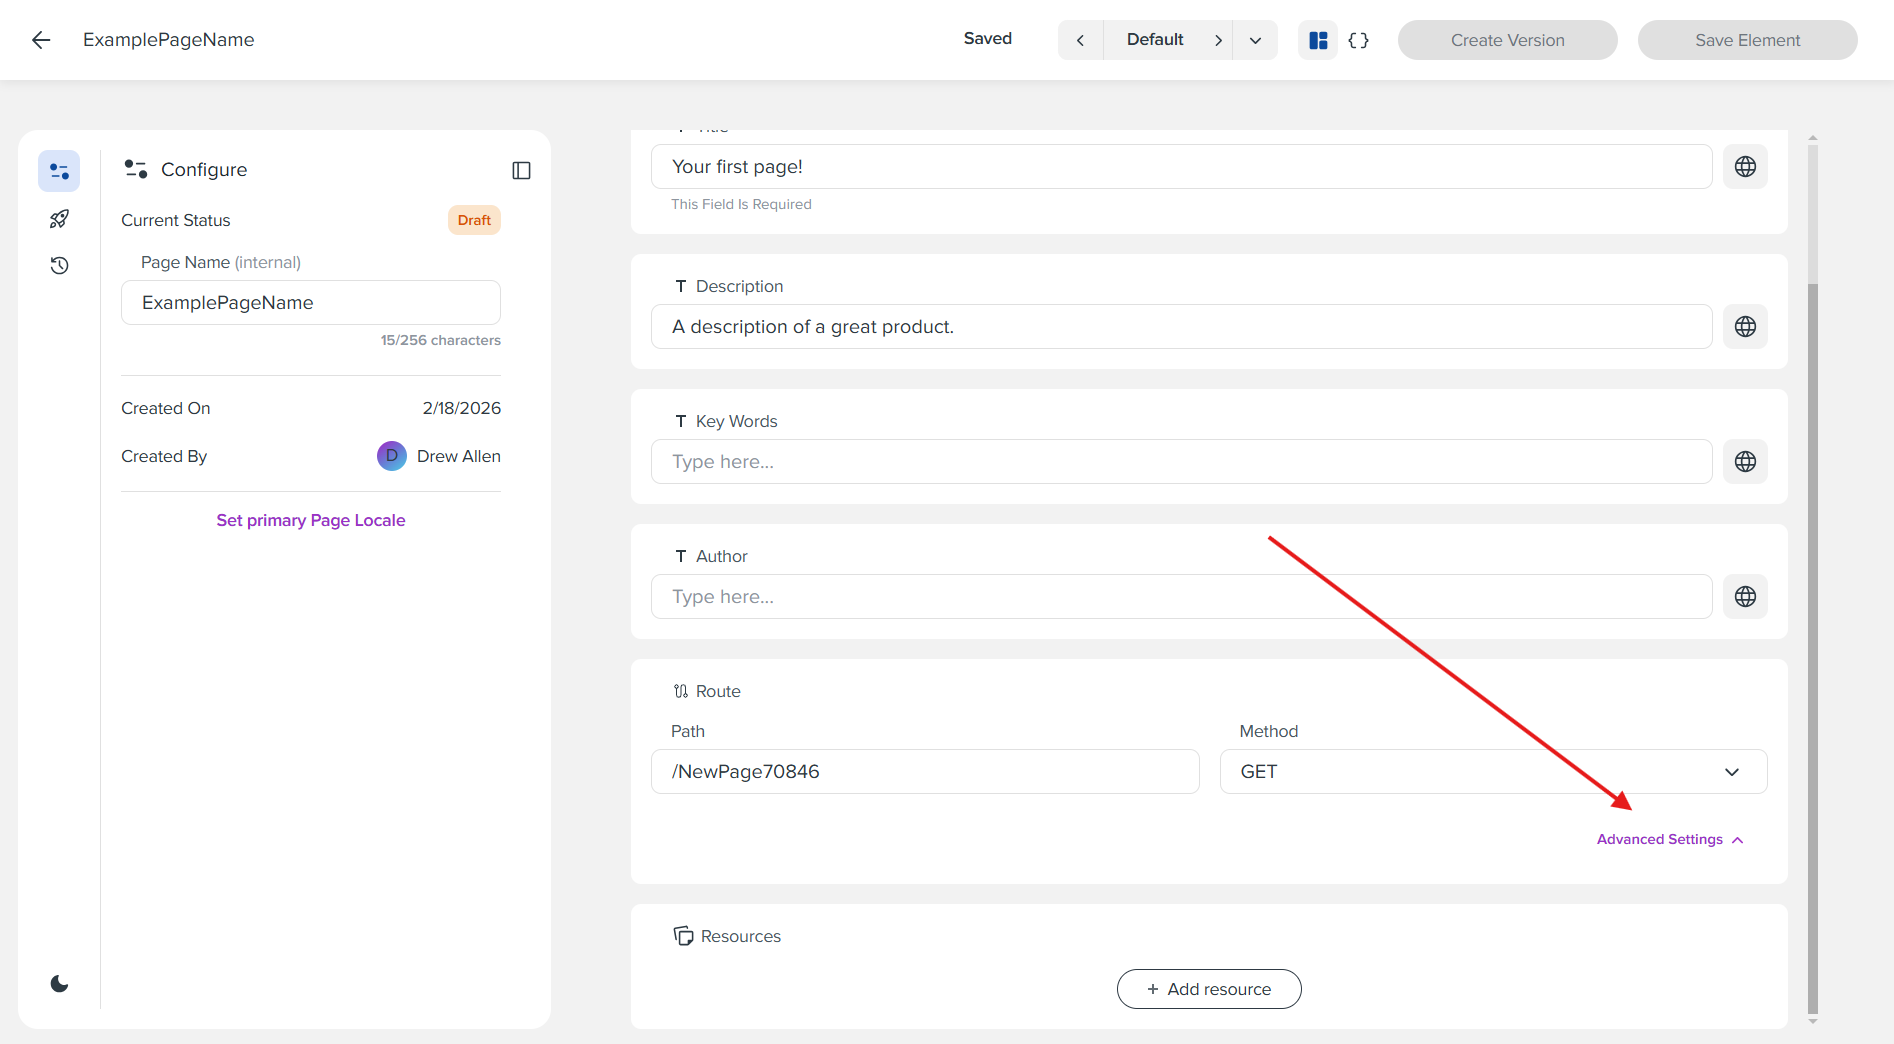
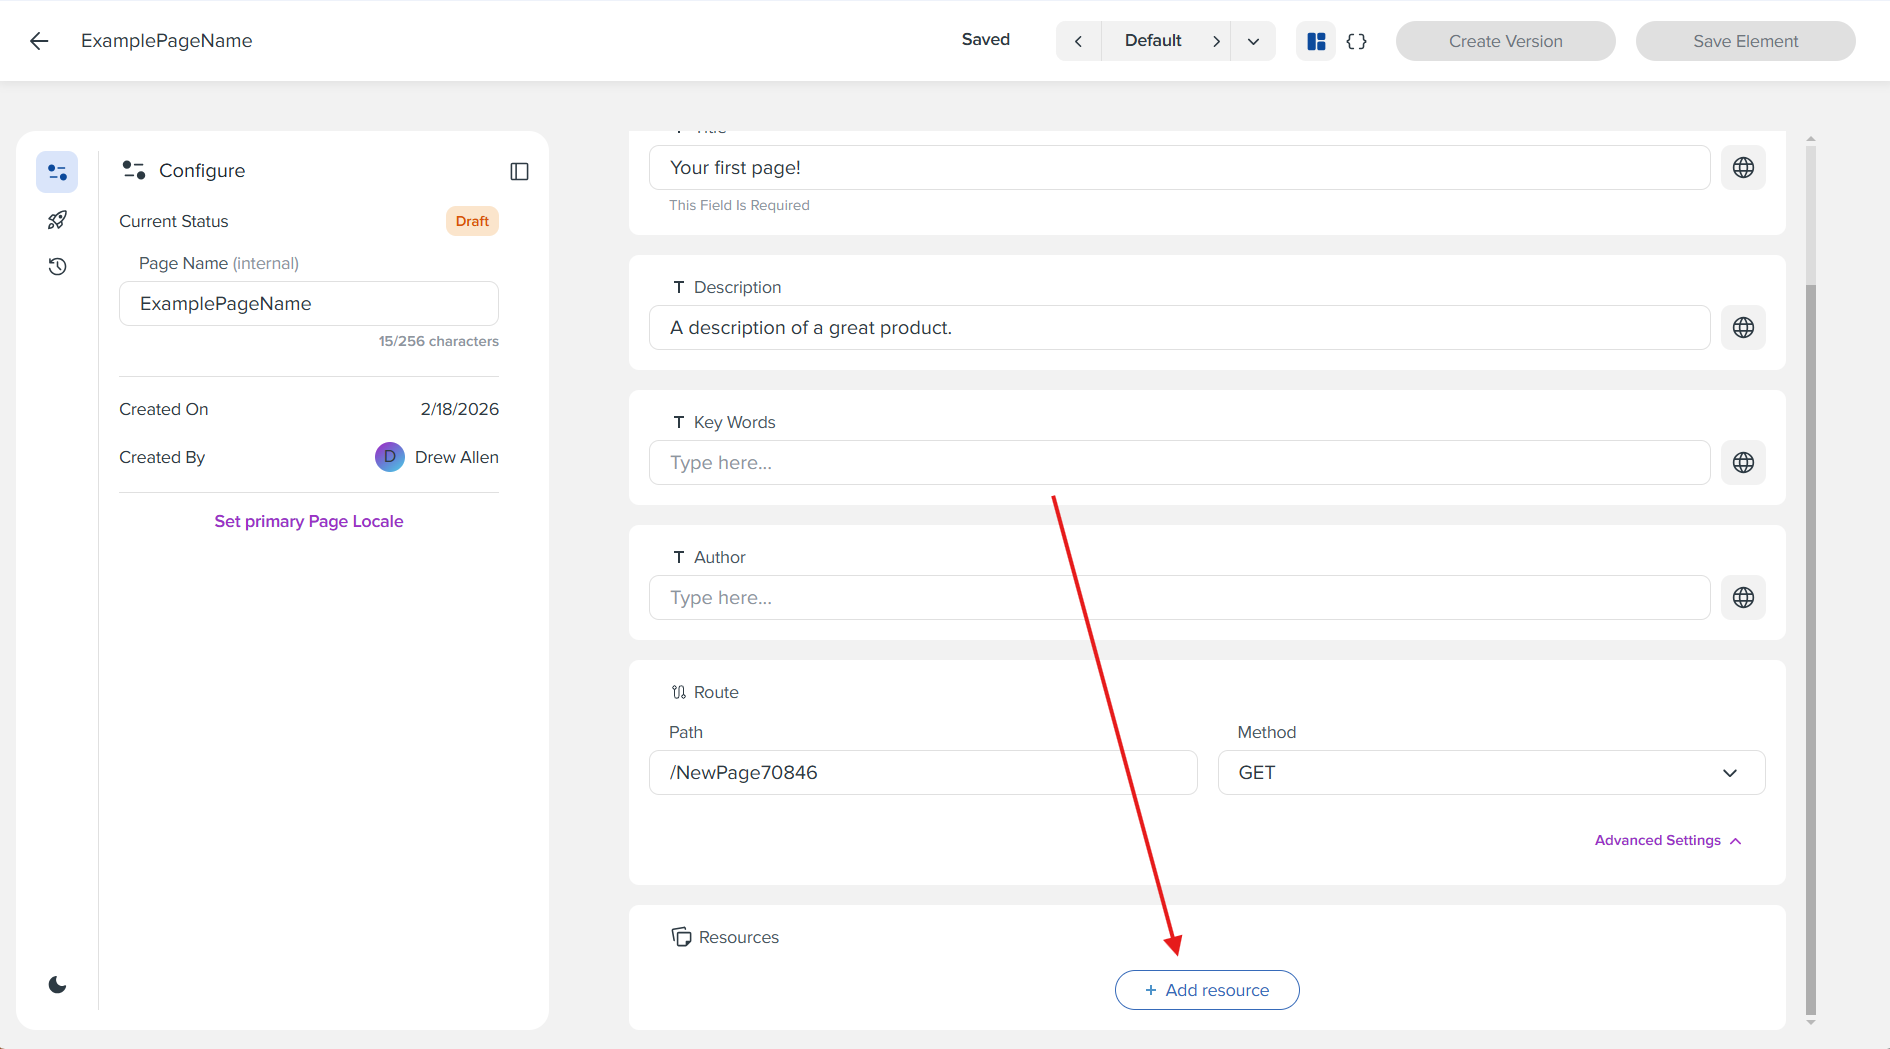
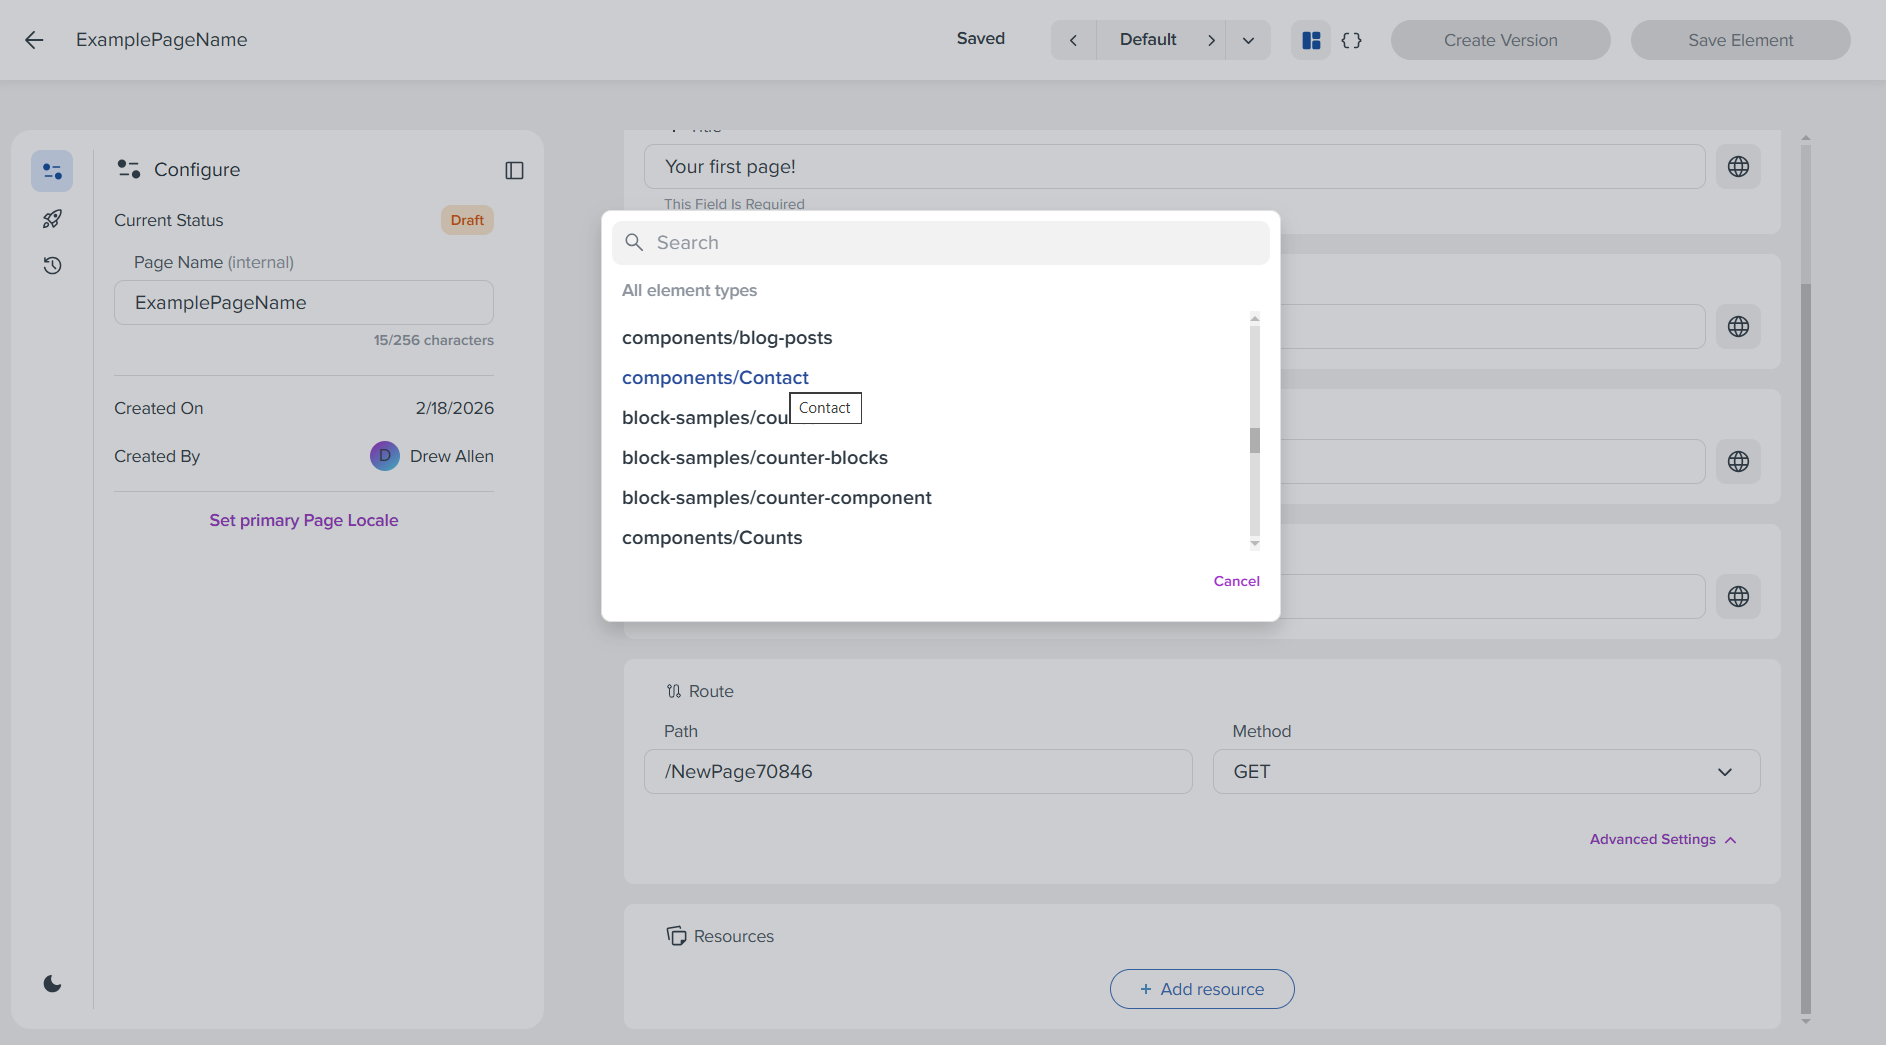
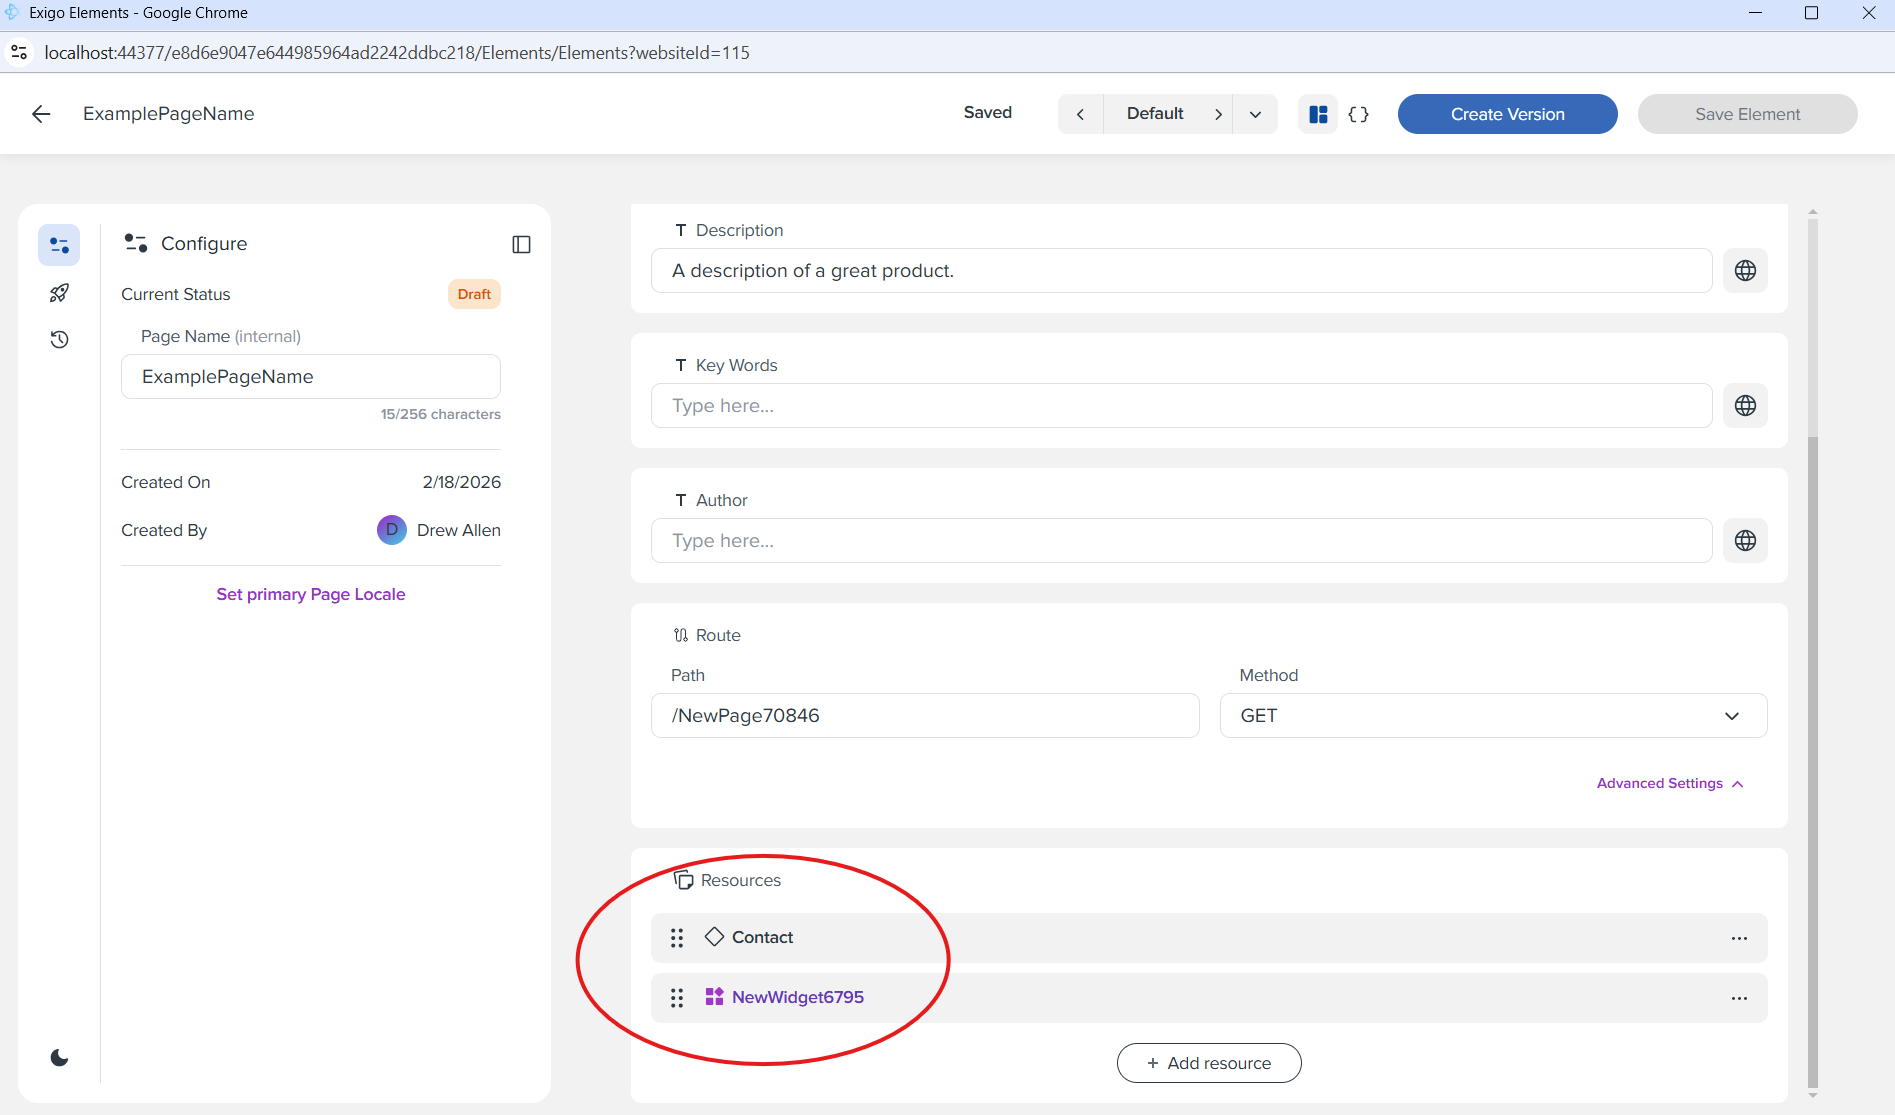
Step 8: Add Resources to Your Page
Click the "Add resource" button at the bottom of the page to add widgets or components to the page. This will open a dialog where you can search and select from available element types.
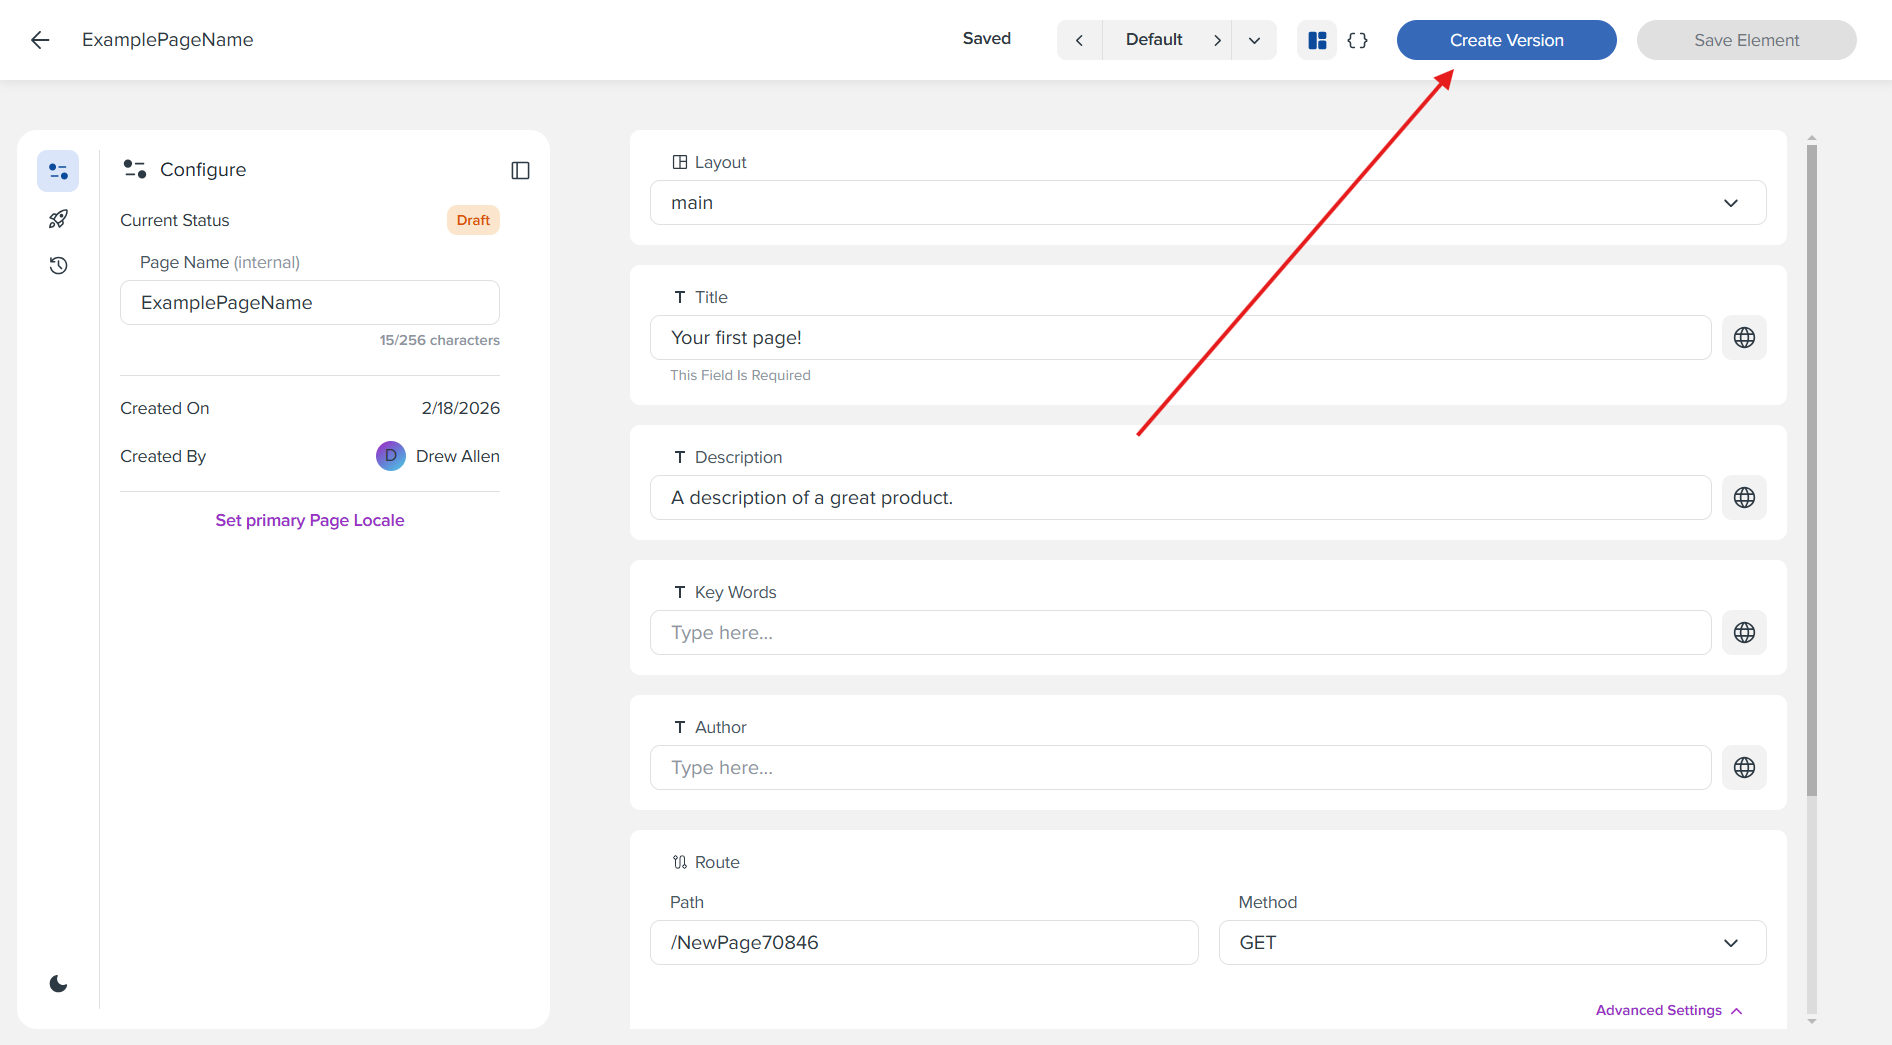
Step 9: Create Versions of Your Page
Once you've set a Layout on your page, and added at least one component or one widget, you are now able to begin creating versions of your page element. Click the "Create Version" button in the top right corner to create a new version of your page.
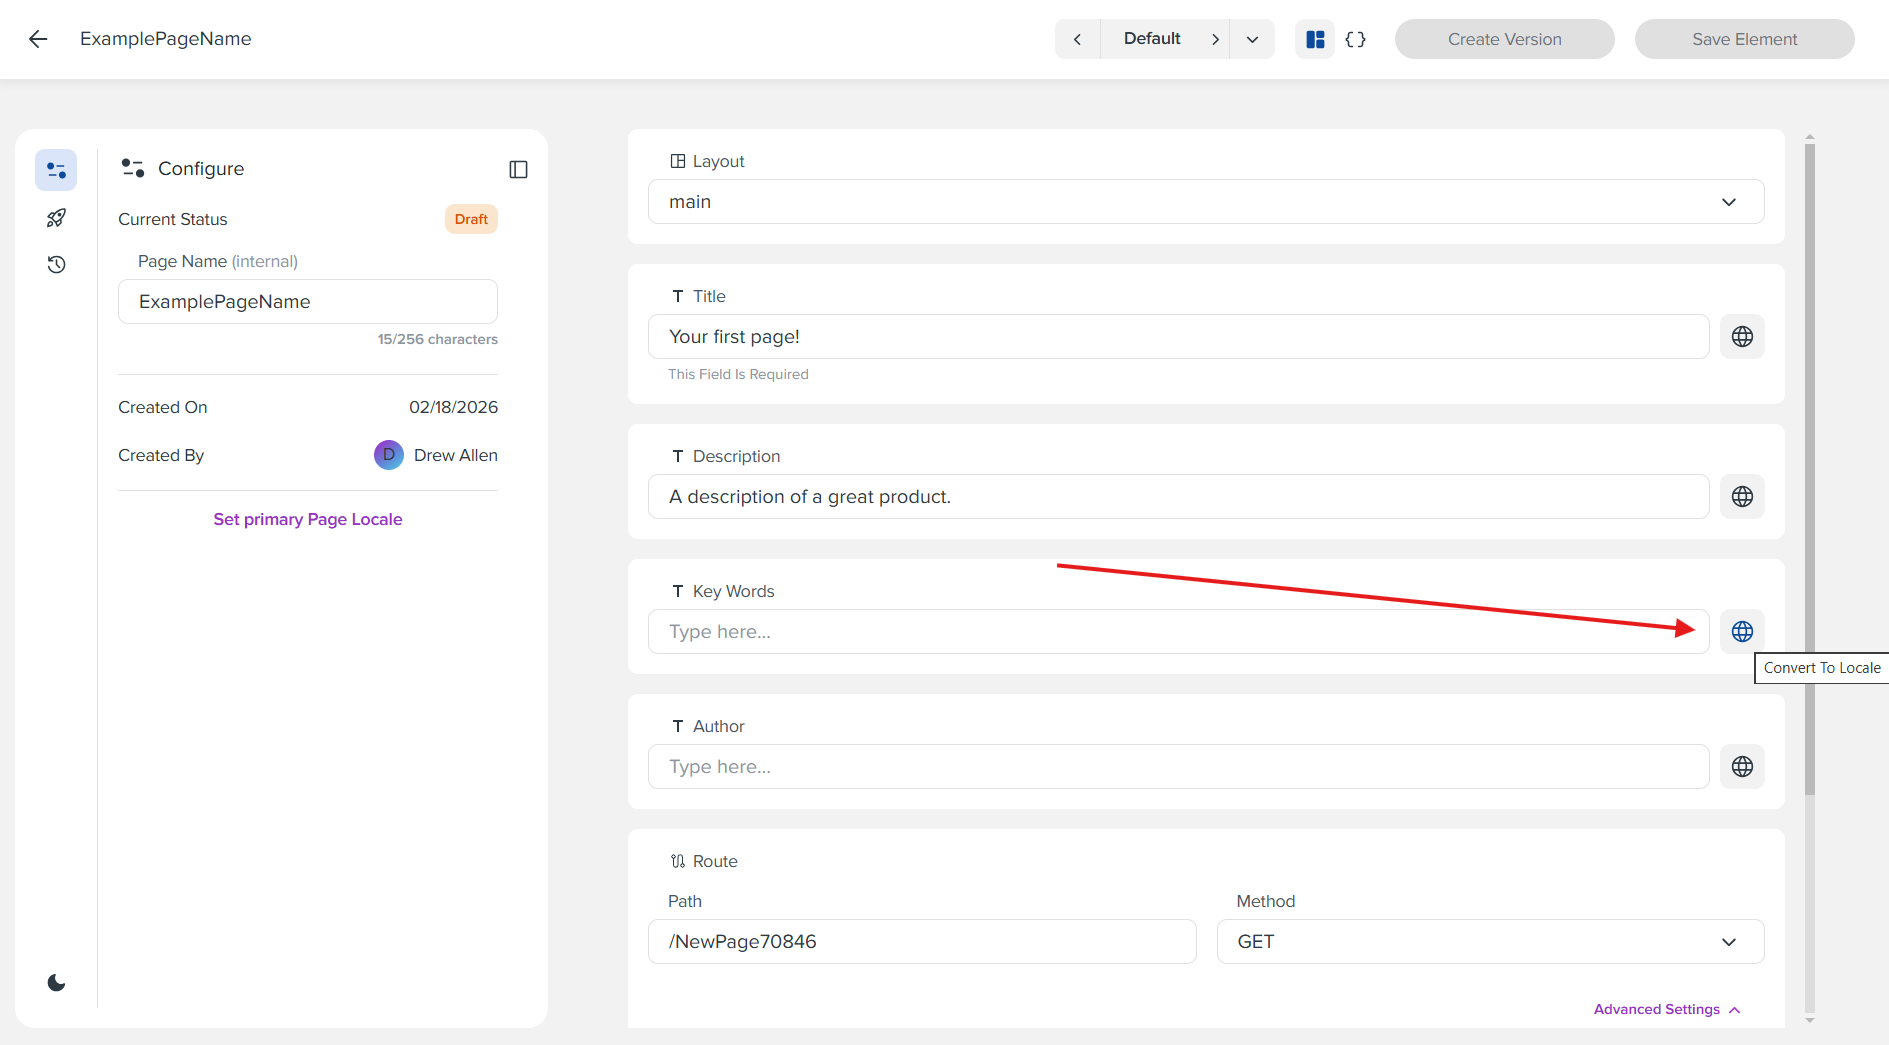
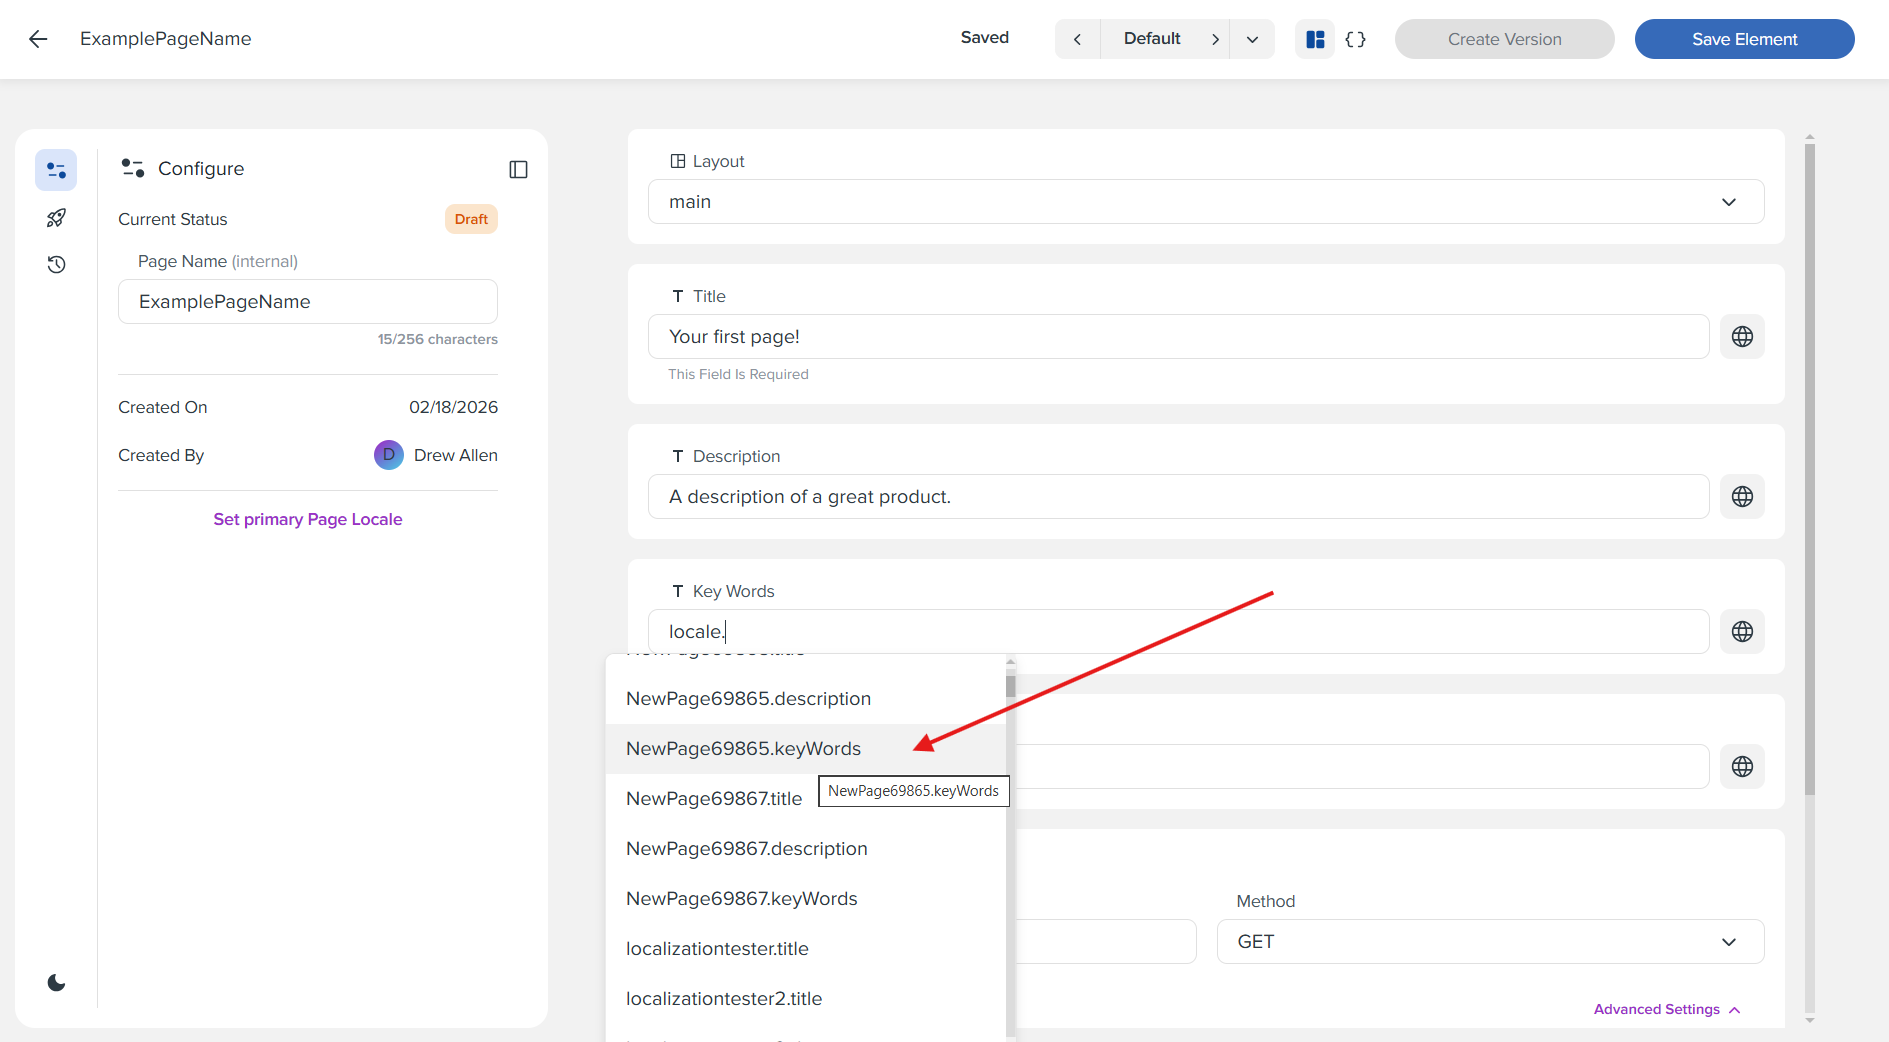
Step 10: Localizing Fields with No Page Primary Locale
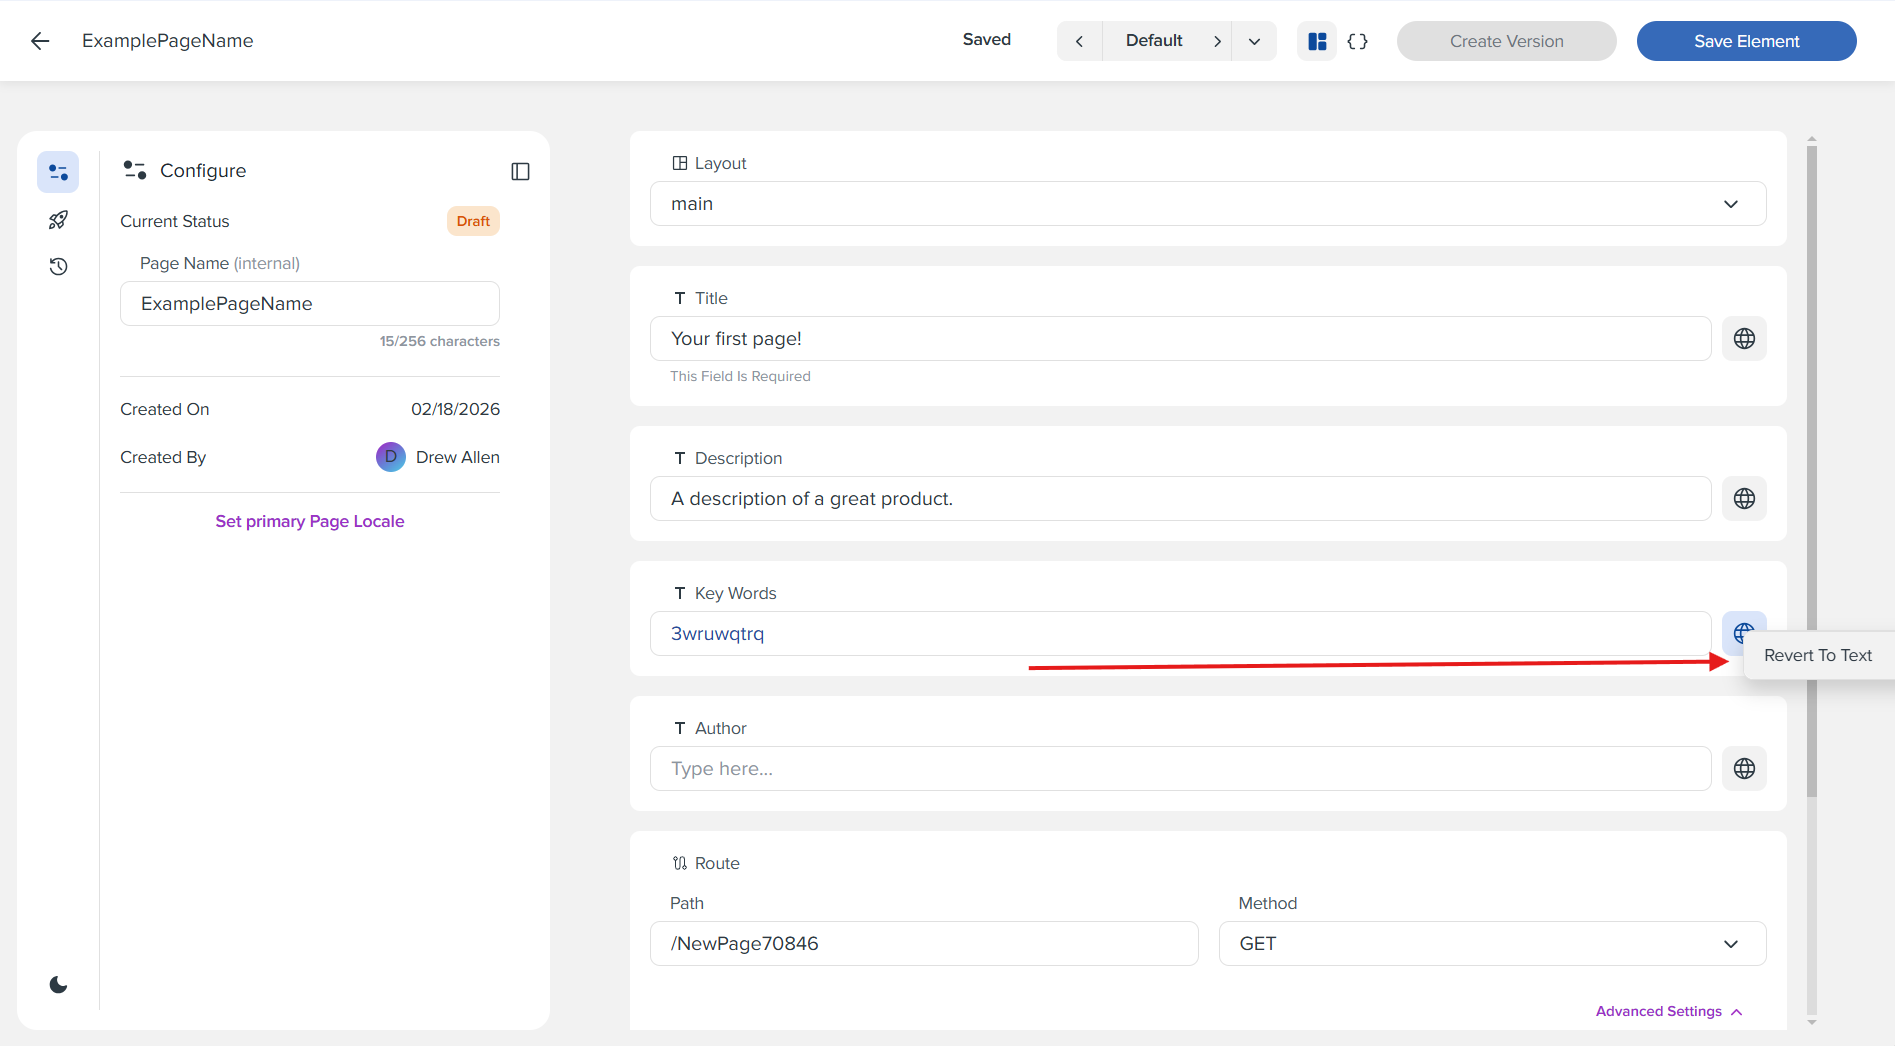
When there is no primary page locale set, clicking the convert to locale button (the globe icon) next to a field will replace whatever is in that field with an existing locale key that you select from the list. This allows you to use existing translations without setting a primary locale for the page.
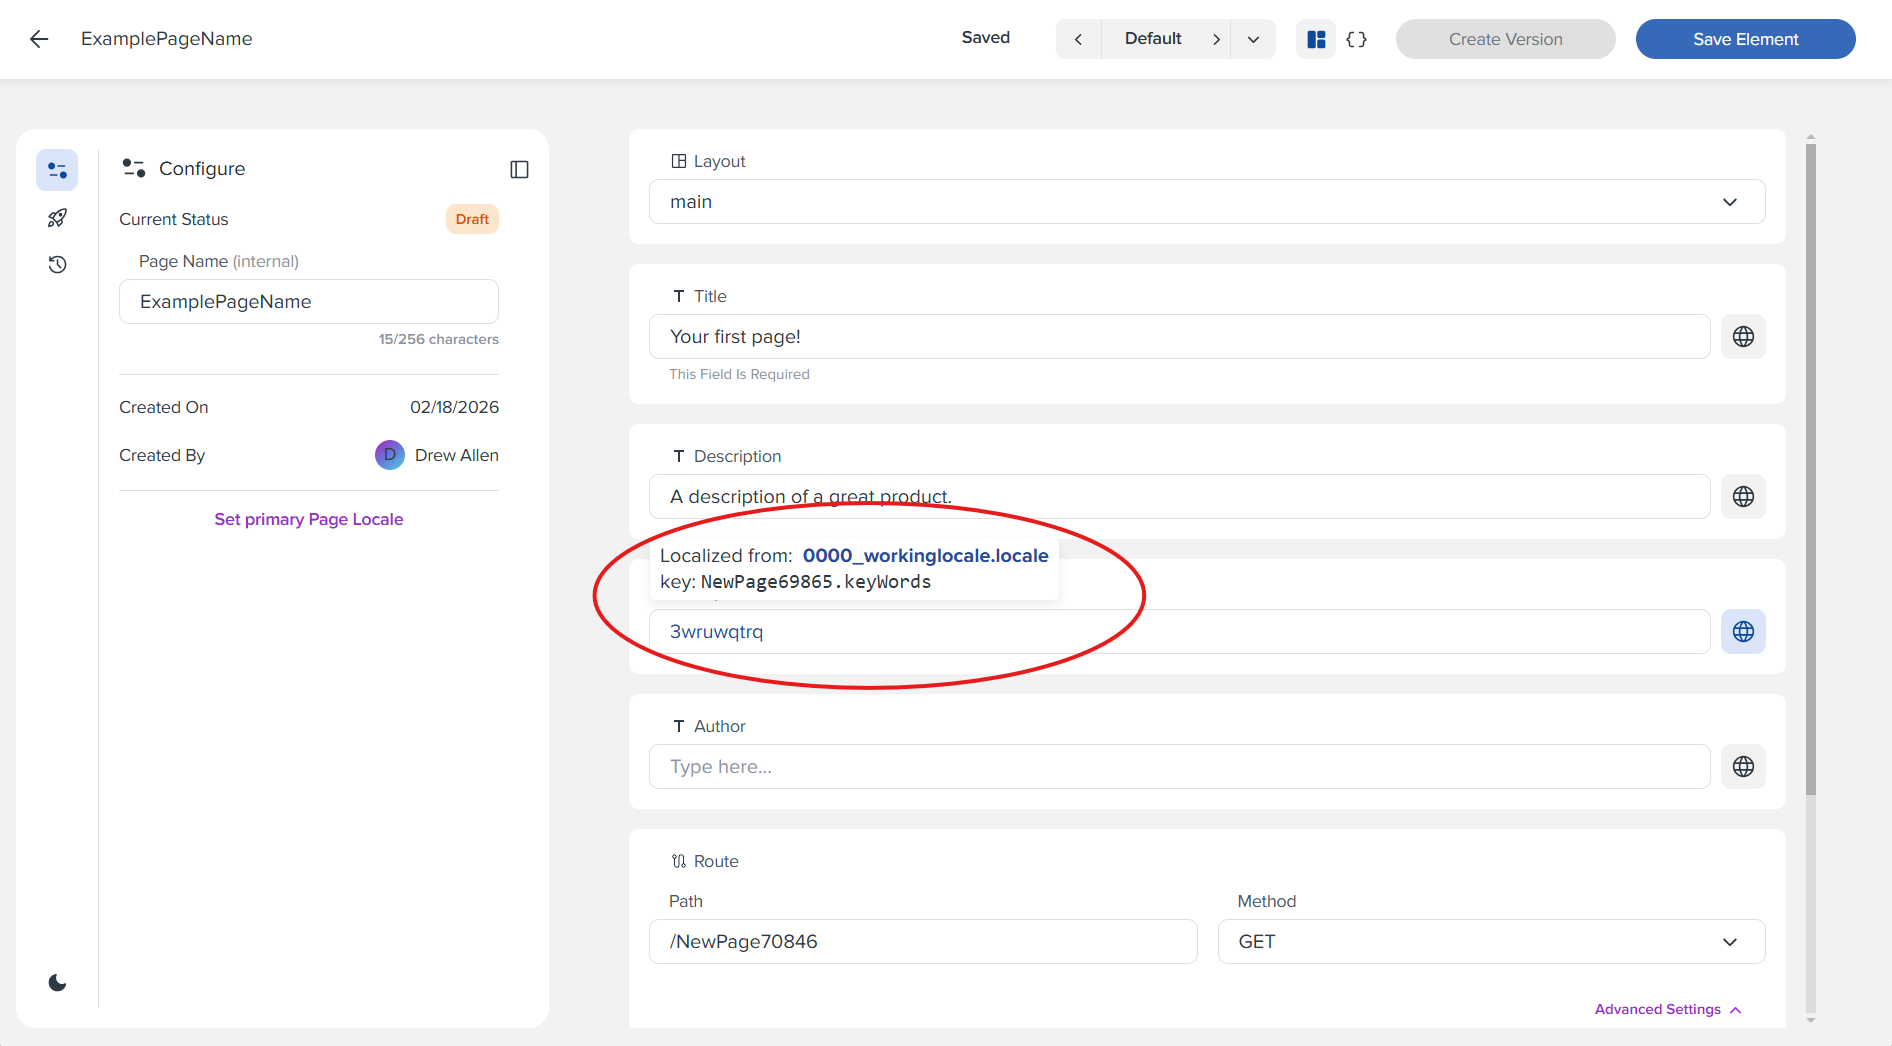
Step 11: Primary Page Locales
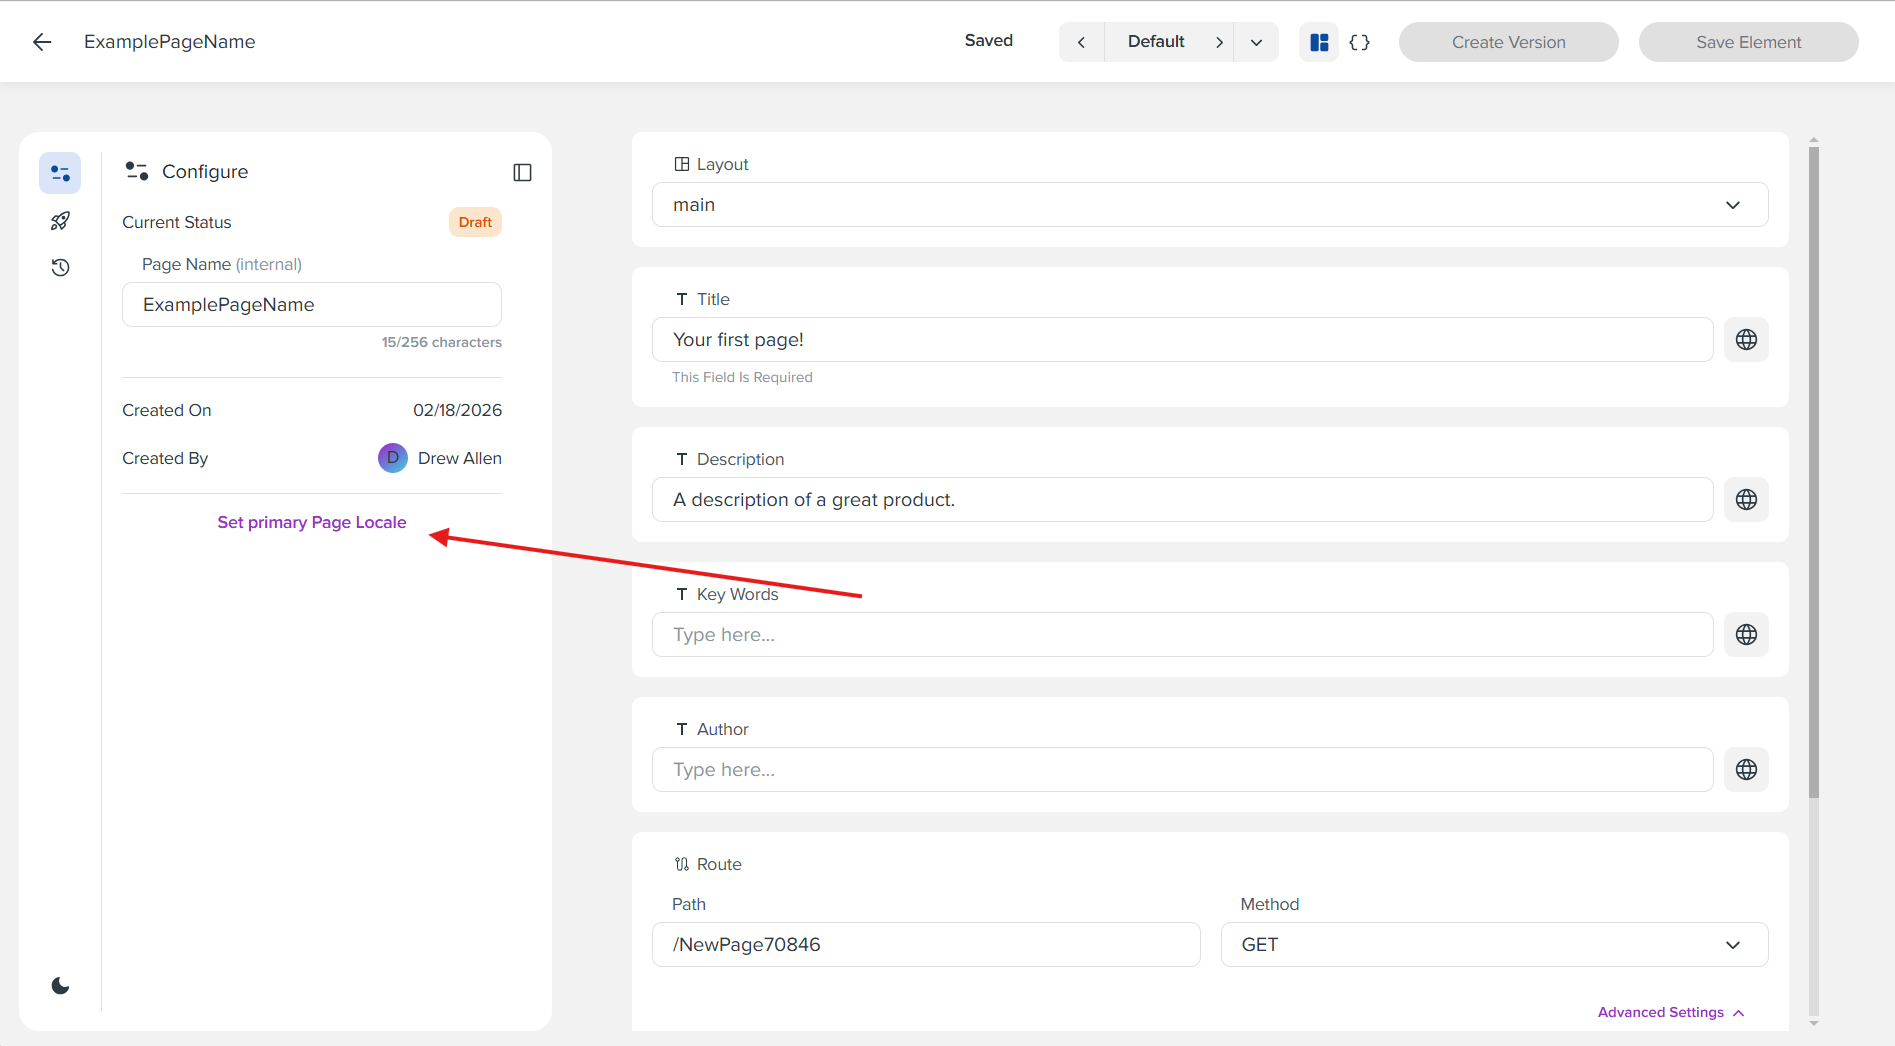
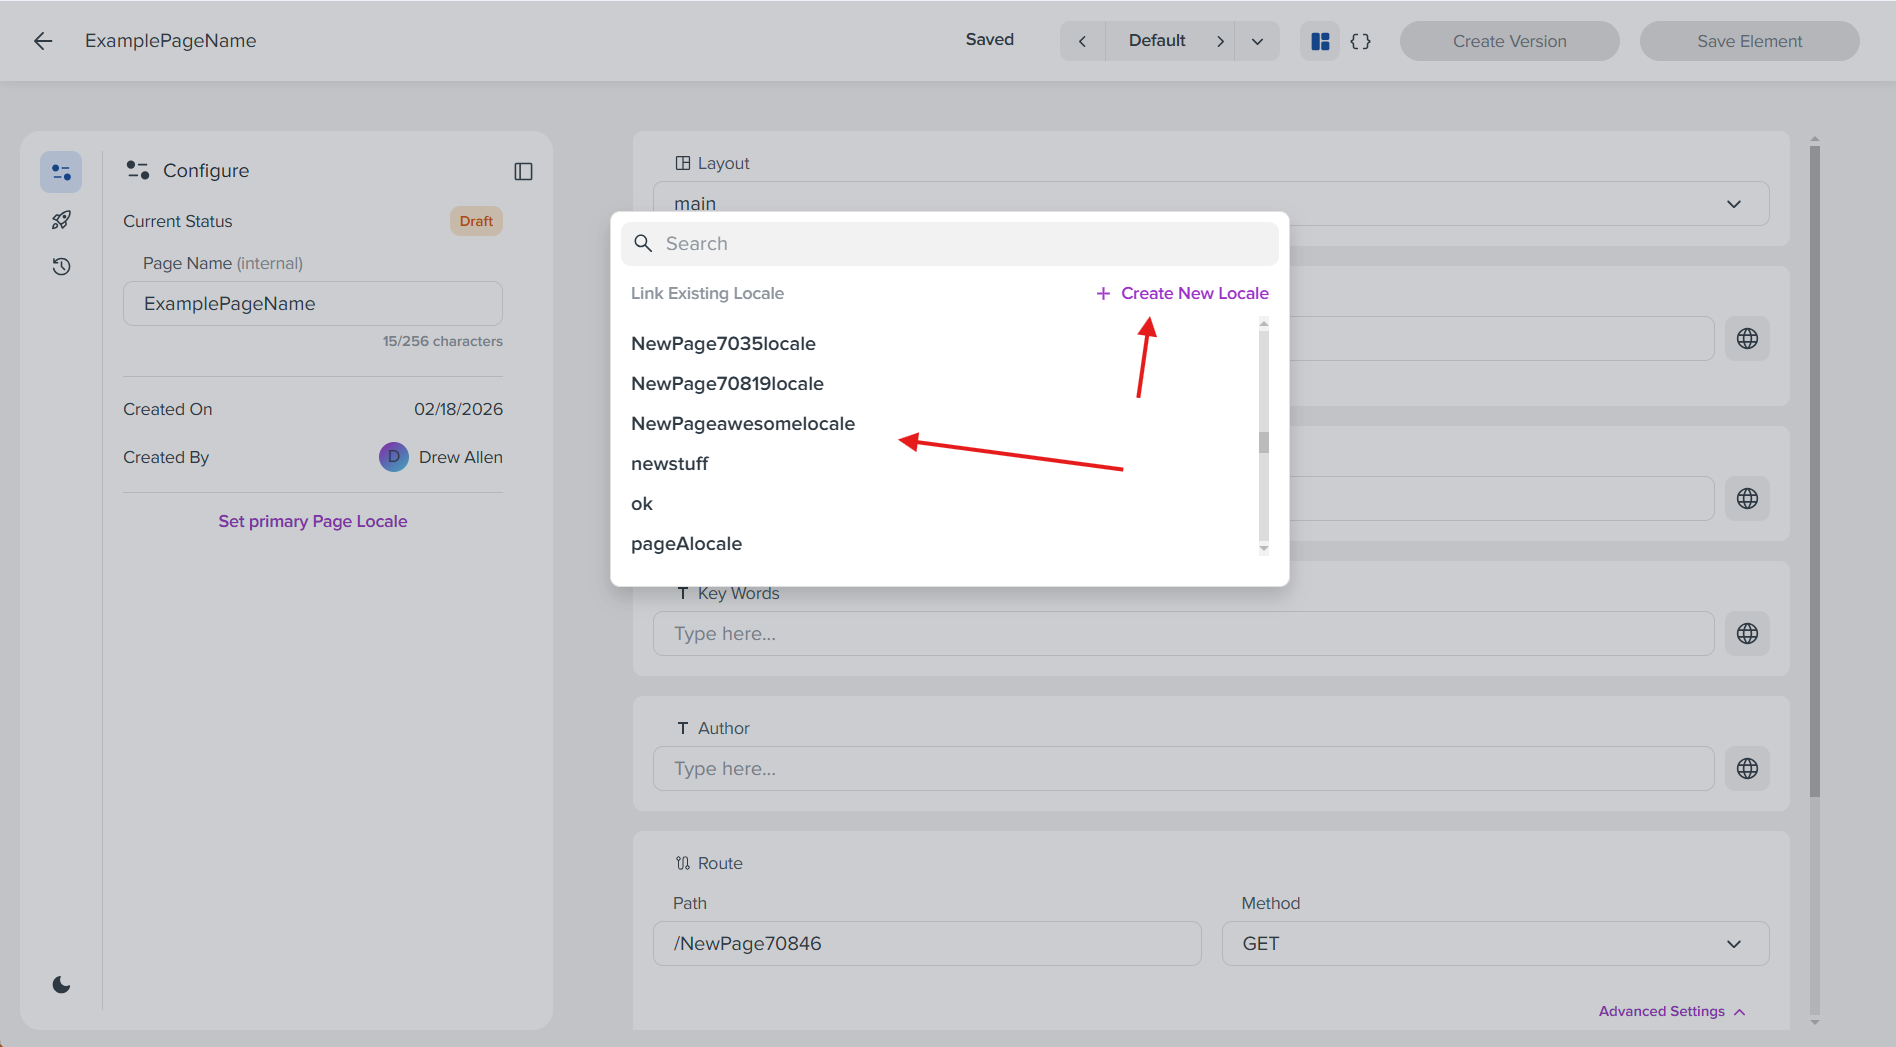
When a page has a primary locale, clicking the convert to locale button will instead create a new key in that locale file. To set a page's primary locale file, first click the "Set primary Page Locale" button on the left panel. Then you will have the option to choose from an existing list of locale files, or have one created based on the name of the current page. Either way, once selected, all non-empty fields on the page will be automatically converted to locale keys and added to the locale file. Like field-level localizations, these can be reverted to text too.
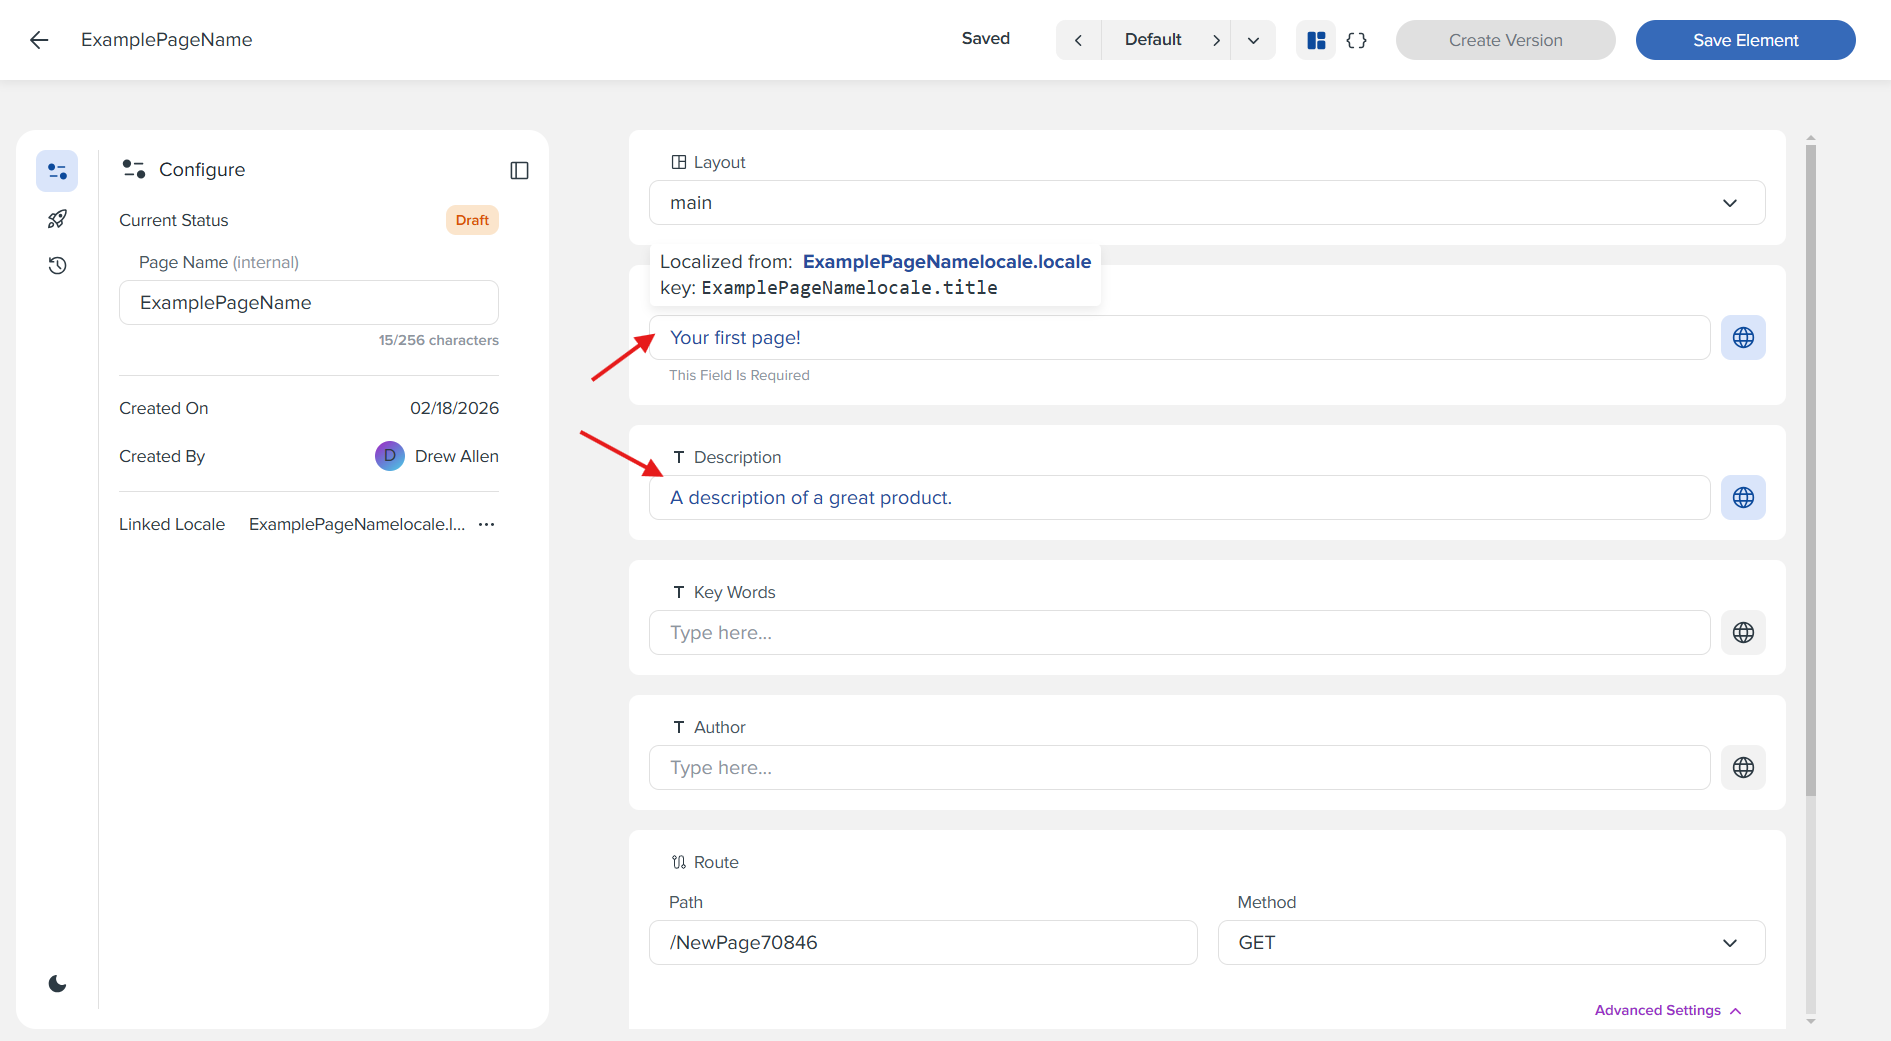
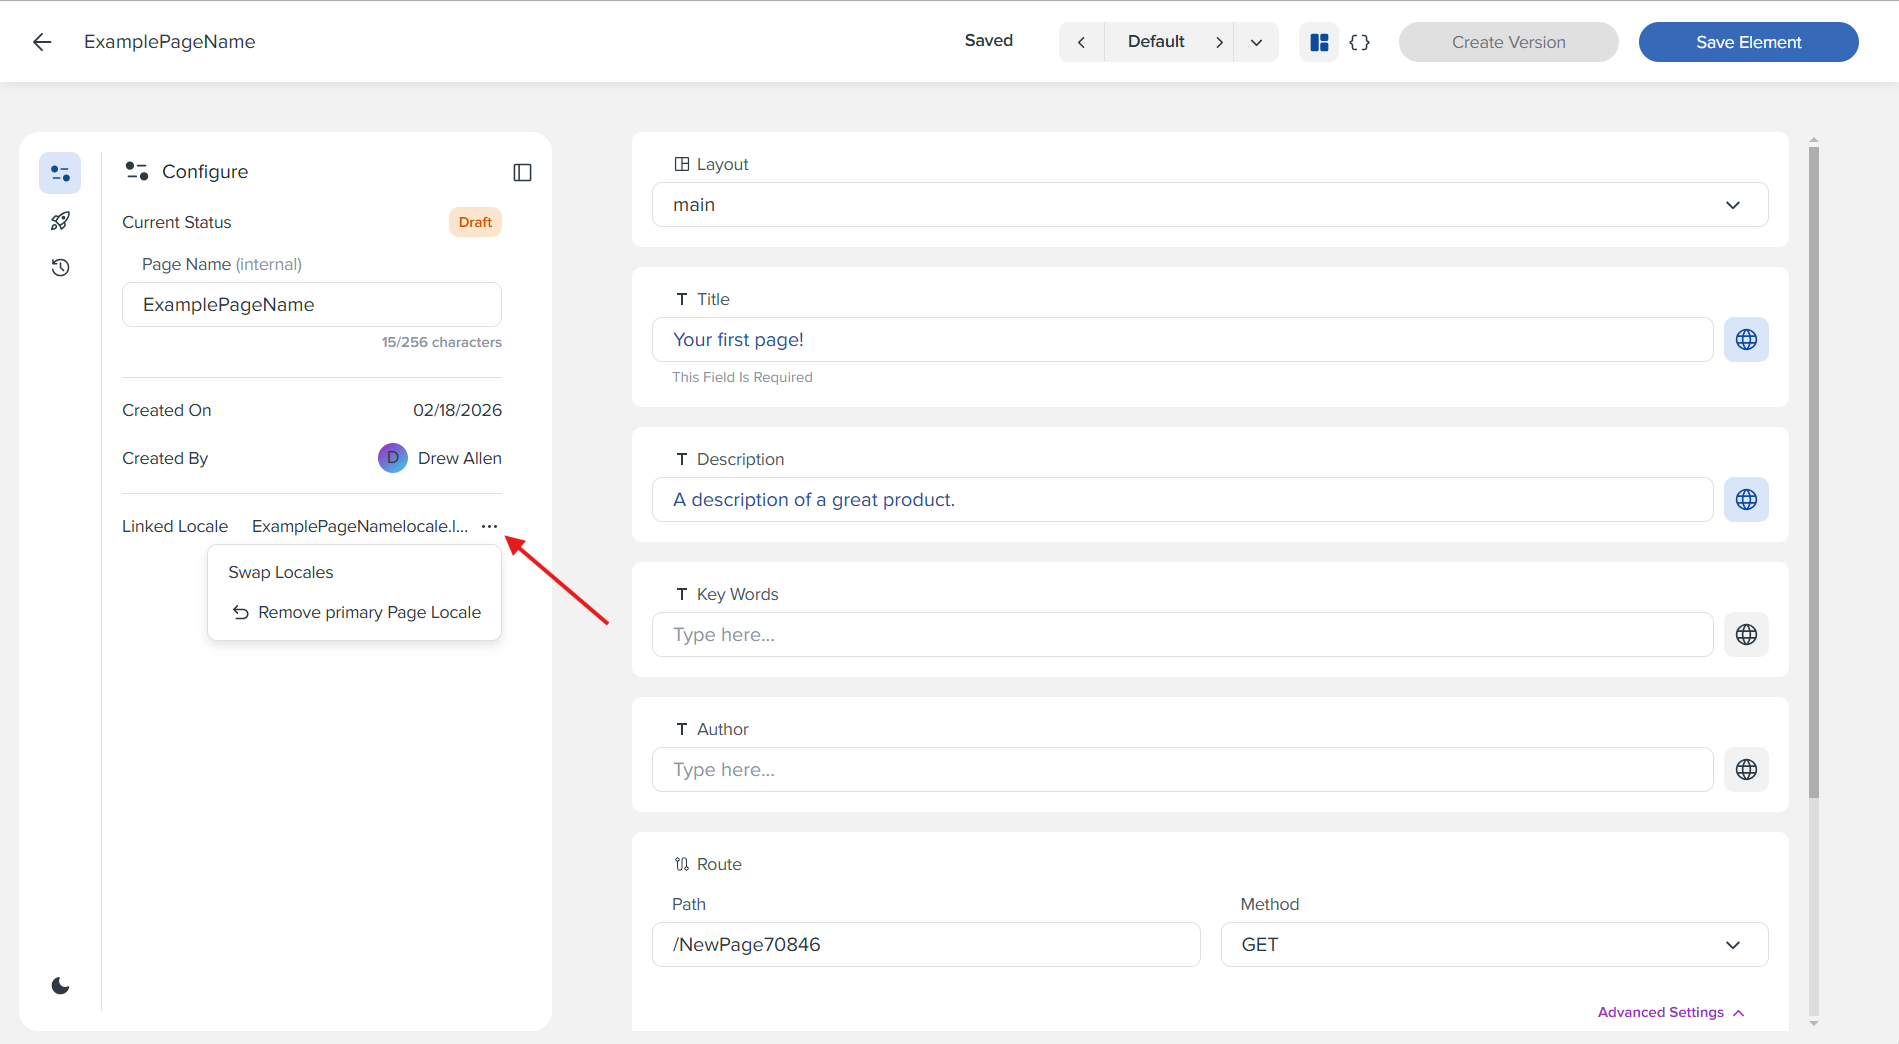
A primary locale can also be removed or swapped out for another one. In the Configure panel, you'll find options to "Swap Locales" or "Remove primary Page Locale" below the Linked Locale information.
What you've learned
By completing this tutorial, you have learned how to: - Navigate the Elements interface to create new page elements - Select the page type from the create element dropdown - Configure a page with a name and layout selection - Save your changes throughout the page creation process - View the JSON code preview to see the underlying page structure, including components and widgets - Configure route attributes such as path name, HTTP method, authorize flag, and redirect path - Add widgets and components to your page using the Add resource button - Create versions of your page element once a layout and at least one component or widget have been added - Localize fields by converting them to use existing locale keys when no primary page locale is set - Set a primary page locale and automatically convert all non-empty fields to locale keys, which can be reverted to text if needed