How to Open a Support Ticket
This guide explains how to open, track, and update a support ticket through the Exigo Company Portal. The Ticket Portal is the primary channel for submitting support requests, reporting incidents, and communicating with the Exigo Platform Support team.
Table of Contents
- Overview
- Accessing the Ticket Portal
- Understanding the Ticket List
- Ticket Statuses
- Ticket Columns
- Creating a New Ticket
- Required Fields
- Ticket Types
- Adding Attachments
- Viewing a Ticket
- Adding a Follow-Up or Updating Status
Overview
The Ticket Portal allows clients to:
- Open new support tickets for incidents, bugs, questions, or change requests
- Track the status of existing tickets in real time
- Add follow-up details or additional information to open tickets
- Upload attachments such as screenshots, logs, or documents
- Rate the experience once a ticket is resolved
Accessing the Ticket Portal
- Log in to the Exigo Admin portal at
login.exigo.com - From the left sidebar, navigate to Company Portal > Ticket Portal
The Ticket Portal will load displaying the full list of tickets associated with your company.
Understanding the Ticket List
The Ticket Portal opens on the All Tickets view, showing every ticket regardless of status. On the left sidebar, you can filter by specific statuses.
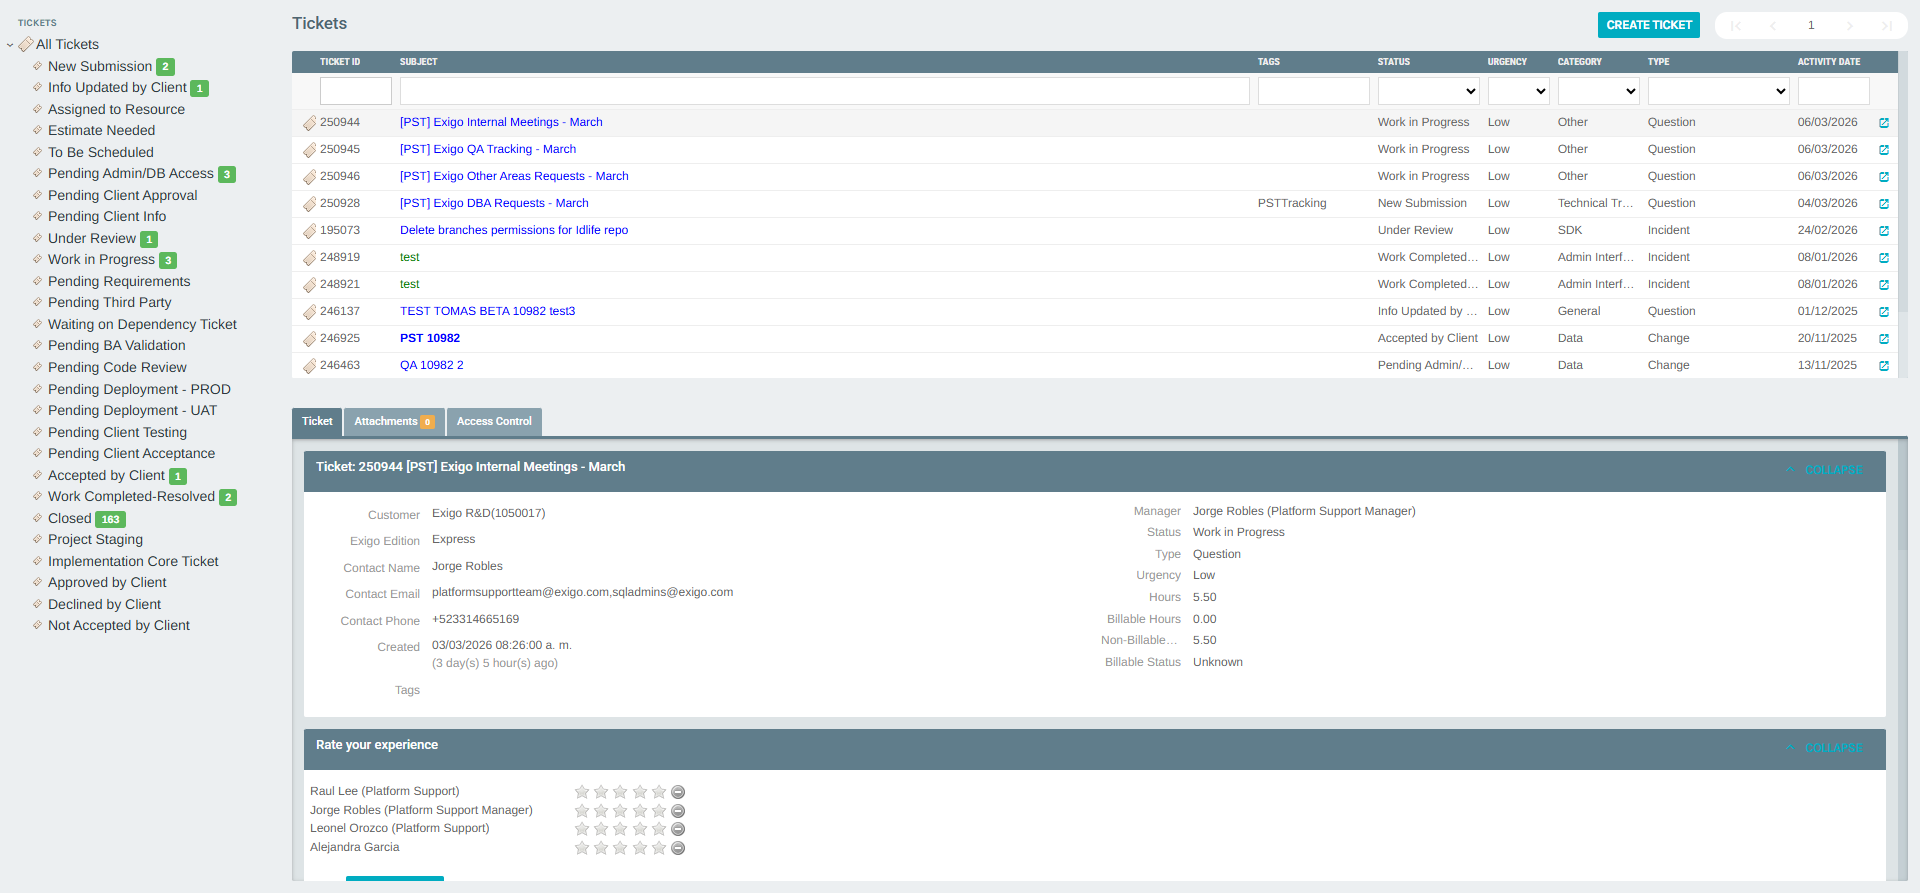
Ticket Statuses
Tickets move through the following lifecycle stages:
| Status | Description |
|---|---|
| New Submission | Ticket has been submitted and is awaiting assignment |
| Info Updated by Client | Client has added new information to the ticket |
| Assigned to Resource | Ticket has been assigned to an Exigo team member |
| Estimate Needed | An estimate of hours/cost is required before work begins |
| To Be Scheduled | Work has been approved and is waiting to be scheduled |
| Pending Admin/DB Access | Waiting on database or admin access to proceed |
| Pending Client Approval | Waiting for client sign-off before proceeding |
| Pending Client Info | Additional information is required from the client |
| Under Review | Ticket is being reviewed by the support team |
| Work in Progress | Active work is being performed on the ticket |
| Pending Requirements | Functional or technical requirements are still needed |
| Pending Third Party | Waiting on a third-party vendor or integration |
| Pending BA Validation | Business Analyst is validating the solution |
| Pending Code Review | Code changes are awaiting peer review |
| Pending Deployment - UAT | Fix is deployed to UAT (staging) environment |
| Pending Deployment - PROD | Fix is ready for deployment to production |
| Pending Client Testing | Client is testing the solution in UAT |
| Pending Client Acceptance | Client needs to formally accept the resolution |
| Accepted by Client | Client has accepted the work |
| Work Completed-Resolved | Work has been completed and the issue is resolved |
| Closed | Ticket has been closed |
Ticket Columns
The ticket list displays the following columns:
| Column | Description |
|---|---|
| Ticket ID | Unique numeric identifier for the ticket |
| Subject | Short description or title of the issue |
| Tags | Optional labels for categorization |
| Status | Current status in the ticket lifecycle |
| Urgency | Priority level: Low, Medium, High, or Urgent |
| Category | Technical area the ticket relates to (e.g., Admin Interface, SDK, Data) |
| Type | Ticket type: Change, Incident, Issue, or Question |
| Activity Date | Date of the most recent activity on the ticket |
Creating a New Ticket
From the Ticket Portal, click the CREATE TICKET button in the top-right corner of the ticket list.
The New Customer Ticket form will open.
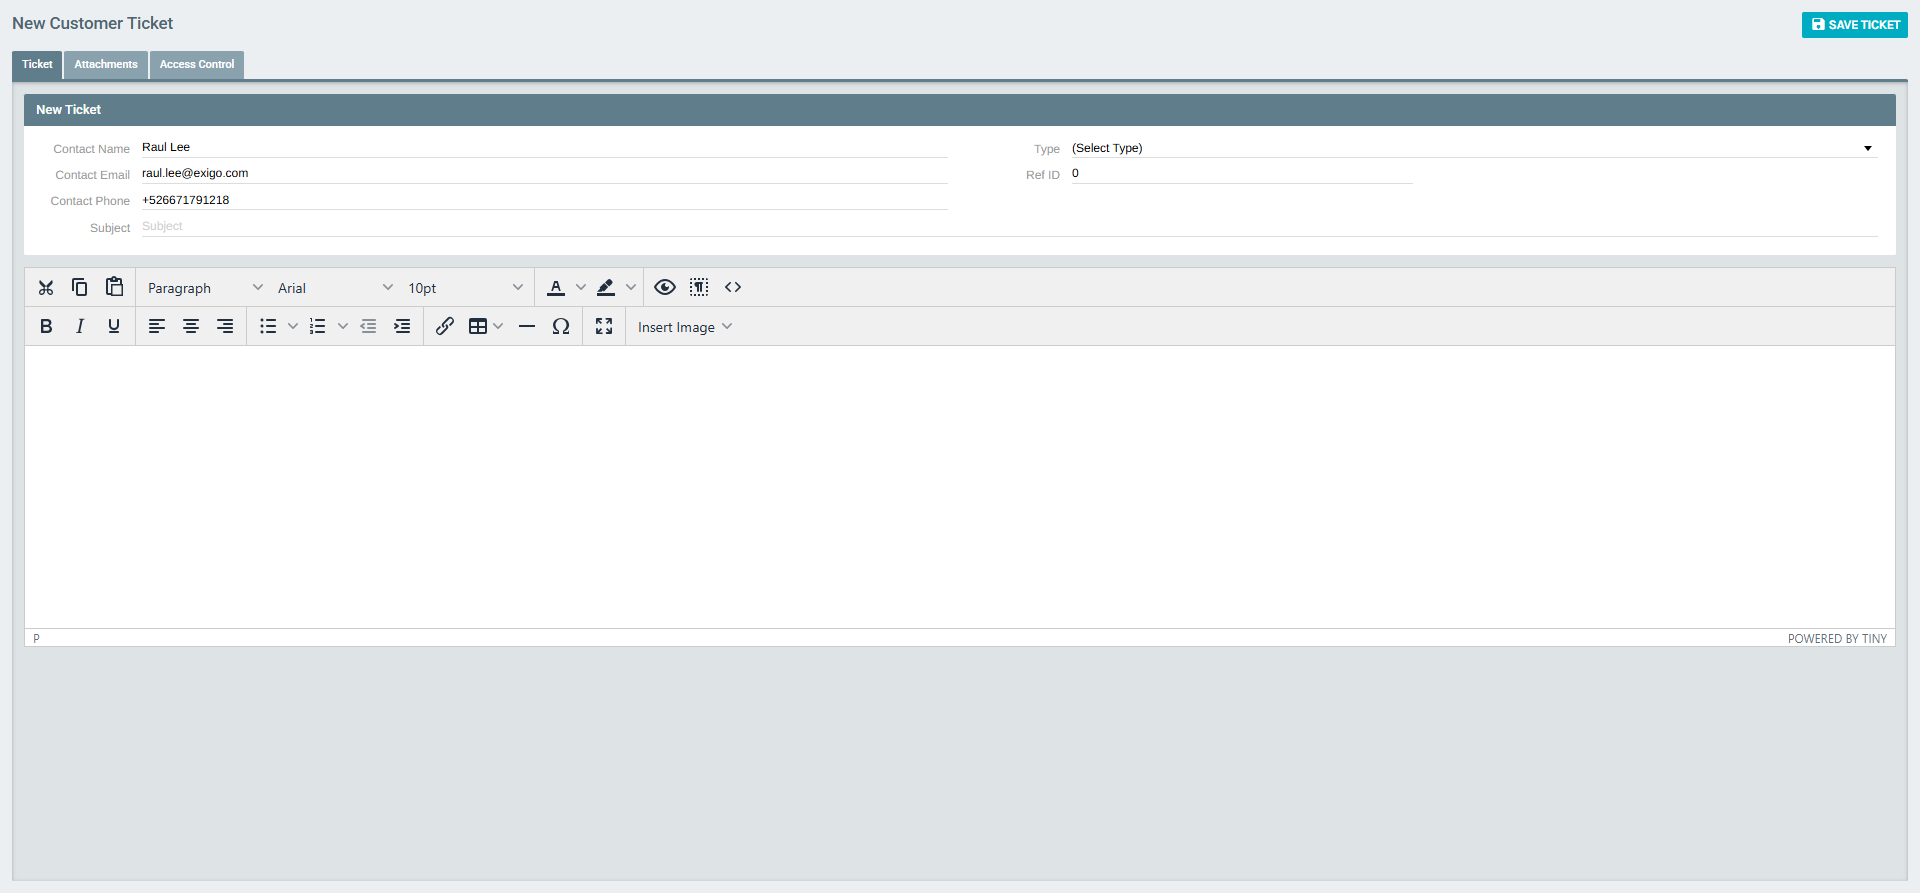
Required Fields
Fill in the following fields:
| Field | Description |
|---|---|
| Contact Name | Your name as the person submitting the ticket (pre-filled from your profile) |
| Contact Email | Your email address for notifications (pre-filled from your profile) |
| Contact Phone | Your phone number for contact purposes (pre-filled from your profile) |
| Type | The type of request — see Ticket Types below |
| Ref ID | Optional reference to an internal ID, work order, or related item |
| Subject | A concise title describing the issue or request |
| Description | A detailed explanation of the issue, steps to reproduce, expected vs. actual behavior, and any relevant context. The description editor supports rich text formatting, bullet lists, tables, links, and image insertion. |
Ticket Types
Use the Type dropdown to select the appropriate category for your request:
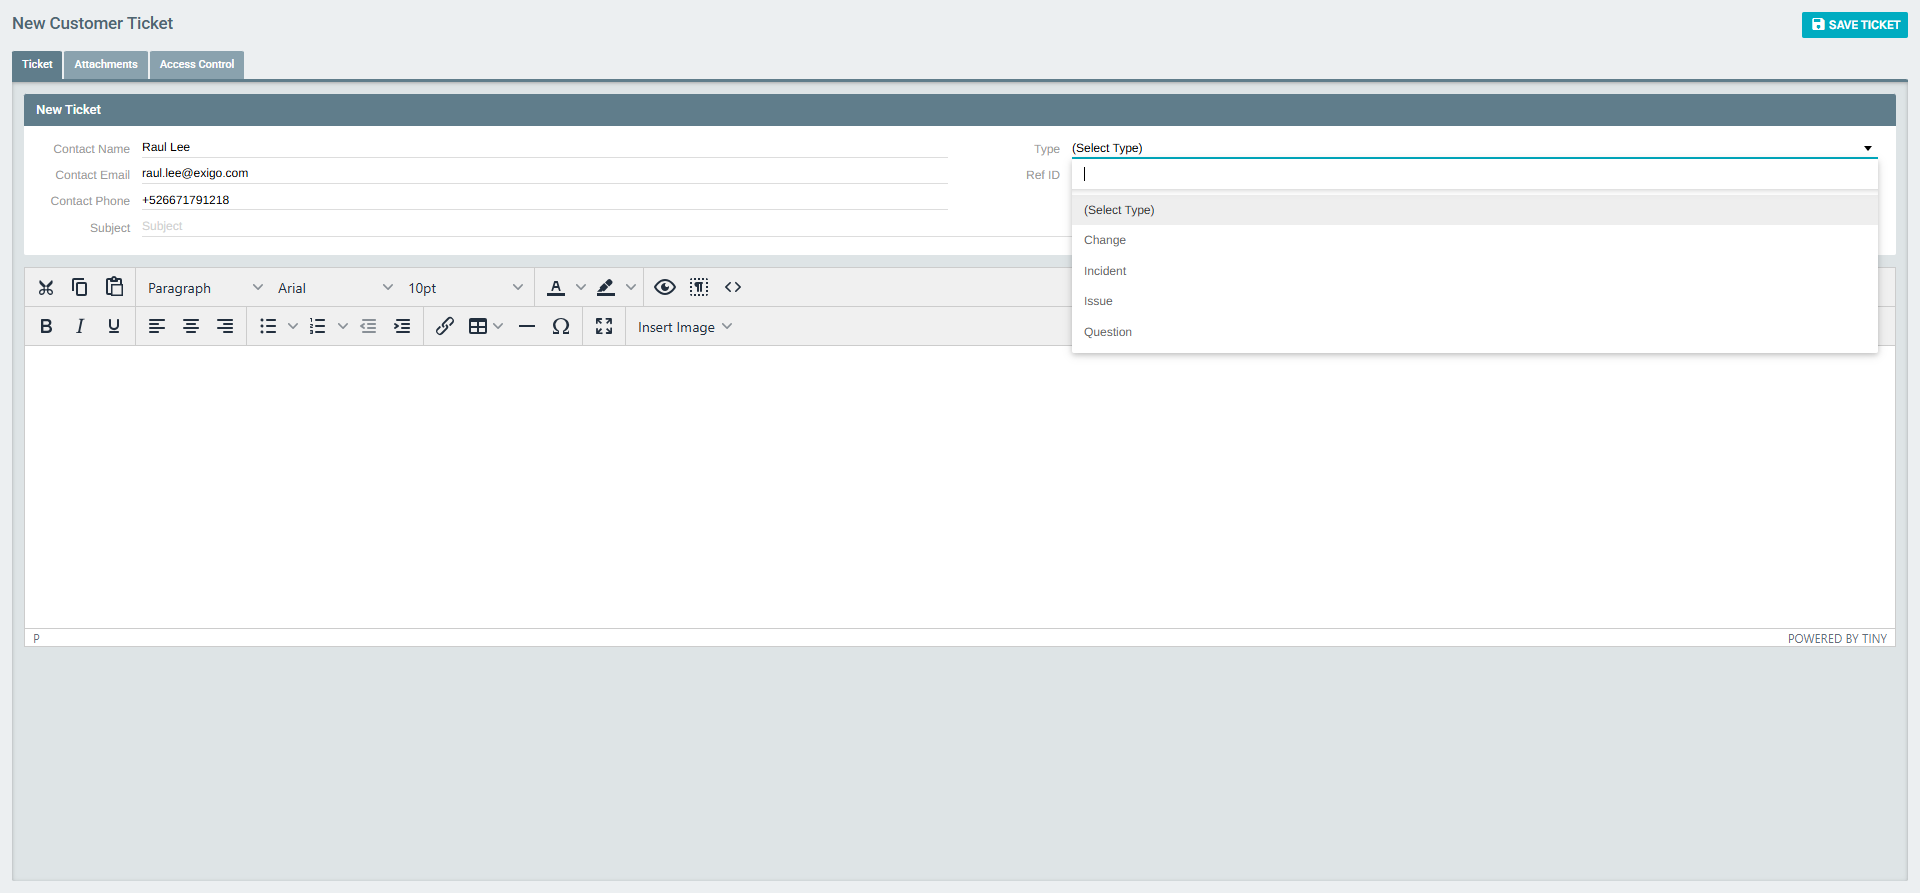
| Type | When to Use |
|---|---|
| Change | Request for a configuration change, customization, or new feature |
| Incident | An unexpected system behavior, outage, or error impacting operations |
| Issue | A known bug or defect that needs to be investigated and fixed |
| Question | A general inquiry or request for guidance on how something works |
Adding Attachments
Before saving, you can navigate to the Attachments tab to upload supporting files:
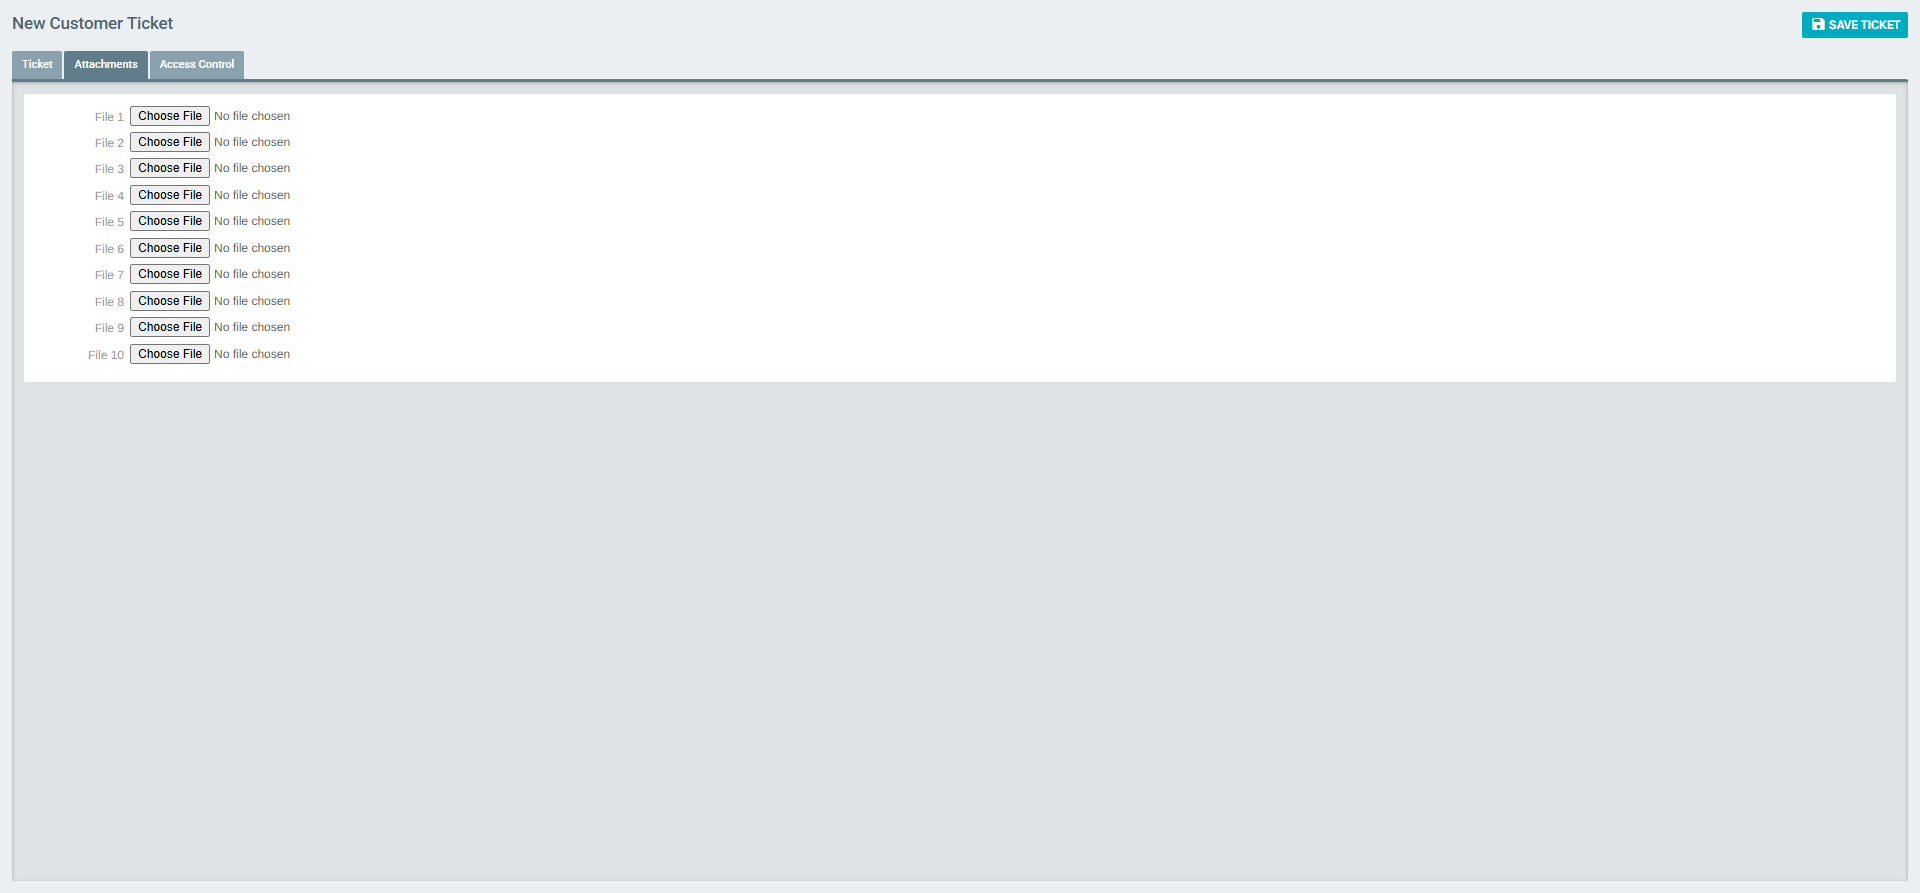
- Attach screenshots, error logs, CSV files, or any document that helps explain the issue
- Multiple files can be attached to a single ticket
Once all fields are filled, click SAVE TICKET to submit the ticket. The system will assign a unique Ticket ID and notify the support team.
Viewing a Ticket
To view the details of an existing ticket, click on any row in the ticket list or navigate directly to the ticket from the status sidebar.
The ticket detail view shows:
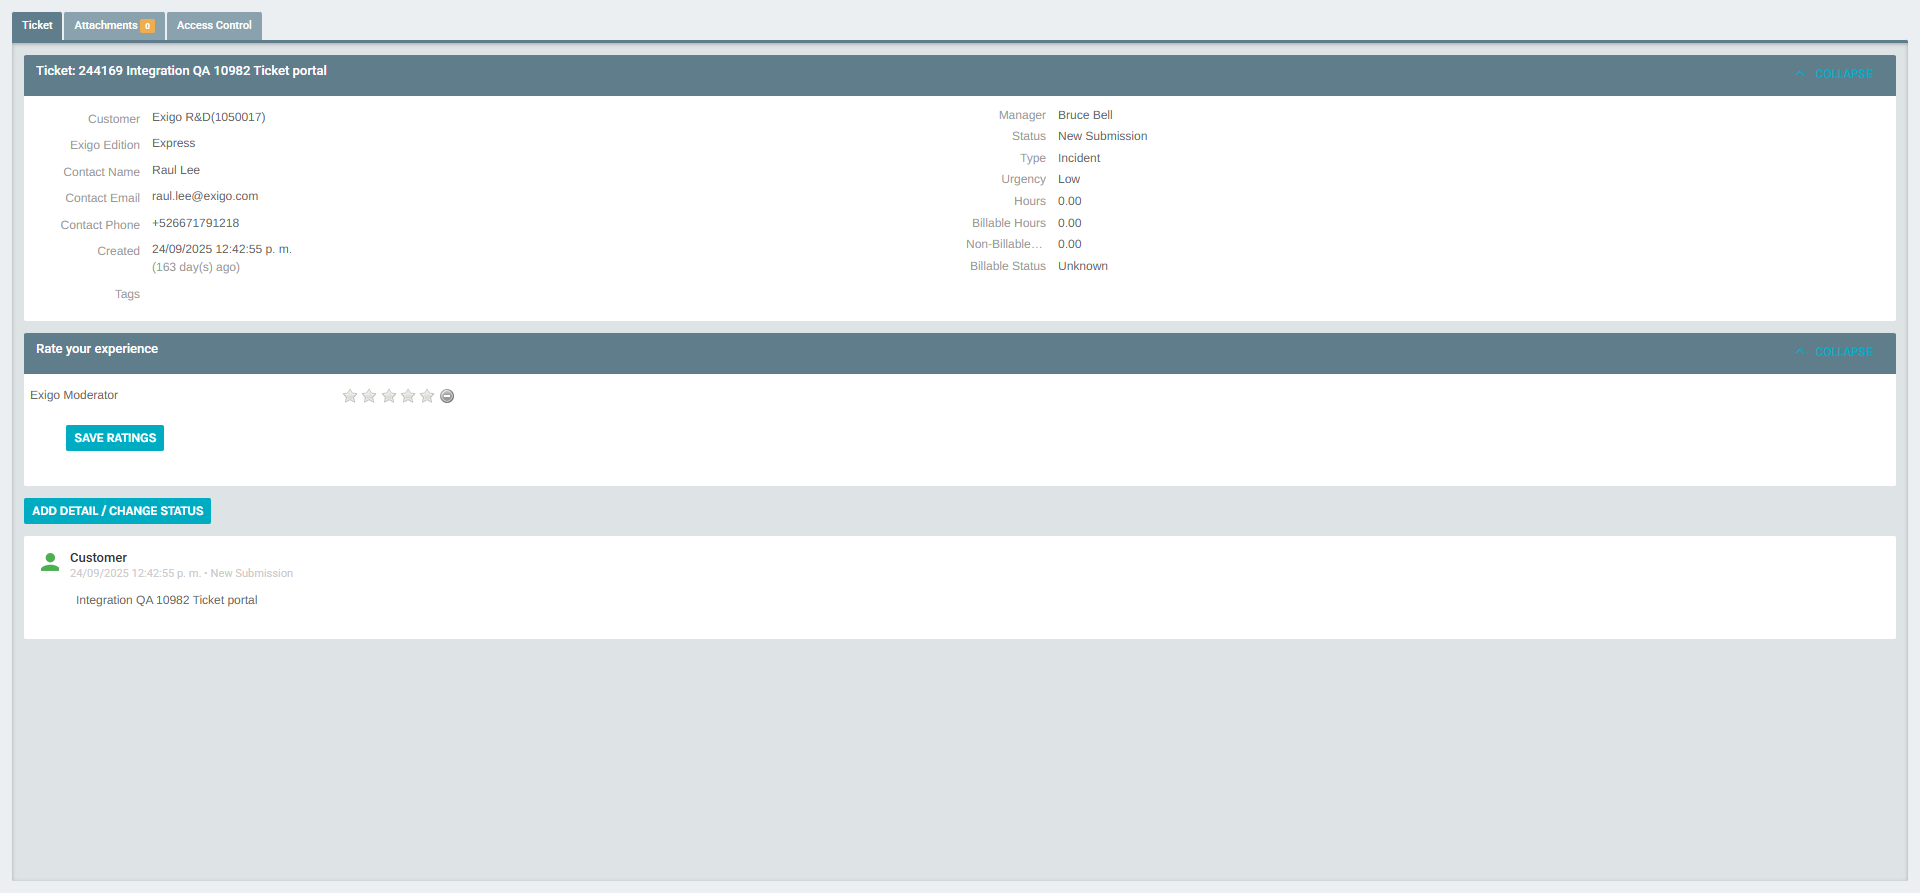
- Ticket header — Ticket ID and Subject
- Contact information — Name, email, and phone of the submitter
- Customer — The company/account associated with the ticket
- Exigo Edition — The platform edition (e.g., Express, Standard)
- Created date — When the ticket was originally submitted
- Manager — The Exigo support manager assigned to the ticket
- Status — Current lifecycle status
- Type — Ticket type (Change, Incident, Issue, Question)
- Urgency — Priority level
- Hours — Total hours logged (Billable / Non-Billable / Total)
- Billable Status — Whether the work is billable
- Rate your experience — Star rating fields to provide feedback once resolved
- Conversation history — A chronological log of all updates, notes, and replies from both the client and the Exigo team
Adding a Follow-Up or Updating Status
To add additional information or context to an open ticket, click the ADD DETAIL / CHANGE STATUS button in the ticket detail view.
The Add Detail / Change Status form will open:
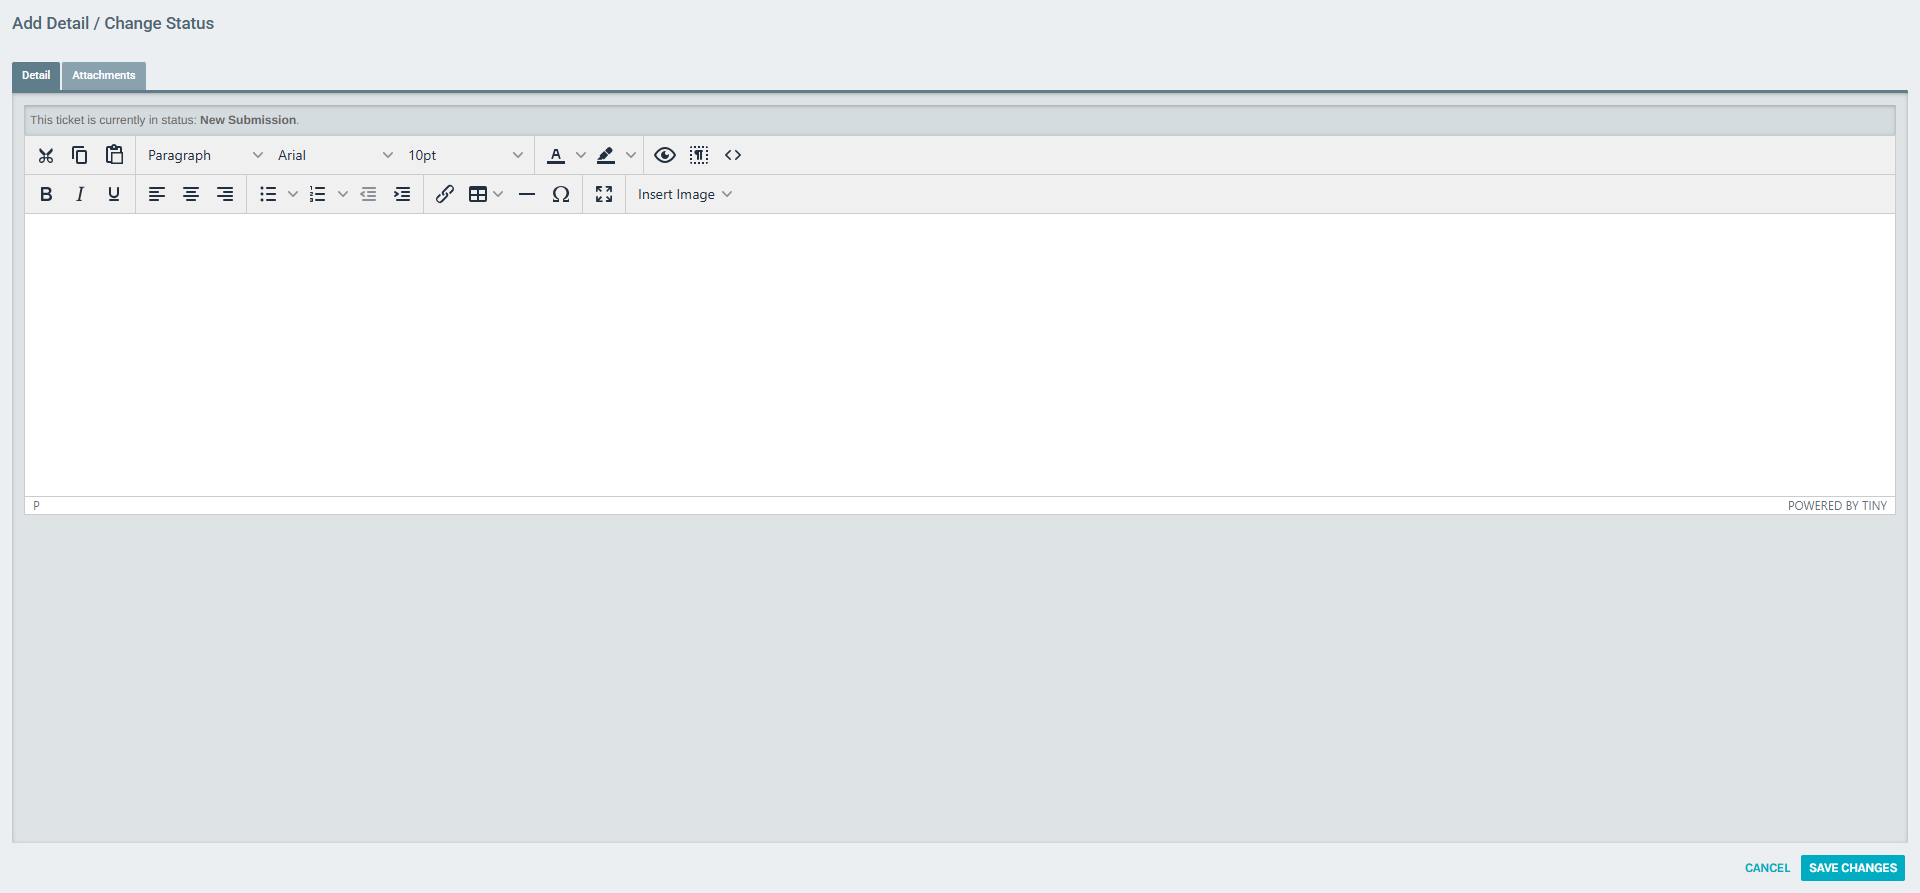
This form shows the current ticket status and provides a rich text editor where you can:
- Add new context, logs, or reproduction steps
- Respond to questions from the support team
- Provide updated information after testing or further investigation
You can also attach additional files using the Attachments tab within this form.
Click SAVE CHANGES to submit the update. Your message will be appended to the ticket's conversation history and the support team will be notified.
Tip: The more detail you provide when opening a ticket — including steps to reproduce, expected vs. actual behavior, environment details, and attached screenshots — the faster the Exigo support team can diagnose and resolve your issue.