Setting Up Warehouses
This guide explains how to configure and manage warehouses in the Exigo platform. Warehouses represent physical or virtual locations from which orders are fulfilled and are a key part of the accounting and order management setup.
Accessing Warehouse Settings
Warehouse settings are located under Administration > Settings > Accounting Settings.
Navigation path:
- From the left sidebar, click Administration.
- Click Settings.
- On the Settings page, click the ACCOUNTING SETTINGS tab at the top right.
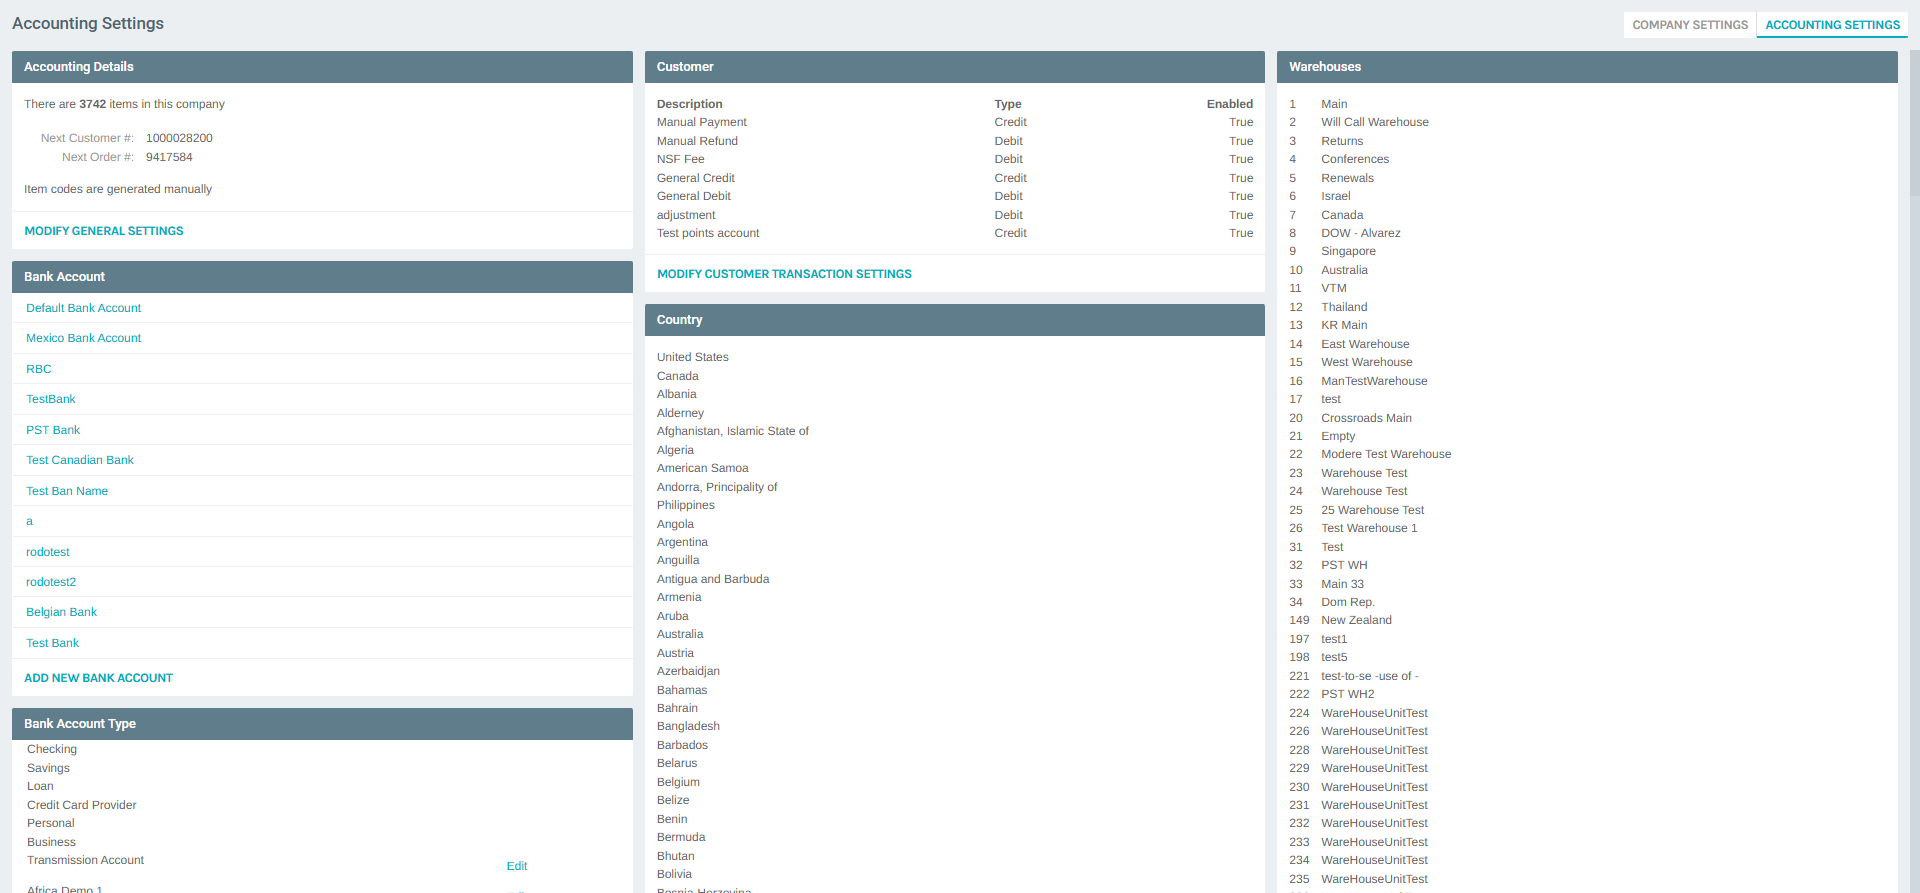
Once on the Accounting Settings page, you will see a Warehouses panel on the right side listing all configured warehouses with their IDs and names.
To manage warehouse details, scroll down to the Warehouses section and click MODIFY WAREHOUSE SETTINGS.
Warehouse List
Clicking MODIFY WAREHOUSE SETTINGS opens the Accounting Settings popup, automatically navigating to the Warehouses tab.
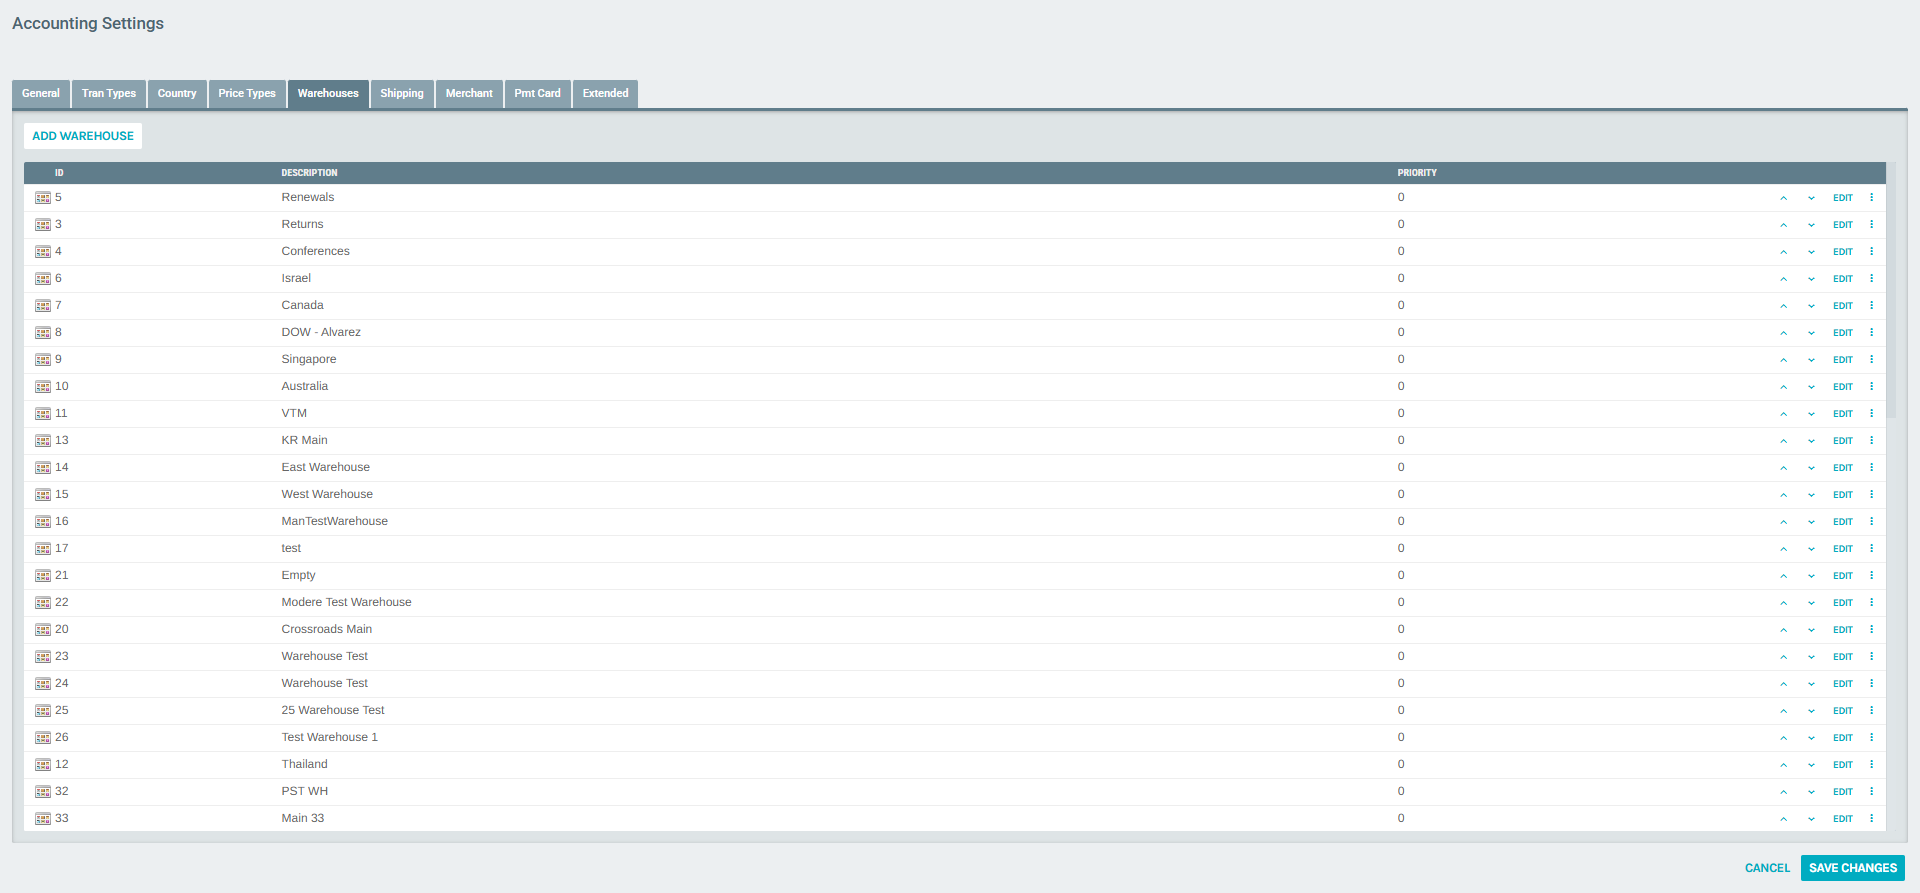
The Warehouses tab displays a table with the following columns:
| Column | Description |
|---|---|
| ID | Unique numeric identifier assigned to the warehouse. |
| Description | The display name of the warehouse. |
| Priority | Determines the order in which warehouses are presented; lower numbers appear first. |
Each row includes:
- Up/Down arrows — Reorder warehouses by adjusting priority.
- EDIT — Opens the warehouse detail form to modify its settings.
- More options (⋮) — Additional actions (e.g., delete).
Editing an Existing Warehouse
Click EDIT next to any warehouse to open the Warehouse Setup form.

Warehouse Setup Fields
| Field | Description |
|---|---|
| Description | The name of the warehouse (required). |
| Address | Street address of the warehouse (required). |
| Address 2 | Secondary address line (suite, floor, etc.). |
| City | City where the warehouse is located (required). |
| State/Zip | State dropdown and ZIP code field (required). |
| Country | Country of the warehouse; defaults to the company's primary country. |
| Default Template | Invoice/statement template used for orders from this warehouse. |
| Stop Auto Order Process | When checked, prevents auto-orders from being processed through this warehouse. |
Currency Availability
The bottom section of the form shows a list of all configured currencies. For each currency you can:
- Available In checkbox — Check to make this currency available for orders from this warehouse.
- Set as Default radio button — Select the default currency for this warehouse (only one may be selected).
Click SAVE CHANGES to apply modifications, or CANCEL to discard them.
Editing the Main Warehouse (Example)
Below is an example of the Main warehouse (ID: 1) configuration:
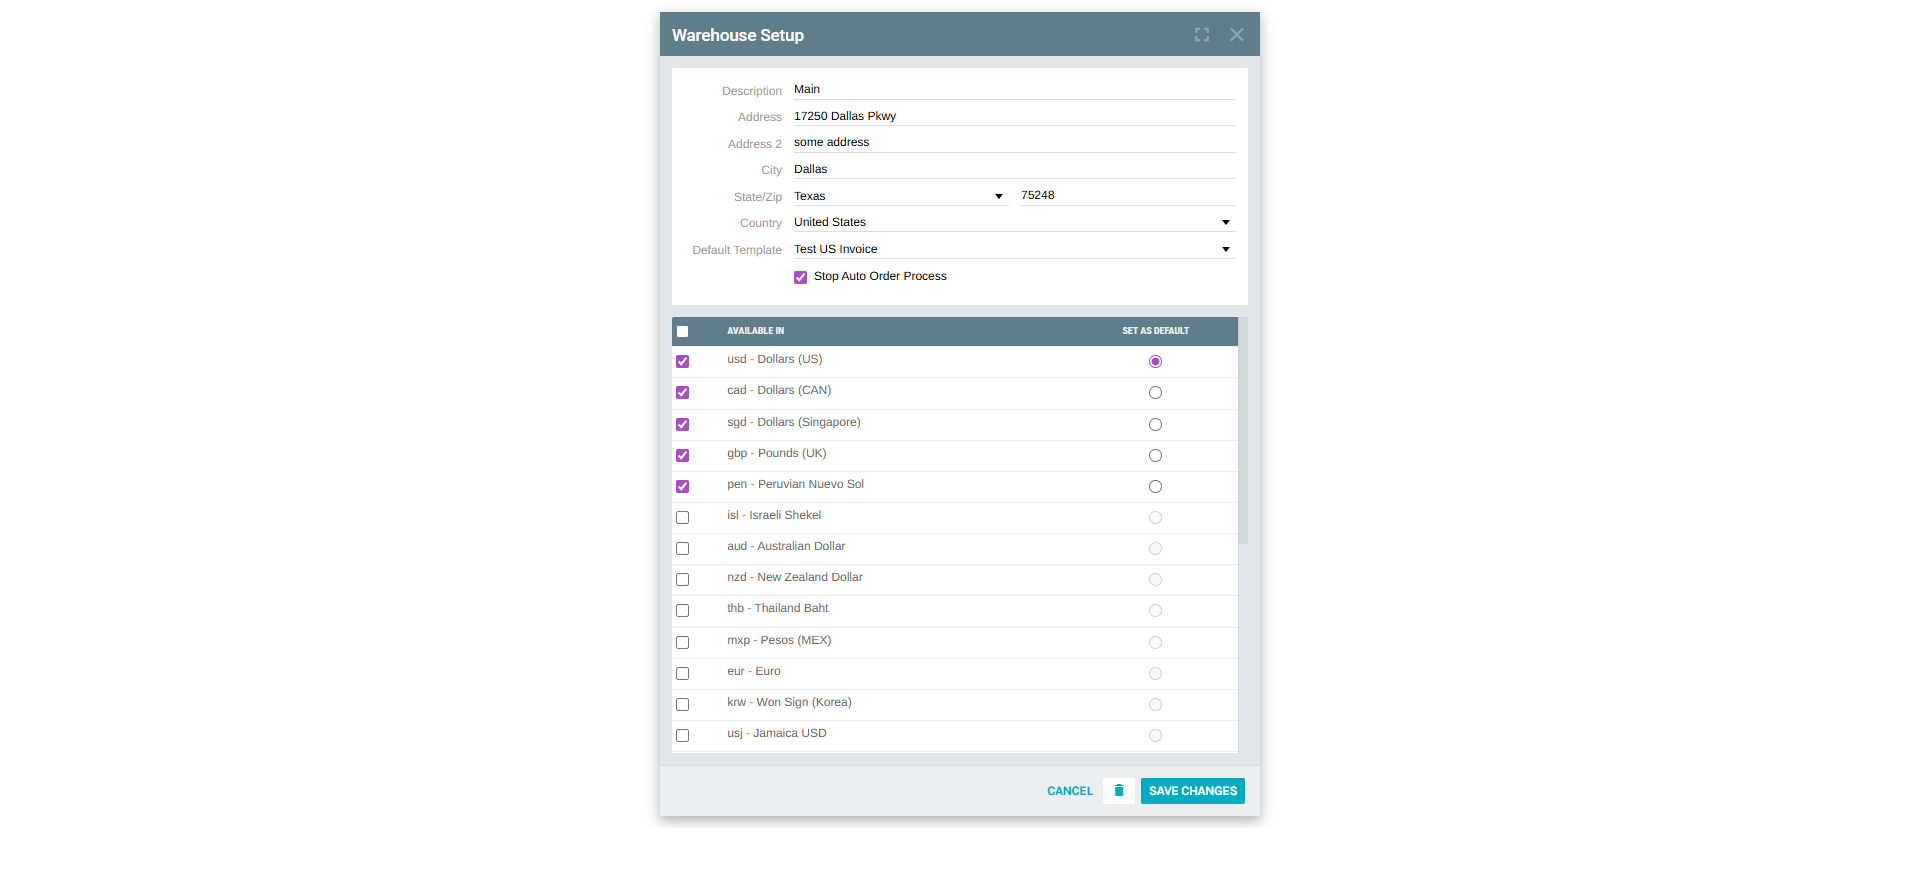
- Description: Main
- Address: 17250 Dallas Pkwy
- City: Dallas, TX 75248
- Country: United States
- Default Template: Test US Invoice
- Stop Auto Order Process: Enabled
- Default Currency: USD - Dollars (US)
Adding a New Warehouse
To create a new warehouse, click the ADD WAREHOUSE button at the top of the Warehouses tab.

The Warehouse Setup form appears with empty fields. Fill in all required fields:
- Enter the Description (warehouse name).
- Provide the full Address, City, State/Zip, and Country.
- Optionally select a Default Template for invoices/statements.
- Check Stop Auto Order Process if this warehouse should not process auto-orders.
- In the currency table, check the currencies this warehouse will accept and set one as the default.
- Click ADD WAREHOUSE to save.
Payments Restricted by Warehouse
Exigo allows you to restrict certain payment types to specific warehouses. This is managed from Accounting Settings > Payments Restricted by Warehouse.
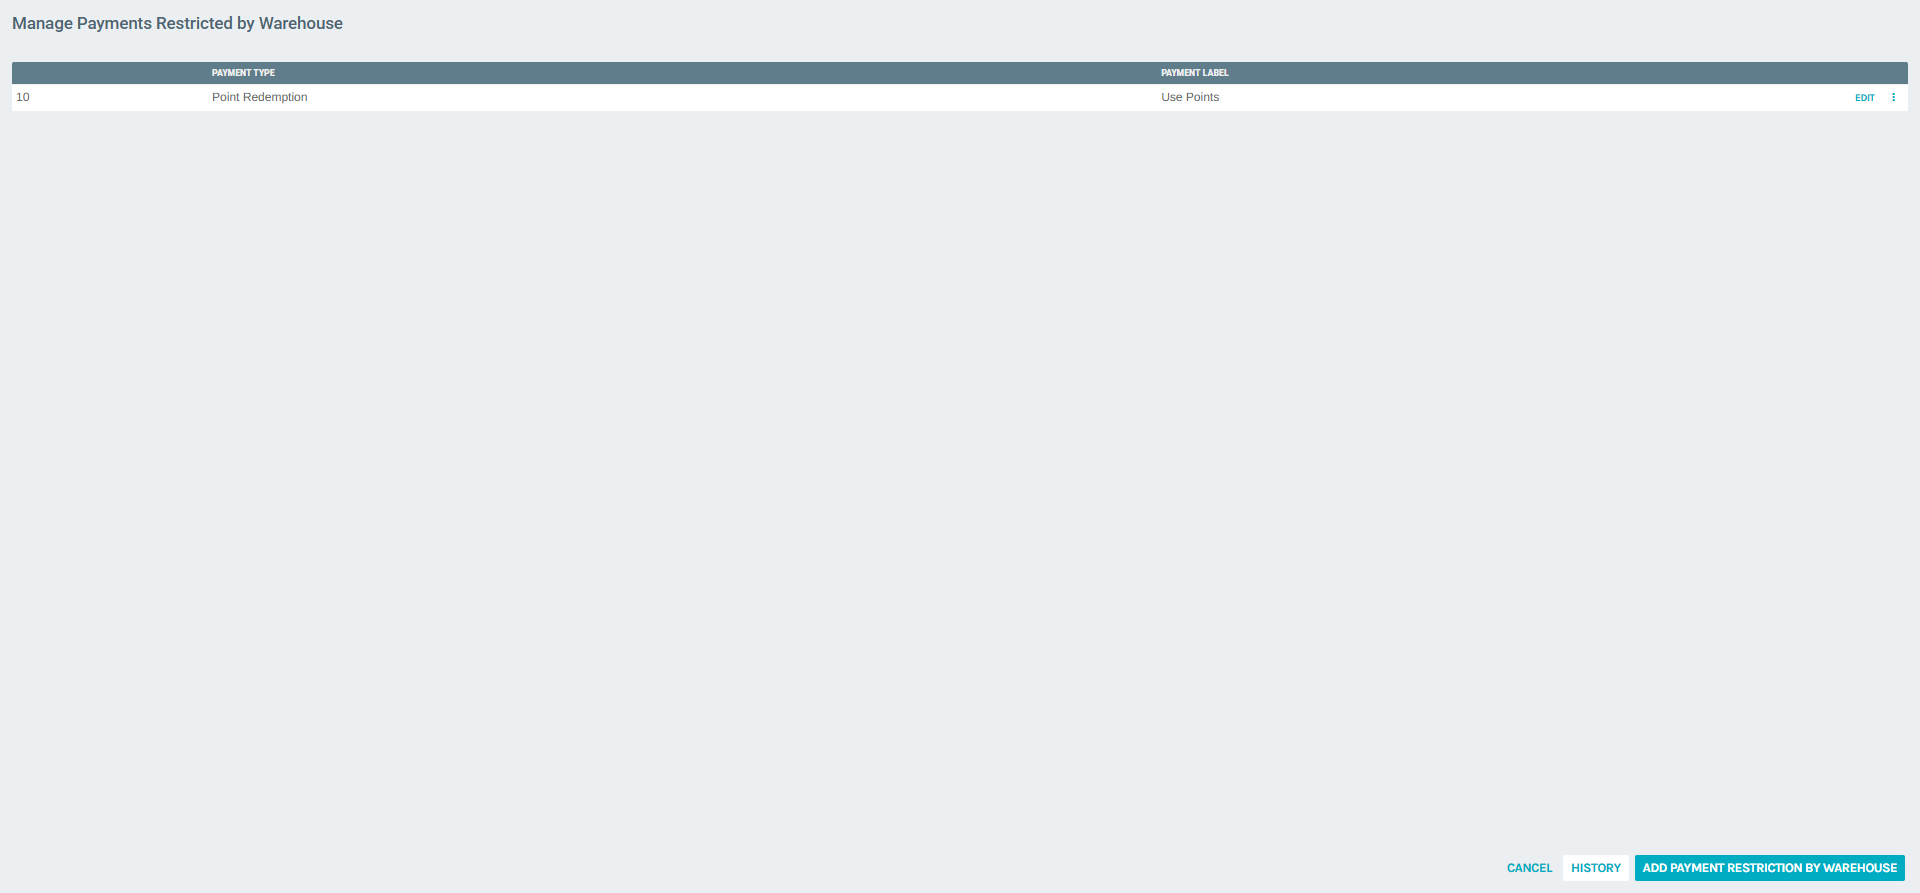
This screen lists all existing payment restrictions, showing:
| Column | Description |
|---|---|
| Payment Type | The payment method being restricted. |
| Payment Label | The display label for the payment type. |
To add a new restriction, click ADD PAYMENT RESTRICTION BY WAREHOUSE at the bottom right.
To edit an existing restriction, click EDIT in the corresponding row.
Summary
| Action | Location |
|---|---|
| View warehouse list | Administration > Settings > Accounting Settings > Warehouses section |
| Manage warehouse settings | Accounting Settings > Modify Warehouse Settings > Warehouses tab |
| Add a new warehouse | Warehouses tab > ADD WAREHOUSE button |
| Edit a warehouse | Warehouses tab > EDIT (on any row) |
| Set payment restrictions | Accounting Settings > Payments Restricted by Warehouse |