Configuring Supported Languages
This guide explains how to configure the supported languages in the Exigo Admin portal, including how to add new languages and remove languages that are no longer needed.
Table of Contents
- Overview
- Accessing Language Settings
- Viewing the Language List
- Adding a Language
- Removing a Language
- Saving Changes
Overview
The Company Language Settings module allows administrators to define which languages are available throughout the Exigo platform. These settings control the language options available in the back office, distributor portals, and customer-facing experiences.
Key Features:
- Add languages from a predefined global list
- Remove languages no longer needed by your business
- Language settings apply platform-wide across the back office and distributor portals
- Changes take effect immediately after saving
Accessing Language Settings
Navigation Path
- Log in to the Exigo Admin portal at
login.exigo.com

- From the left sidebar, navigate to Administration > Settings
- On the Company Settings page, click the ACCOUNTING SETTINGS tab at the top
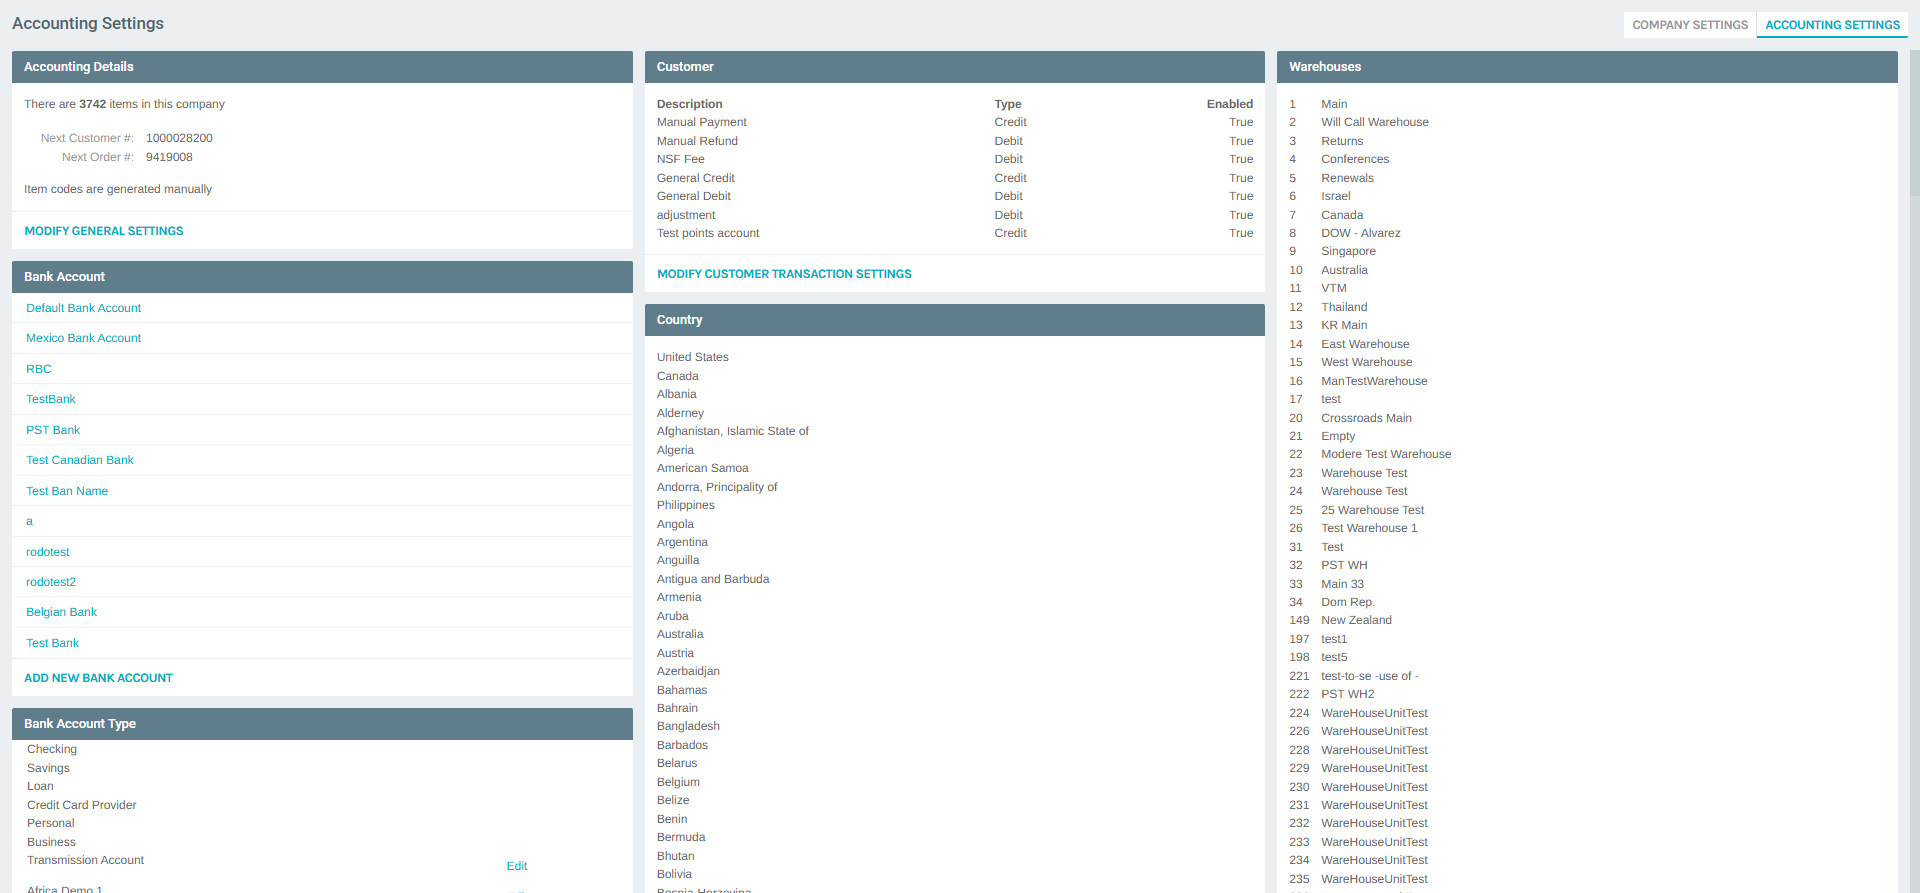
- Scroll down the Accounting Settings summary page to find the Language section
- Click MODIFY LANGUAGE SETTINGS
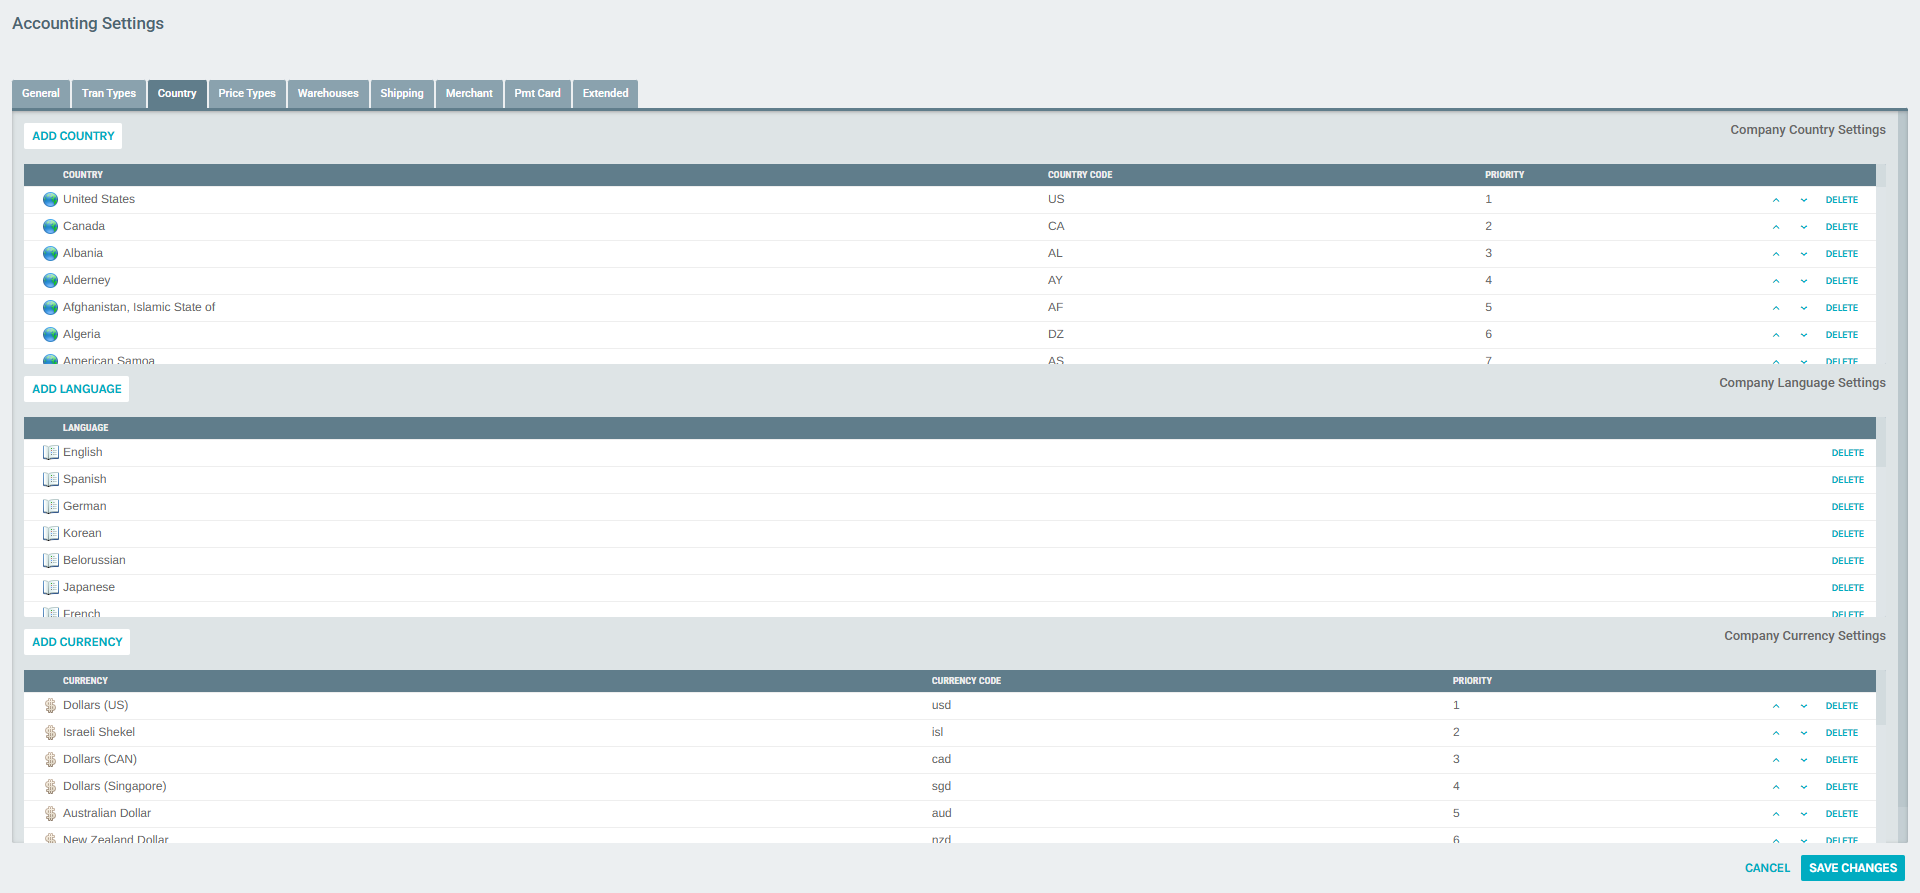
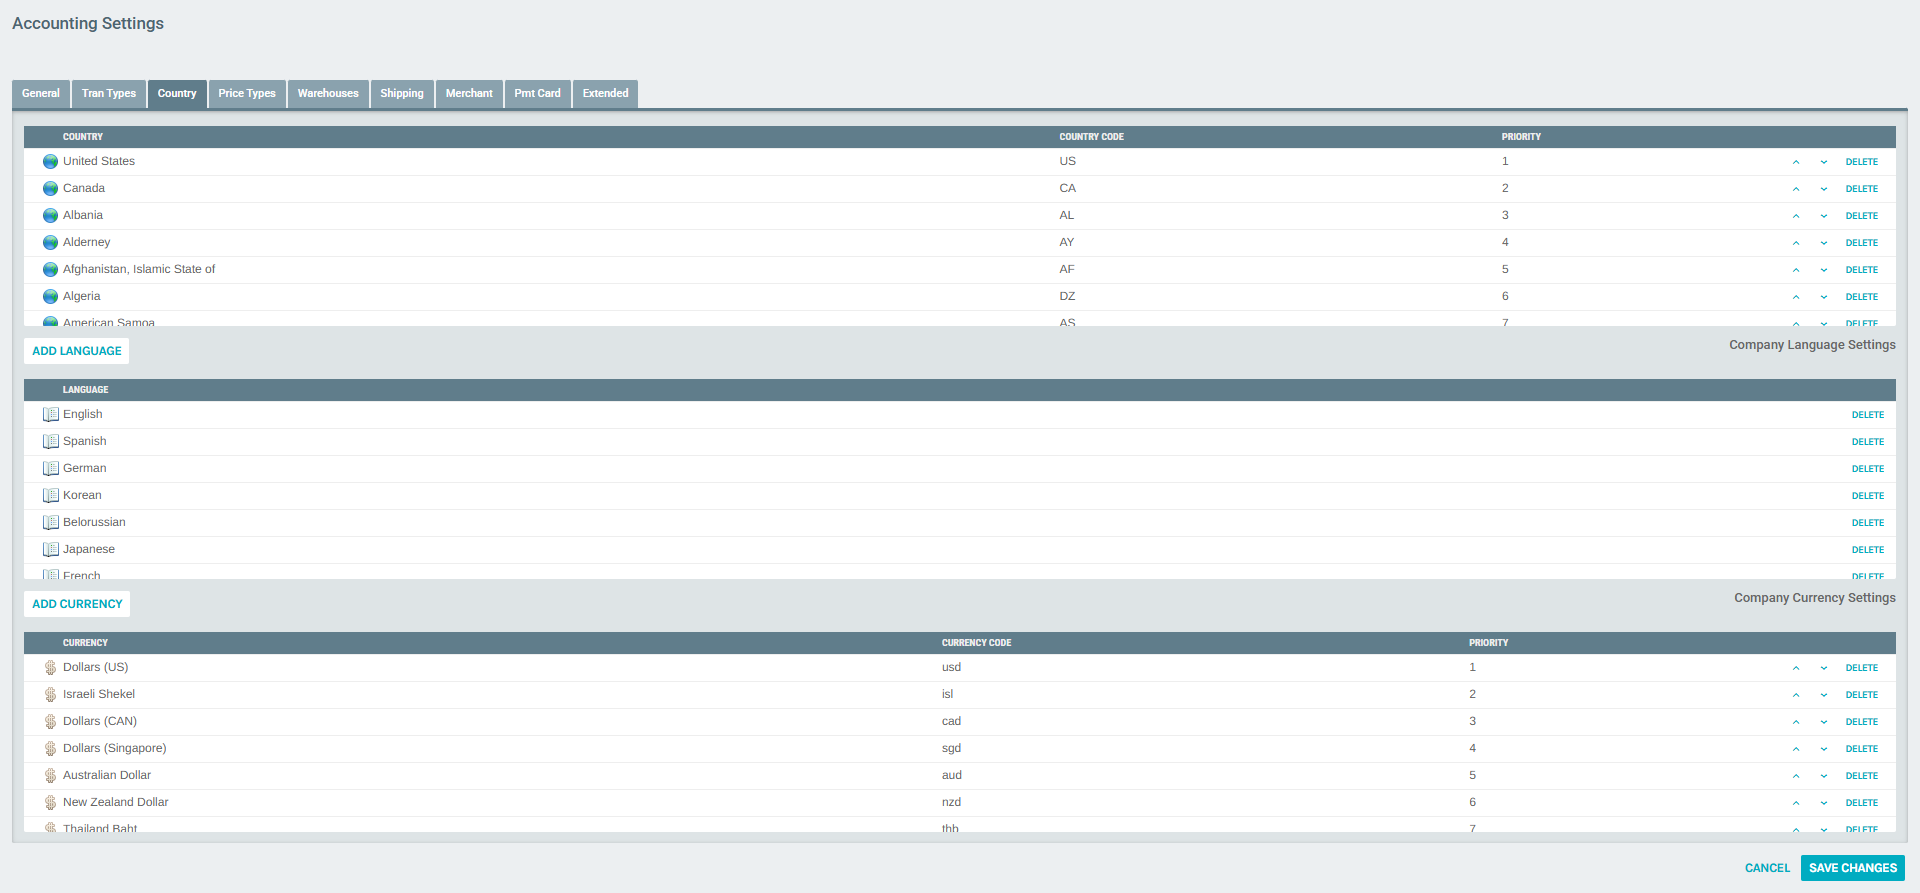
The Accounting Settings popup will open on the Country tab. This tab contains three sections stacked vertically: Company Country Settings, Company Language Settings, and Company Currency Settings. Scroll past the Country section to reach the Language section.
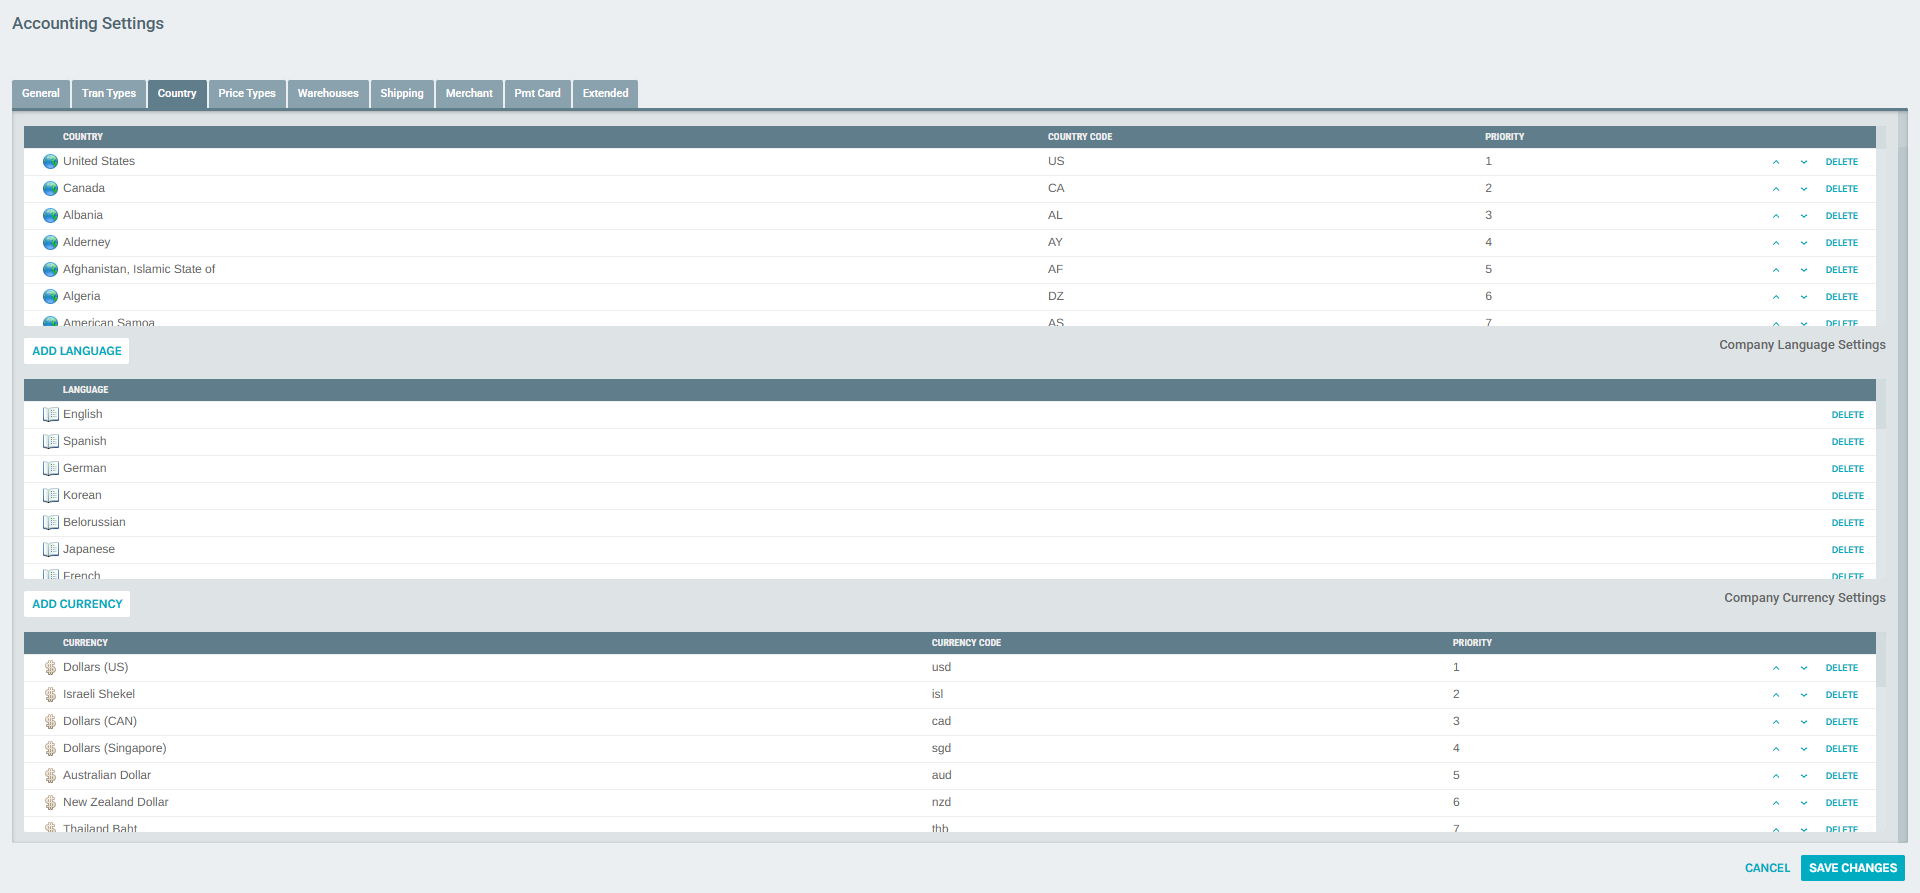
Viewing the Language List
The Company Language Settings table lists all currently configured languages. The table has a single column:
| Column | Description |
|---|---|
| Language | Full name of the language (e.g., English, Spanish, French) |
Each row also has a DELETE button to remove that language from the supported list.
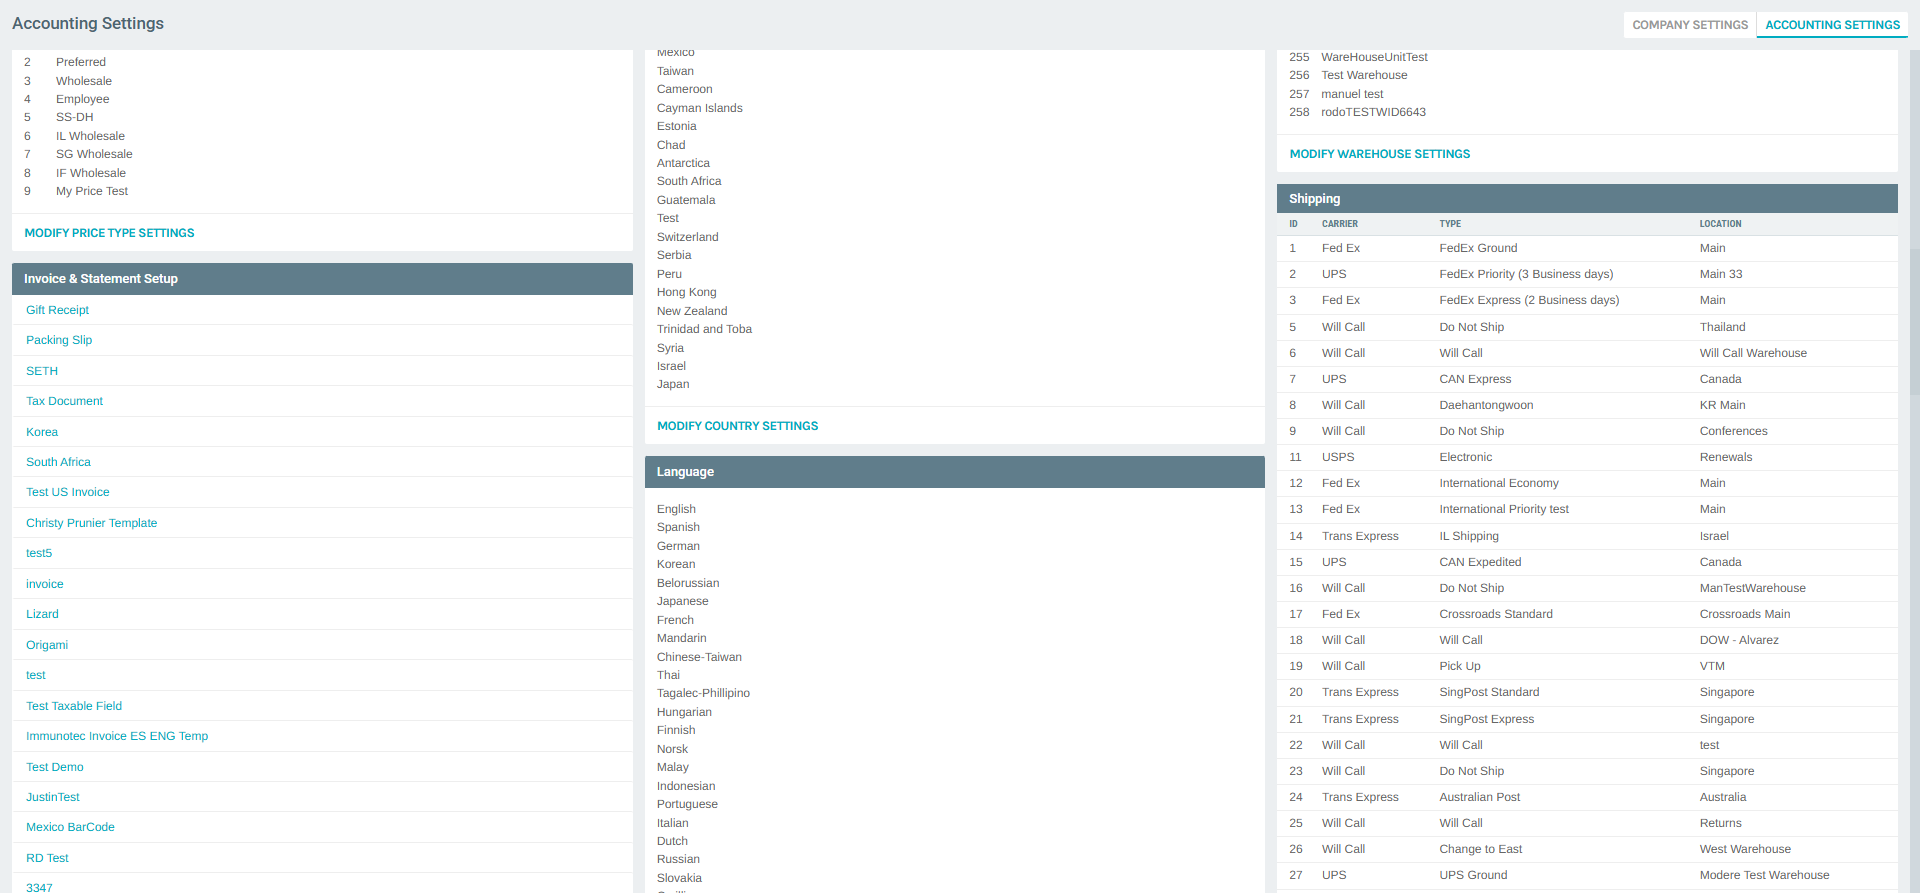
The currently configured languages for this company are:
| # | Language |
|---|---|
| 1 | English |
| 2 | Spanish |
| 3 | German |
| 4 | Korean |
| 5 | Belorussian |
| 6 | Japanese |
| 7 | French |
| 8 | Mandarin |
| 9 | Chinese-Taiwan |
| 10 | Thai |
| 11 | Tagalec-Phillipino |
| 12 | Hungarian |
| 13 | Finnish |
| 14 | Norsk |
| 15 | Malay |
| 16 | Indonesian |
| 17 | Portuguese |
| 18 | Italian |
| 19 | Dutch |
| 20 | Russian |
| 21 | Slovakia |
| 22 | Cyrillic |
| 23 | Estonian |
| 24 | English - Malaysia |
| 25 | Malay |
| 26 | Serbian |
| 27 | Czech Republic |
| 28 | Bangla (Bangladesh) |
| 29 | Bangla (India) |

Adding a Language
- Scroll to the Company Language Settings section within the Country tab
- Click the ADD LANGUAGE button above the language table

- The Company Language Setup dialog will appear

- Click the Language dropdown to browse all available languages
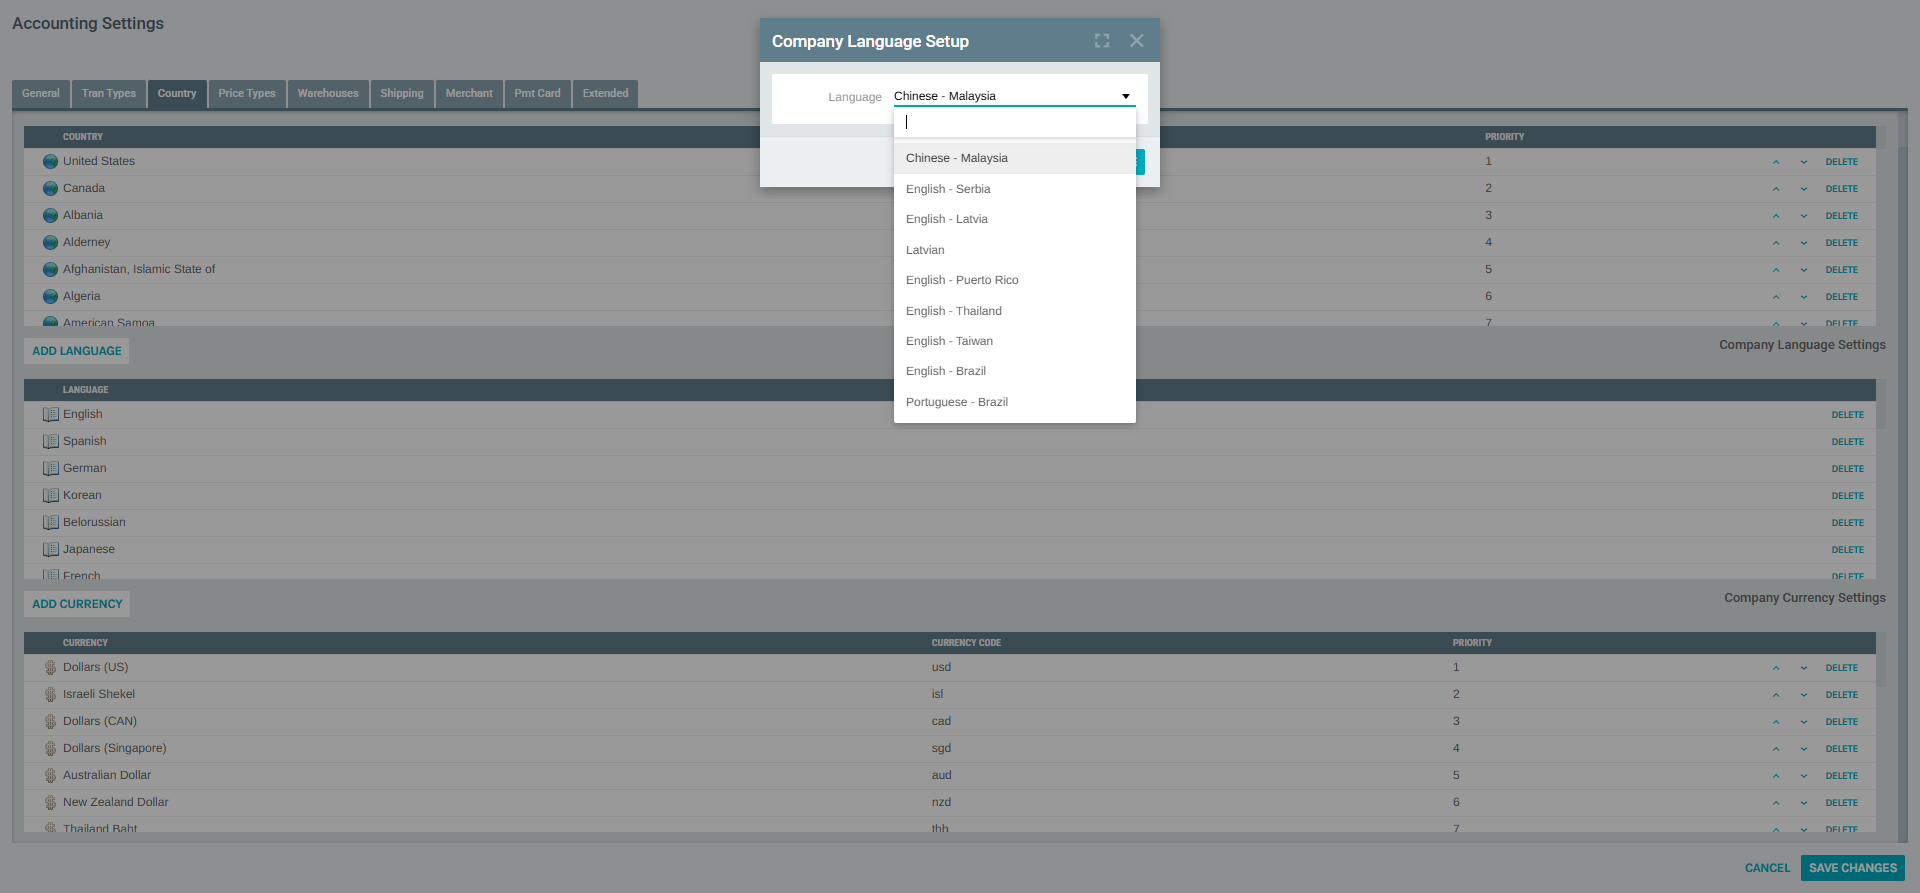
- Select the desired language from the list
- Click ADD LANGUAGE to confirm
- The new language will be appended to the bottom of the language list
- Click SAVE CHANGES at the top of the popup to persist the change
Note: Only languages not already added to the company will appear in the dropdown. If a language does not appear, it may already be in the list.
Removing a Language
- Scroll to the Company Language Settings section within the Country tab
- Locate the language you want to remove
- Click the DELETE button on the right side of the language row
- The language will be removed from the list immediately in the UI
- Click SAVE CHANGES to finalize the deletion
Warning: Removing a language may affect distributor portals and back office users configured to use that language. Ensure no active users or sites depend on a language before removing it.
Saving Changes
All additions and deletions to the language list (along with any changes to the Country and Currency sections on the same tab) are applied only after clicking the SAVE CHANGES button at the top of the Accounting Settings popup.
- To discard all pending changes, click CANCEL
- Changes take effect immediately after saving and apply platform-wide