Creating Extended Properties
This document provides a step-by-step guide for creating and managing Extended Properties in the Exigo Admin portal.
Table of Contents
- Overview
- Accessing Extended Properties
- Viewing Existing Extended Properties
- Adding a New Extended Property
- Adding Fields to an Extended Property
- Available Field Types
- Best Practices
- System Notes
Overview
Extended Properties in Exigo allow administrators to define custom data structures that extend the information stored on customer records. Each extended property acts as a group (or container) that holds one or more custom fields. These fields can capture additional data points beyond the standard customer profile — such as survey responses, tax information, preferences, or any business-specific data your organization needs to track.
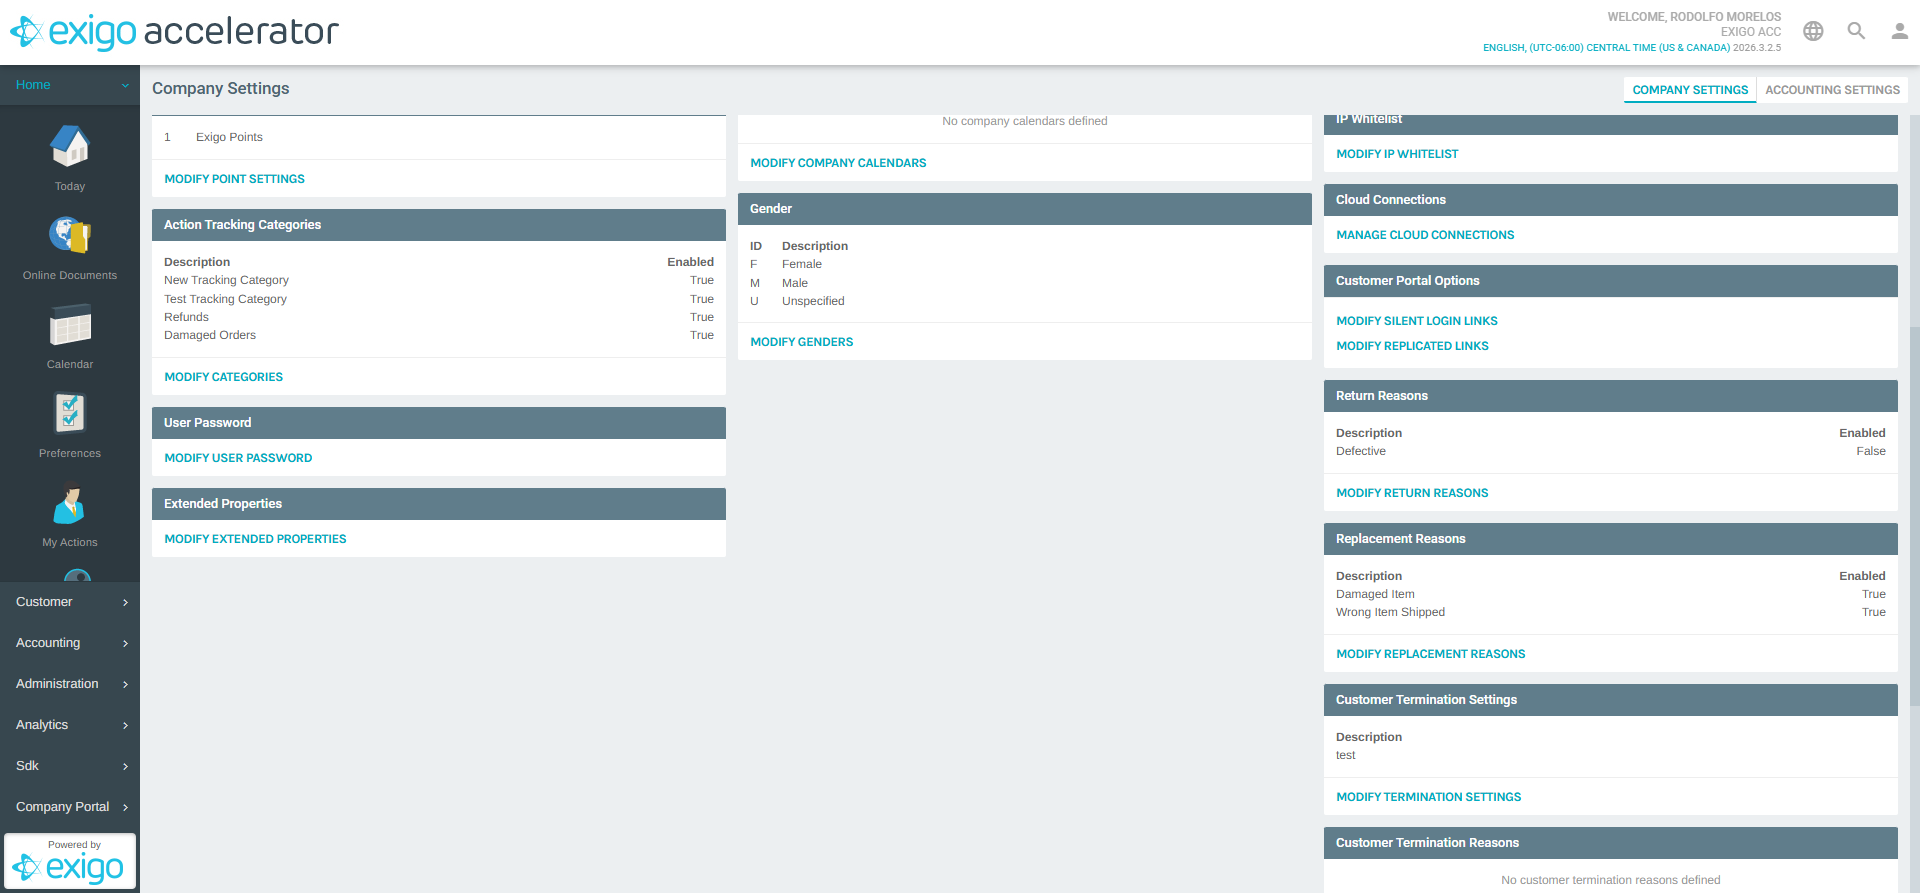
Accessing Extended Properties
Navigation Path
- Log in to the Exigo Admin portal at
login.exigo.com - From the left sidebar, navigate to Administration > Settings
-
The Company Settings page loads in the main content area. Scroll to the Extended Properties section.
-
Click MODIFY EXTENDED PROPERTIES to open the management popup.
Viewing Existing Extended Properties
After clicking MODIFY EXTENDED PROPERTIES, the "Extended Properties" popup opens.
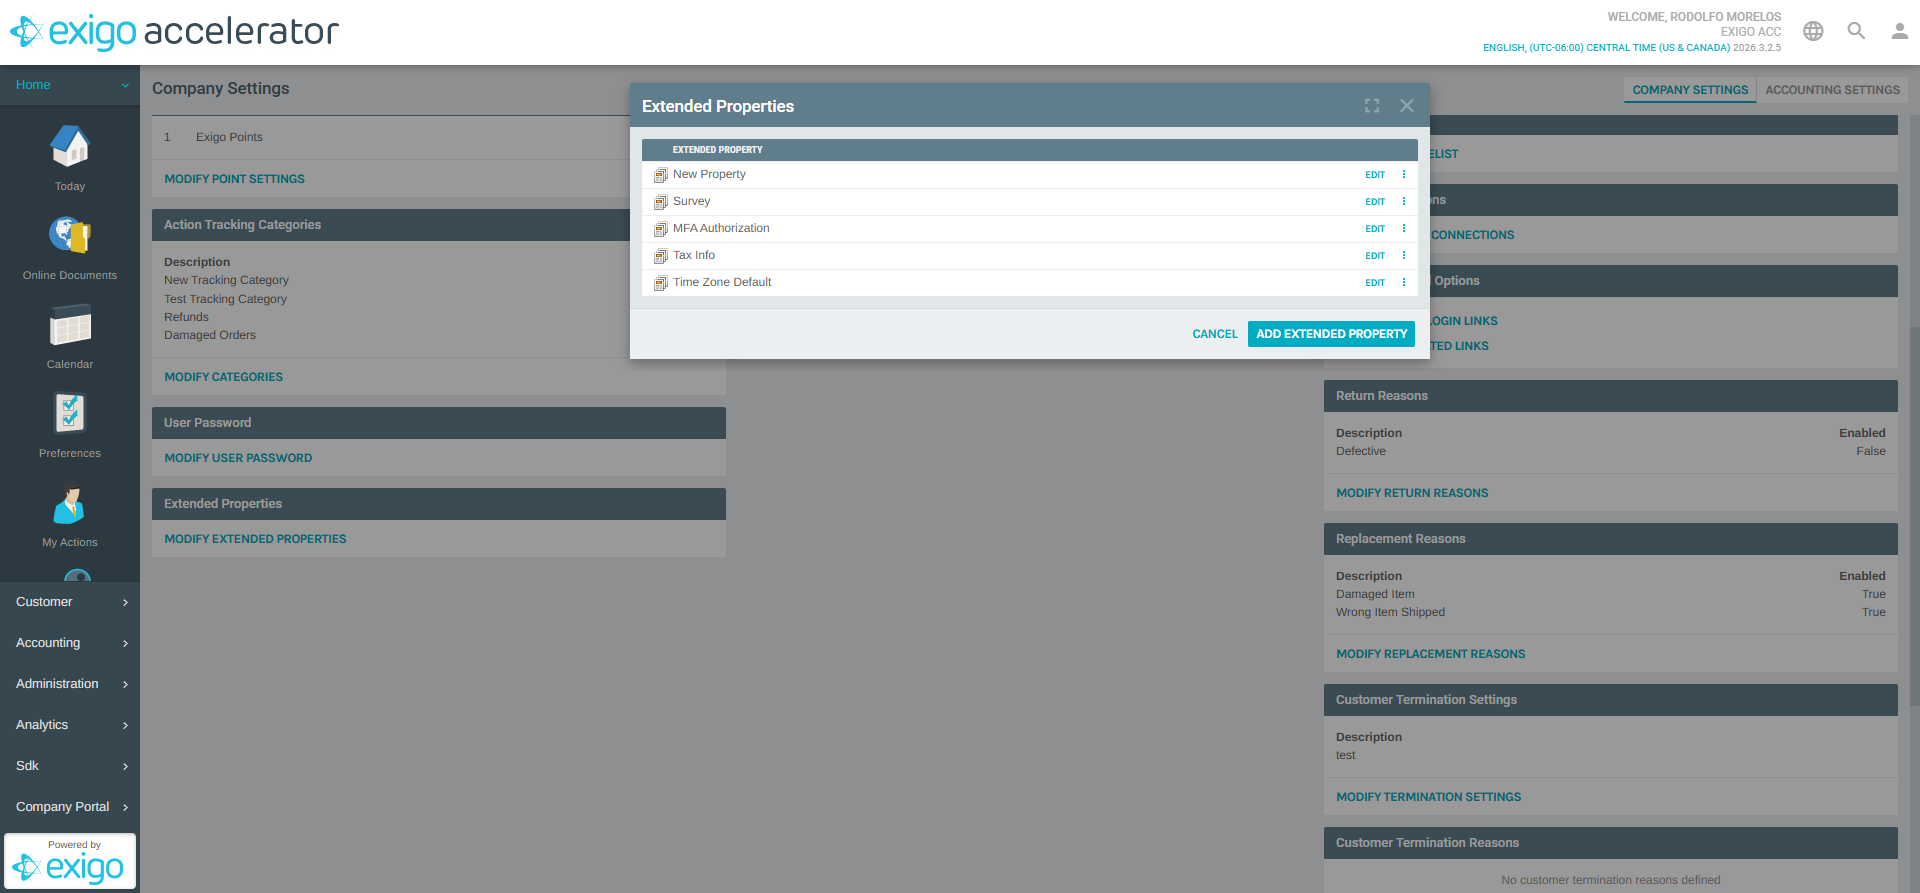
The popup includes: - ADD EXTENDED PROPERTY link at the top to create a new property group - Extended Property Table with columns: - Extended Property: The name of each property group - EDIT: Link to modify the property - Options menu (three-dot icon): Additional actions such as delete - CANCEL button to close the popup
Adding a New Extended Property
Steps to Add:
- In the Extended Properties popup, click the ADD EXTENDED PROPERTY link
- The "Extended Property Setup" form opens
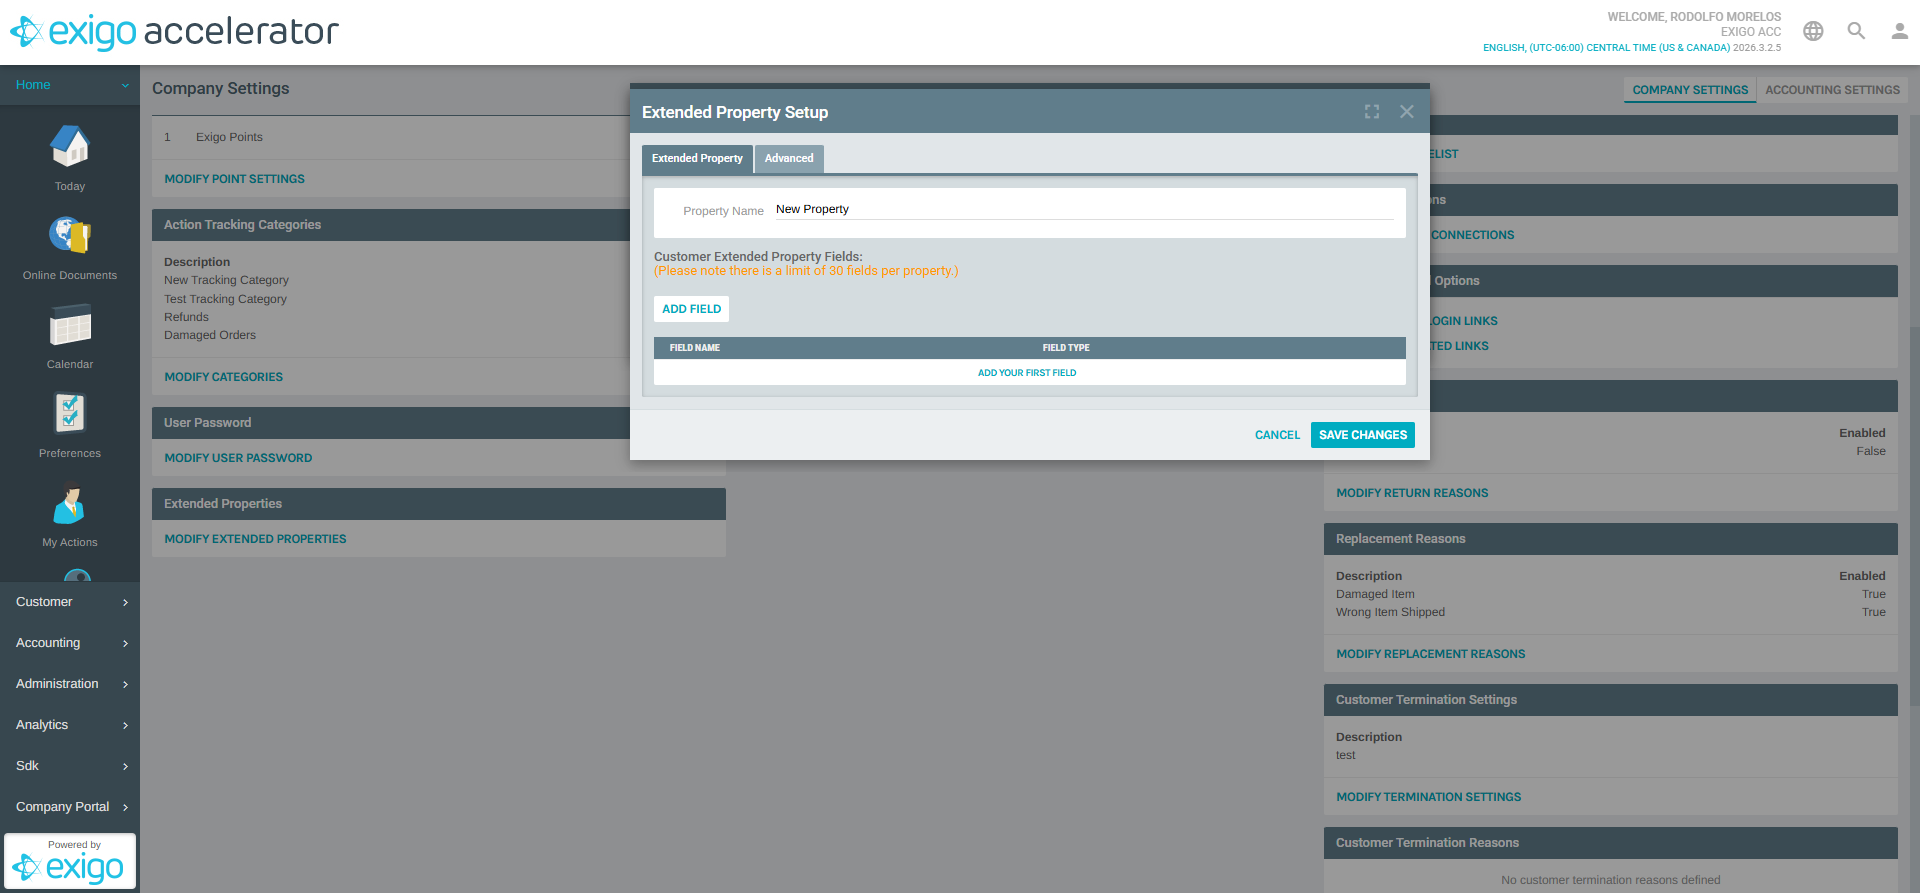
- The form contains two tabs:
| Tab | Description |
|---|---|
| Extended Property | Main configuration tab for the property name and fields |
| Advanced | Additional advanced settings for the property |
- Fill in the Property Name field (required) — this is the display name for the property group
- Add fields to the property (see Adding Fields to an Extended Property)
- Click SAVE CHANGES to create the extended property
Adding Fields to an Extended Property
Each extended property can contain up to 30 fields. Fields define the individual data points captured within the property group.
Steps to Add a Field:
- In the Extended Property Setup form, click the Add Field link below the "Customer Extended Property Fields" heading
- The "Property Field Setup" dialog opens
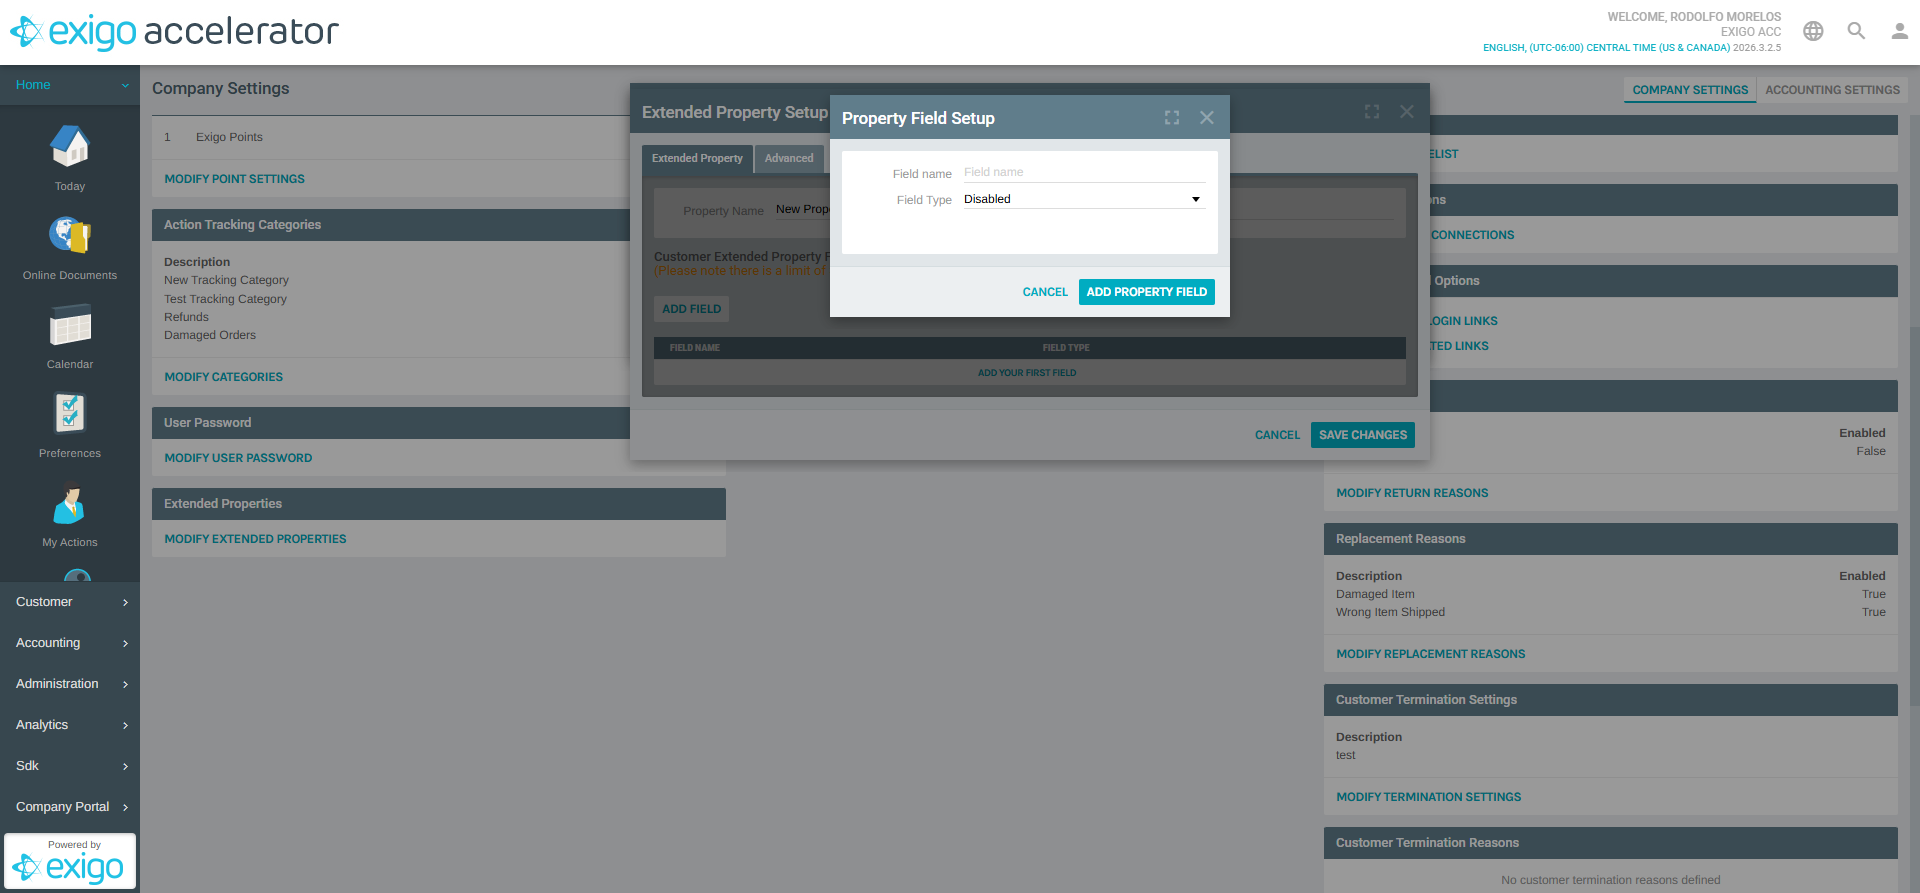
- Fill in the following:
| Field | Type | Required | Description |
|---|---|---|---|
| Field name | Text | Yes | The name/label for this field |
| Field Type | Dropdown | Yes | The data type that determines how the field is displayed and what values it accepts |
- Click ADD PROPERTY FIELD to save the field
- The field will appear in the fields list on the Extended Property Setup form
- Repeat for each additional field you need
Available Field Types
When adding a field, you must select a Field Type from the dropdown. Each type controls how data is entered and stored.
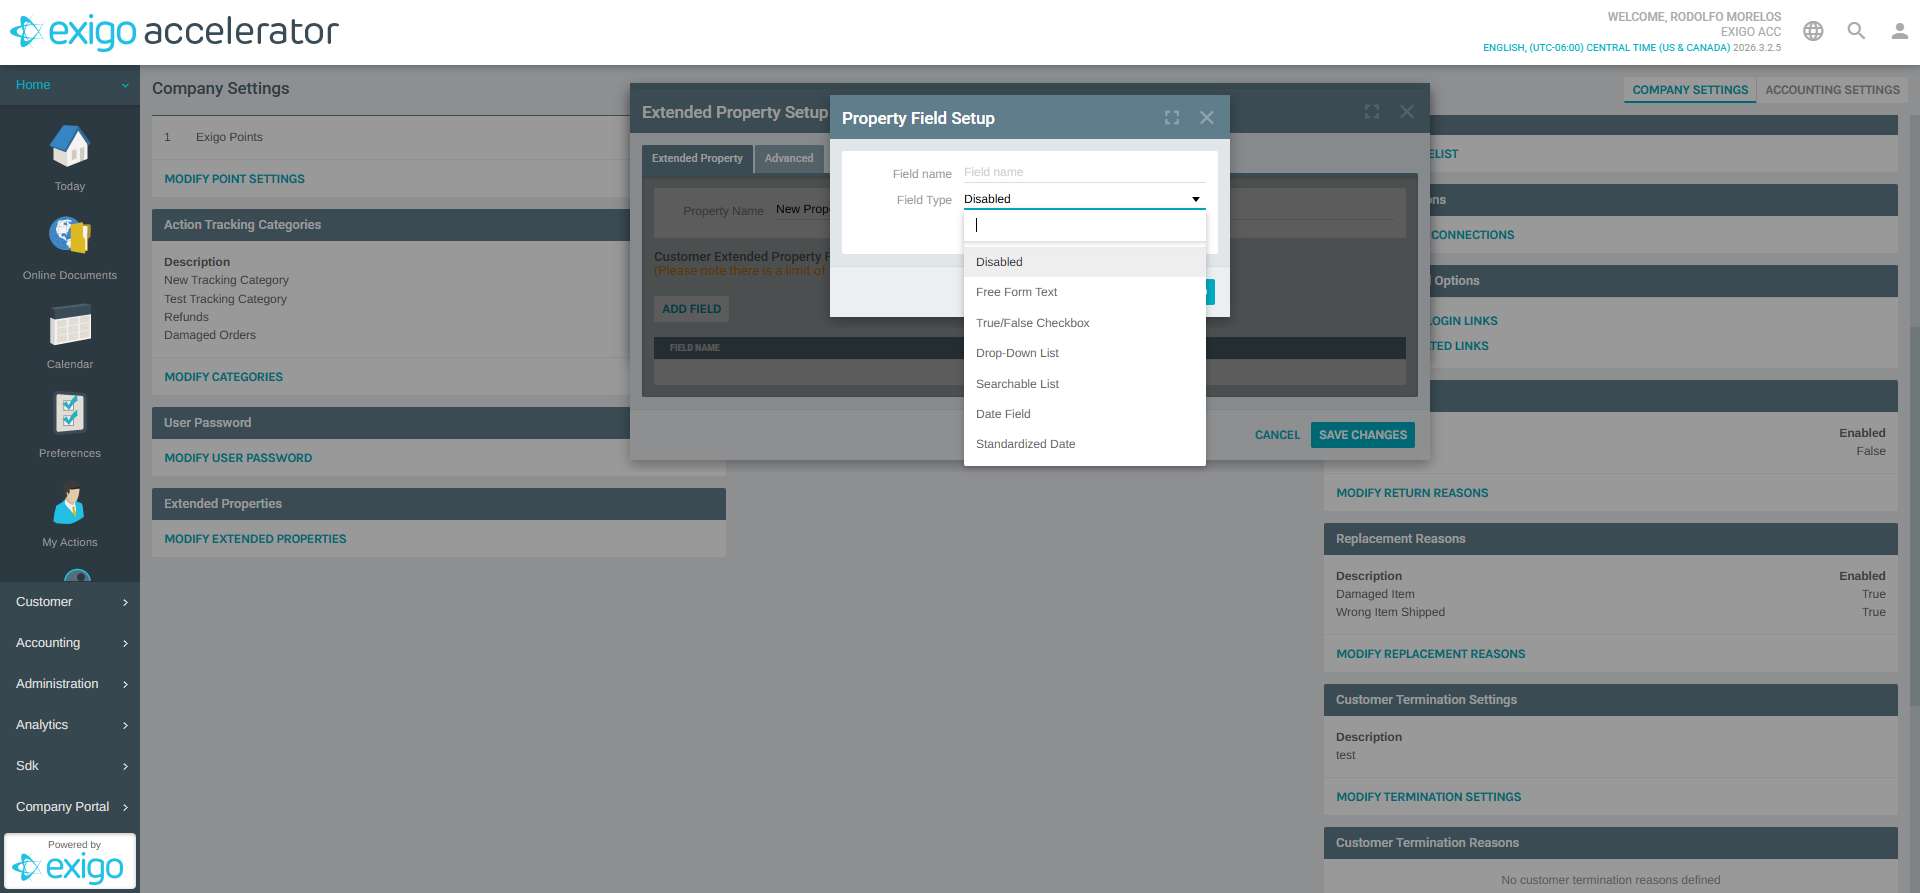
| Field Type | Description |
|---|---|
| Disabled | Field is defined but not active — it will not be displayed or accept input |
| Free Form Text | A standard text input field for entering any text value |
| True/False Checkbox | A checkbox that stores a boolean value (checked or unchecked) |
| Drop-Down List | A selection field with predefined options the user can choose from |
| Searchable List | A dropdown with search/filter functionality for large option sets |
| Date Field | A date picker for entering date values |
| Standardized Date | A date field with a standardized format enforced by the system |
Best Practices
- Plan Your Data Structure: Before creating extended properties, map out what additional data you need to capture and how fields should be organized into logical groups
- Use Descriptive Names: Choose clear property and field names that immediately convey their purpose (e.g., "Tax Information" with fields like "Tax ID Number", "Tax Exempt Status")
- Select Appropriate Field Types: Use Drop-Down List or Searchable List for fields with a known set of valid values to ensure data consistency; use Free Form Text only when values are truly open-ended
- Respect the 30-Field Limit: Each property group supports up to 30 fields — if you need more, create additional property groups organized by topic
- Use Disabled Sparingly: Set a field to Disabled only when you want to temporarily hide it without deleting the field definition
System Notes
- Extended properties are associated with customer records throughout the system
- Each property group can contain a maximum of 30 fields
- Property names must be unique across all extended properties
- Field types cannot be changed after the field has been created with data — plan your types carefully
- The Advanced tab provides additional configuration options for property behavior
- Changes are saved when you click SAVE CHANGES on the Extended Property Setup form
- Existing properties can be edited via the EDIT link or deleted via the options menu (three-dot icon) in the Extended Properties list
Documentation created: February 18, 2026 Environment: Exigo Admin v2026.3.2.5