Configure Return Reasons (Admin)
This guide explains how to configure Return Reasons in Exigo Admin. Return reasons are used when processing order returns to track why items are being returned.
Overview
Return reasons allow you to: - Define a list of standard return reasons (e.g., "Defective", "Wrong Item", "Changed Mind") - Enable or disable specific return reasons - Edit existing return reasons or add new ones
Step-by-step
1) Navigate to Company Settings
- In the left navigation, expand Administration
- Click Settings
- The Company Settings page will load
Screenshot (Company Settings page):
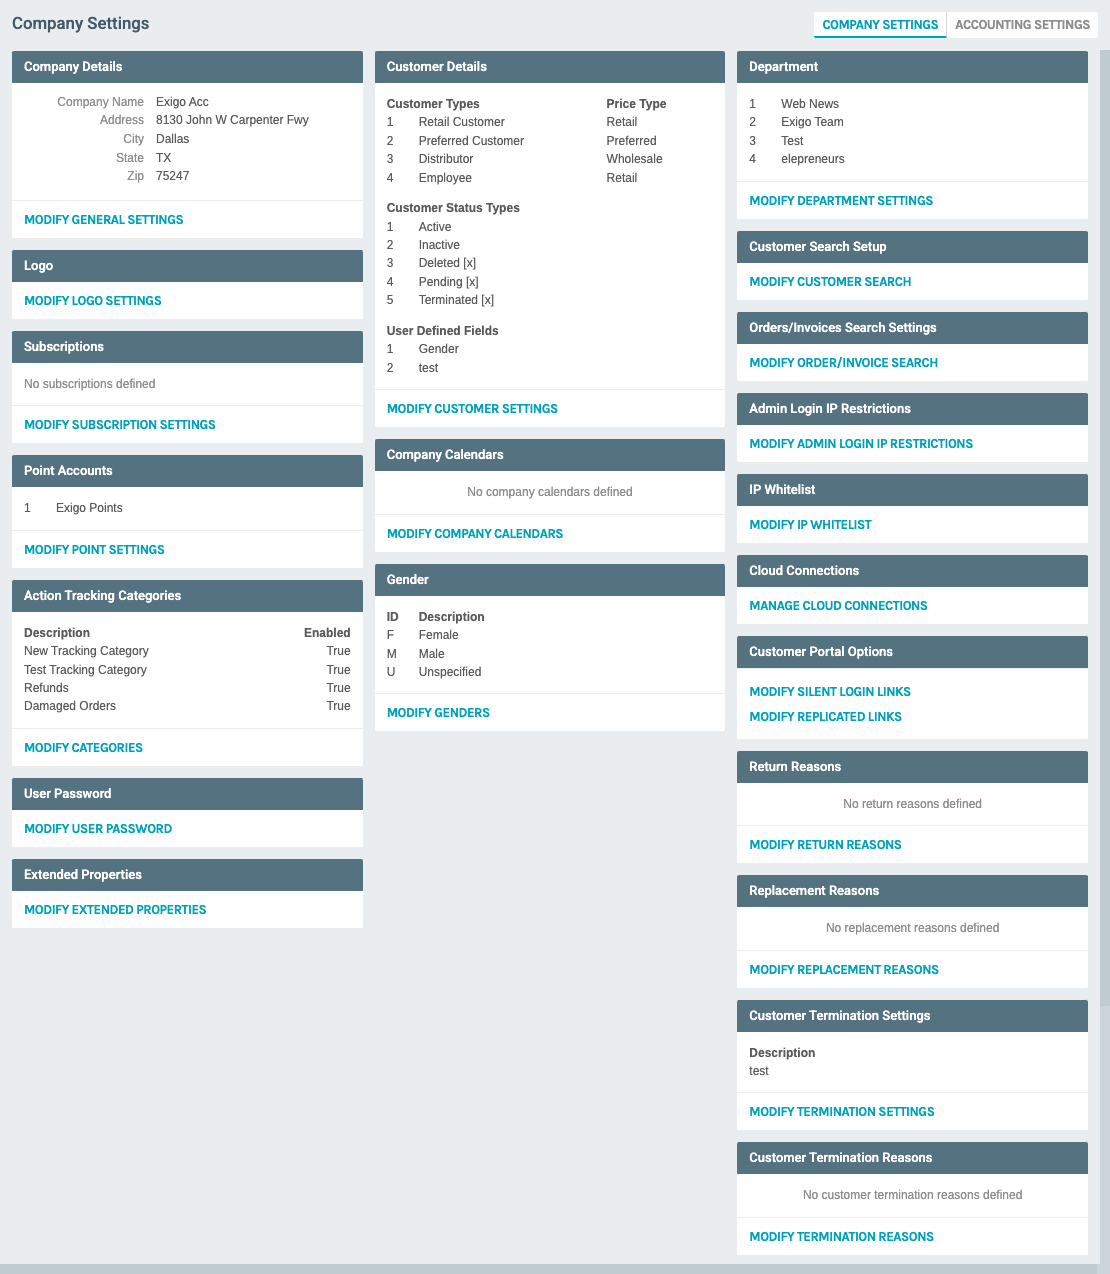
On this page, you'll see various configuration sections. The Return Reasons section is located in the right column.
2) Open Return Reasons Configuration
- In the right column, find the Return Reasons section
- Click Modify Return Reasons
Screenshot (Empty Return Reasons modal):

The Return Reasons modal displays: - REASON column: The description of the return reason - ENABLED column: Whether the reason is active and available for selection - ADD YOUR FIRST RETURN REASON link (when empty) - ADD ORDER RETURN REASON button: To add a new return reason - CANCEL button: To close without saving changes
3) Add a New Return Reason
- Click ADD ORDER RETURN REASON (or ADD YOUR FIRST RETURN REASON if the list is empty)
Screenshot (Add Return Reason form):
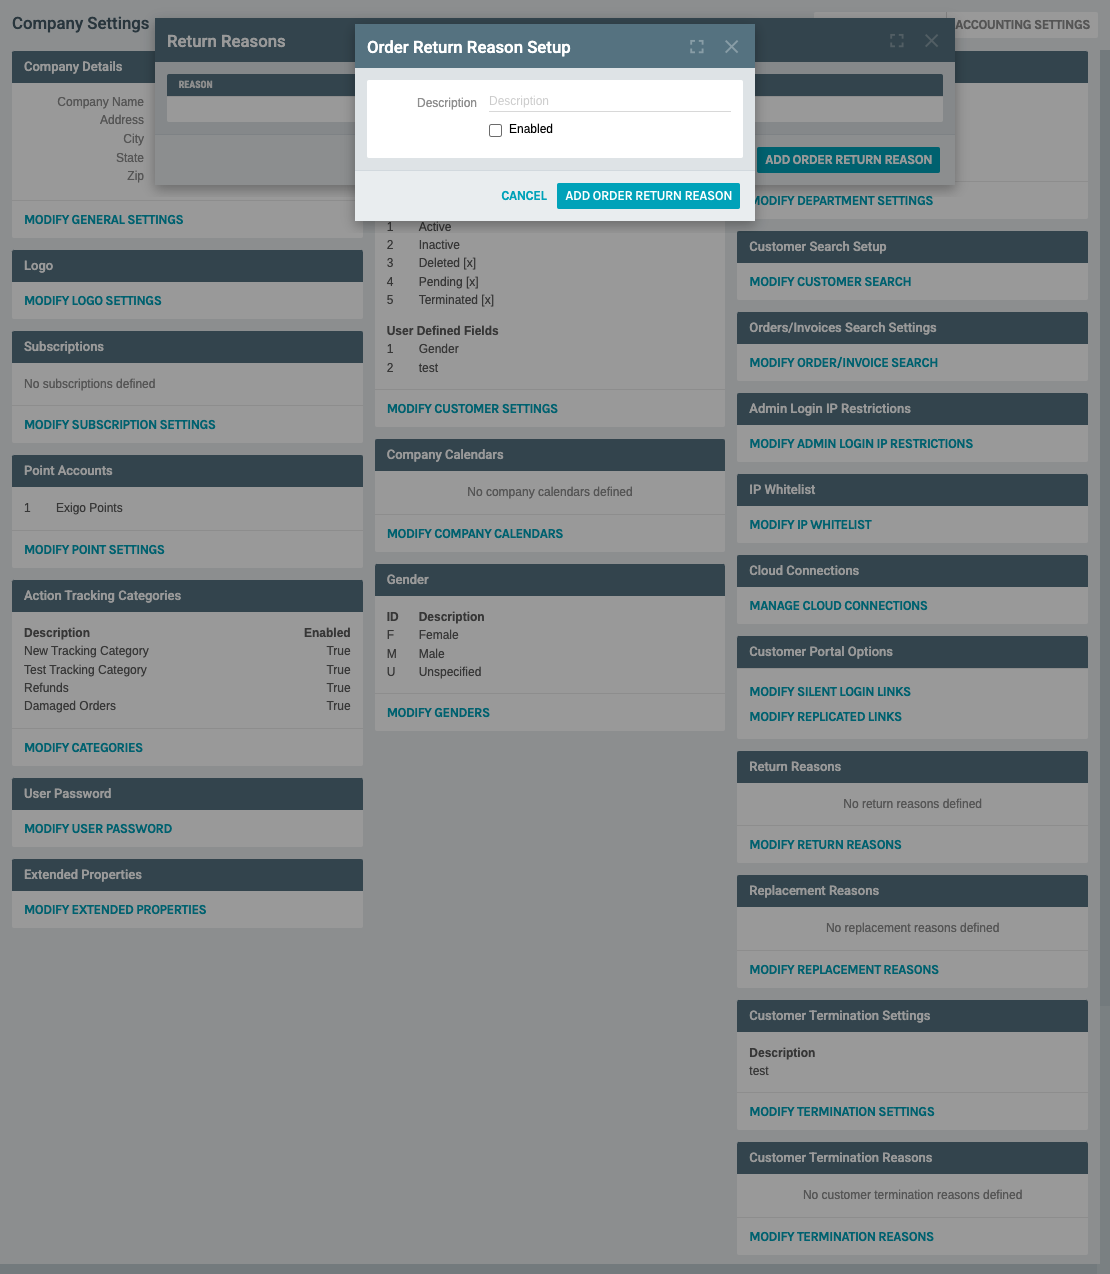
The Order Return Reason Setup form contains: - Description: Text field for the return reason name (e.g., "Defective", "Wrong Item Shipped") - Enabled: Checkbox to enable/disable this return reason - CANCEL button: To close without saving - ADD ORDER RETURN REASON button: To save the new return reason
Fill in the details: - Enter a description (e.g., "Defective") - Check Enabled if you want this reason to be immediately available - Click ADD ORDER RETURN REASON to save
4) View Saved Return Reasons
Screenshot (Return Reasons list with saved entry):
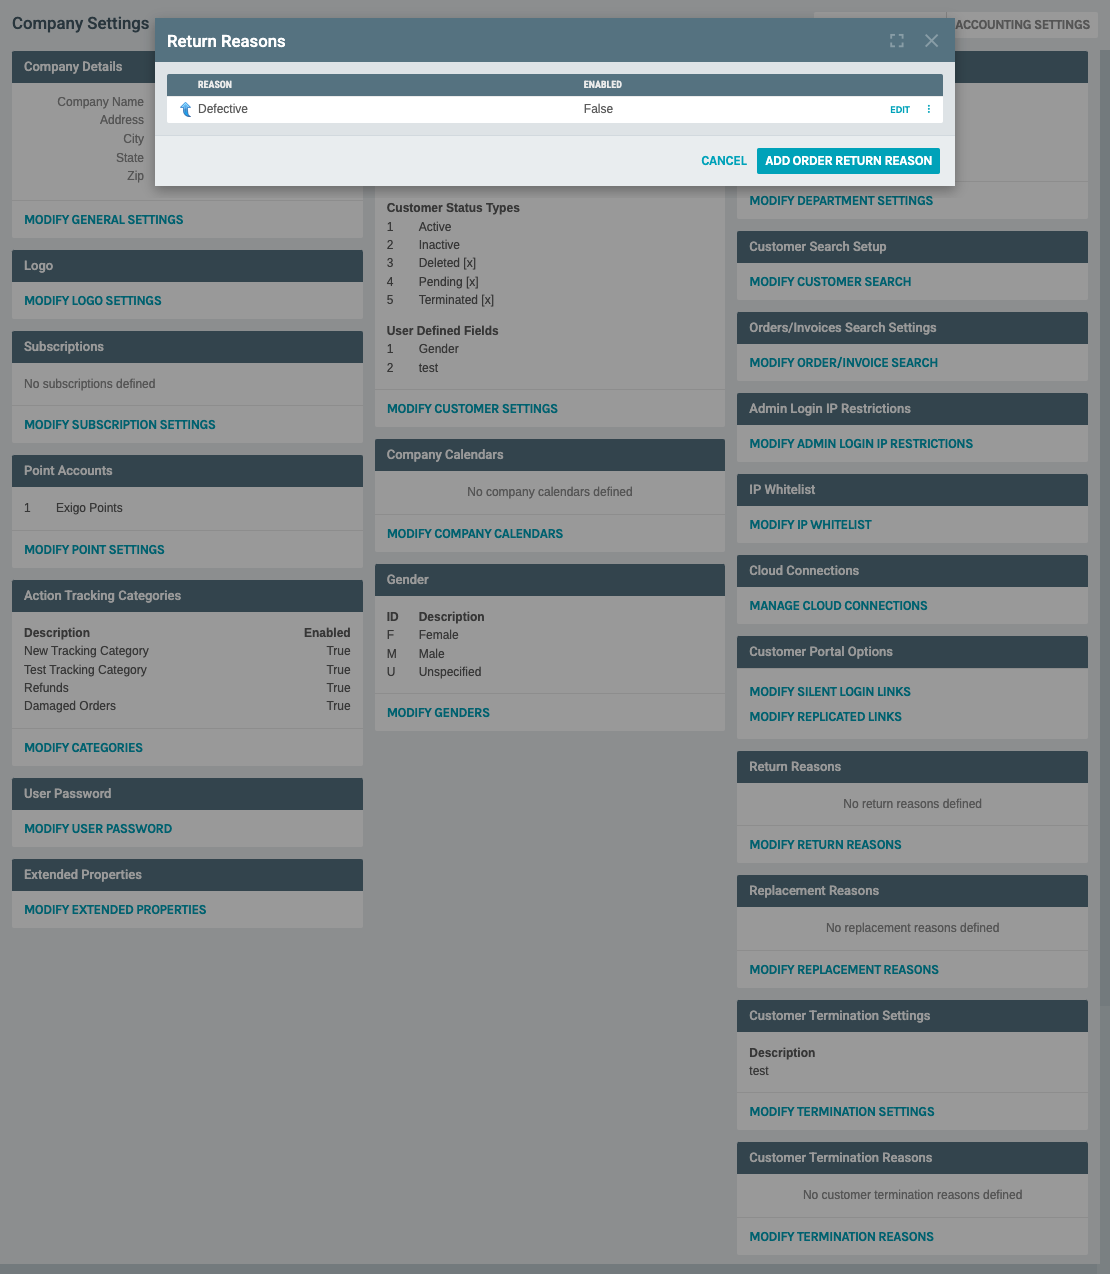
After saving, the return reason appears in the list: - REASON: Shows "Defective" - ENABLED: Shows "False" (if not enabled) - EDIT link: Opens the edit form for this return reason
5) Edit an Existing Return Reason
- Click the EDIT link next to any return reason
Screenshot (Edit Return Reason form):
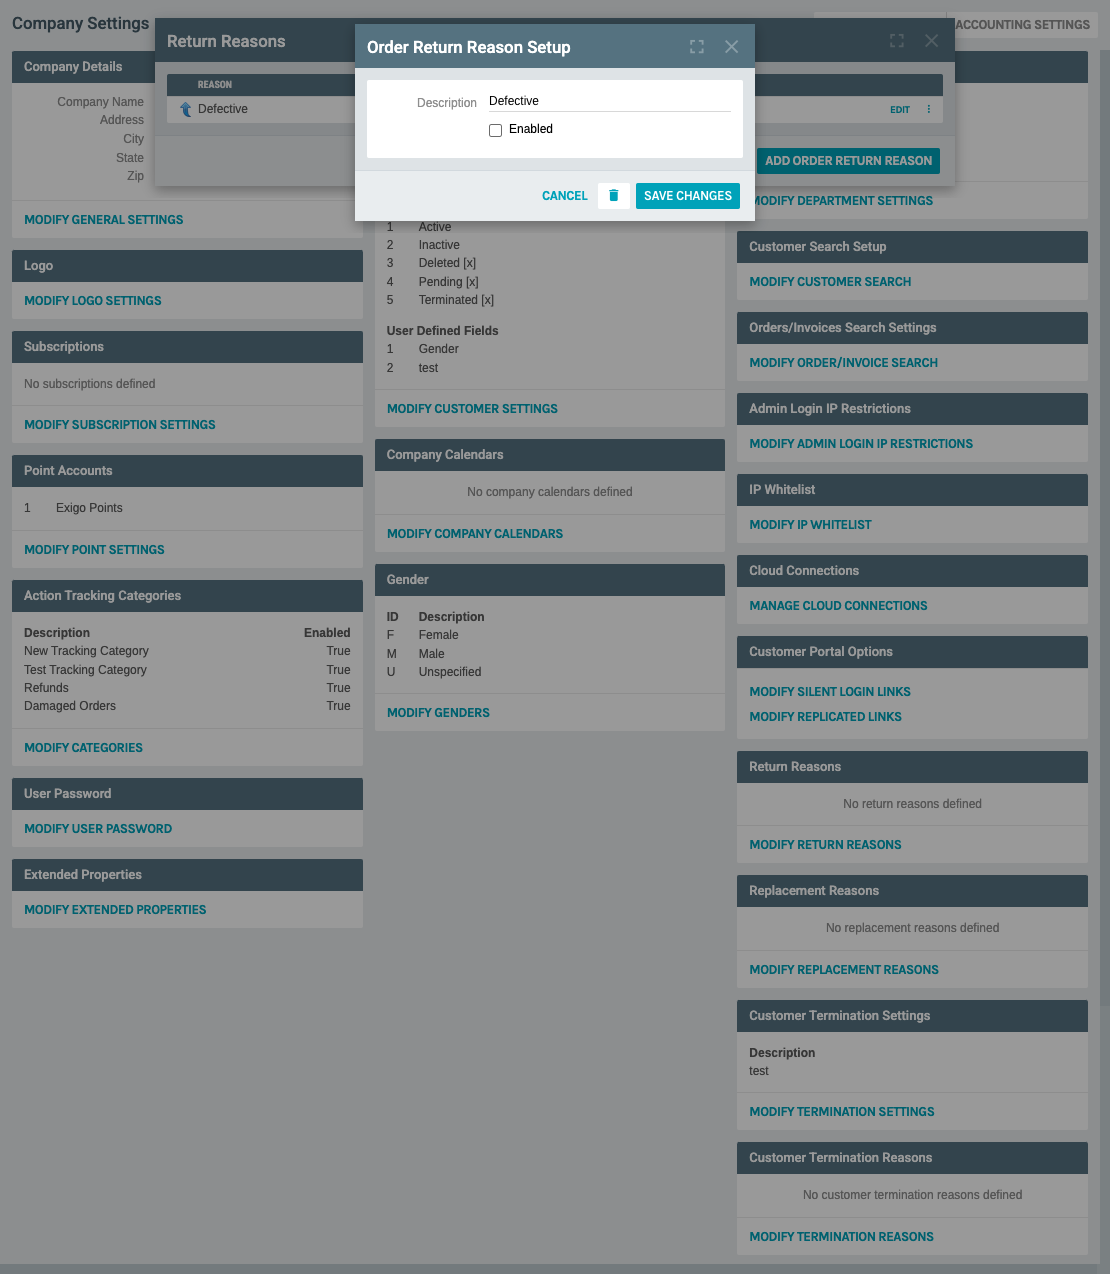
The edit form allows you to: - Description: Modify the return reason text - Enabled: Check/uncheck to enable or disable the reason - Delete button (trash icon): Remove the return reason - CANCEL button: Close without saving changes - SAVE CHANGES button: Update the return reason
6) Save and Close
- After configuring all return reasons, click CANCEL to close the modal (your changes are already saved)
- The Company Settings page will show the updated return reason count
Common Return Reasons
Typical return reasons you might configure: - Defective - Product is defective or damaged - Wrong Item Shipped - Customer received incorrect item - Changed Mind - Customer no longer wants the item - Damaged in Shipping - Item was damaged during delivery - Not as Described - Product doesn't match description - Quality Issues - Product quality is below expectations - Better Price Found - Customer found a better price elsewhere
Notes
- Return reasons must be enabled to appear in return processing workflows
- You can temporarily disable a return reason without deleting it
- Changes take effect immediately after saving
- Consider your business needs when naming return reasons to ensure consistent tracking