Setting Up Supported Countries
This document provides a comprehensive guide for configuring the supported countries, languages, and currencies in the Exigo Admin portal.
Table of Contents
- Overview
- Accessing Country Settings
- Managing Supported Countries
- Viewing the Country List
- Adding a Country
- Reordering Countries
- Removing a Country
- Managing Supported Languages
- Adding a Language
- Removing a Language
- Managing Supported Currencies
- Adding a Currency
- Reordering Currencies
- Removing a Currency
- Saving Changes
Overview
The Country Settings module allows administrators to define which countries, languages, and currencies are supported in their Exigo platform. These settings determine what options are available to customers during registration, order placement, and profile management.
Key Features:
- Add or remove supported countries with ISO country codes
- Set the display priority order for countries in dropdowns
- Configure supported languages for internationalization
- Define available currencies with codes and display priorities
Accessing Country Settings
Navigation Path
- Log in to the Exigo Admin portal at
login.exigo.com - From the left sidebar, navigate to Administration > Settings
- On the Company Settings page, click the ACCOUNTING SETTINGS tab at the top
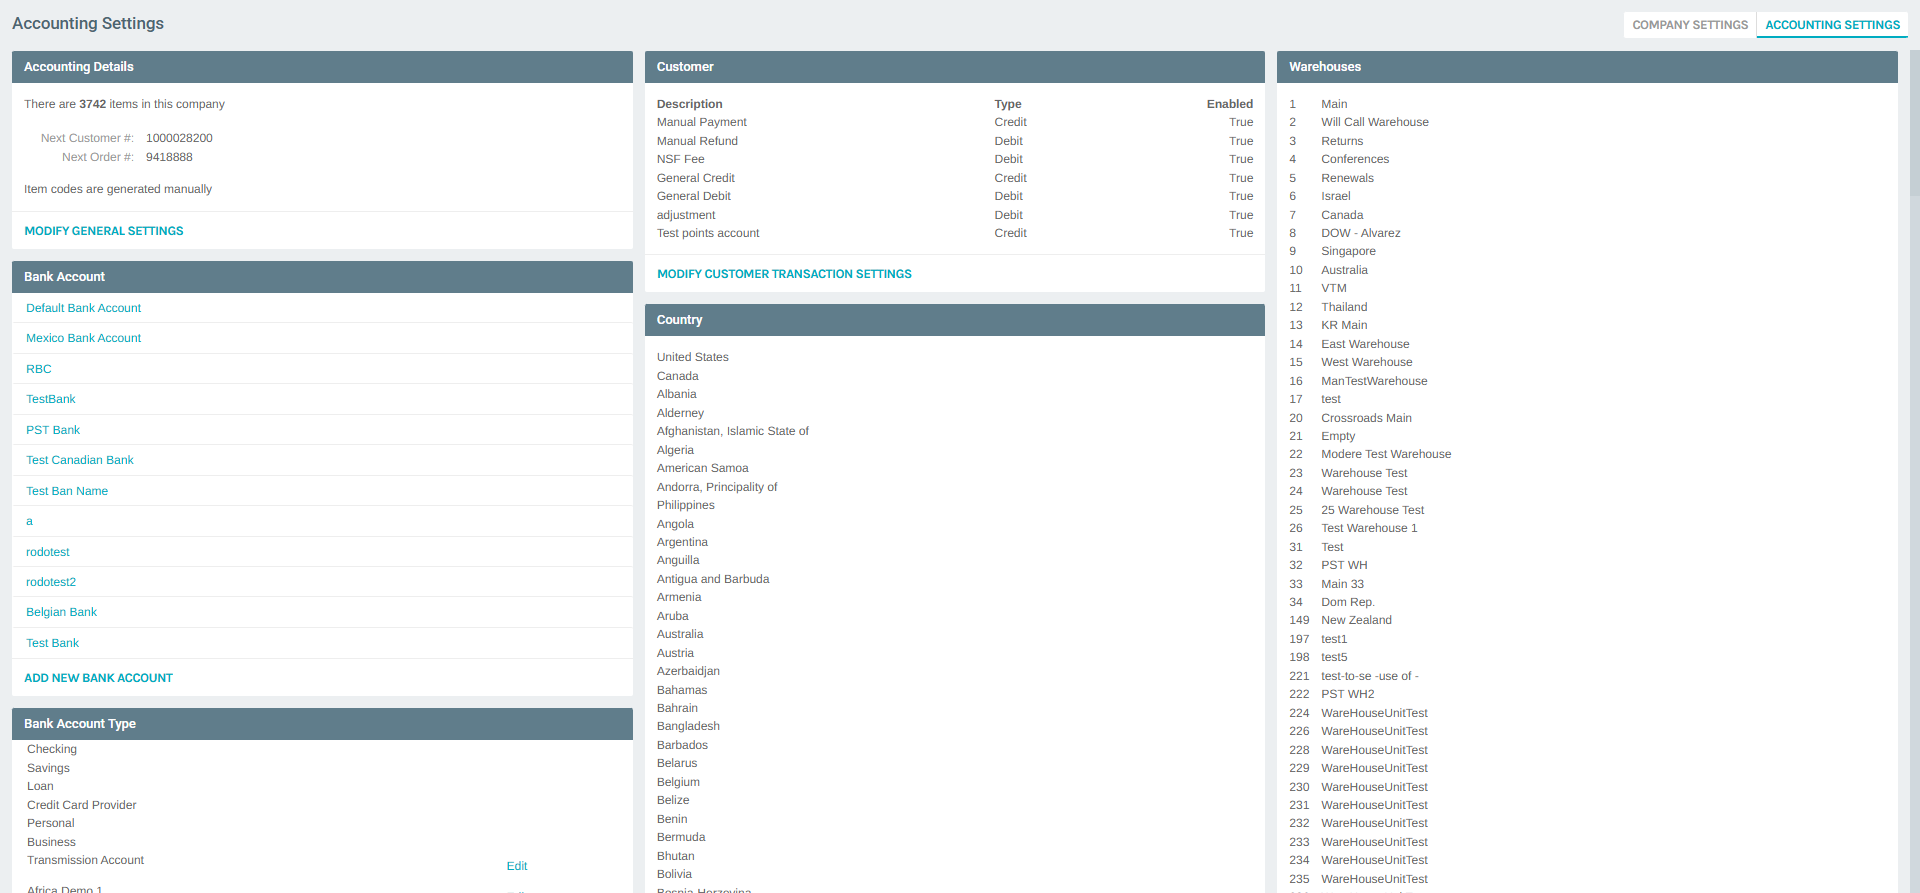
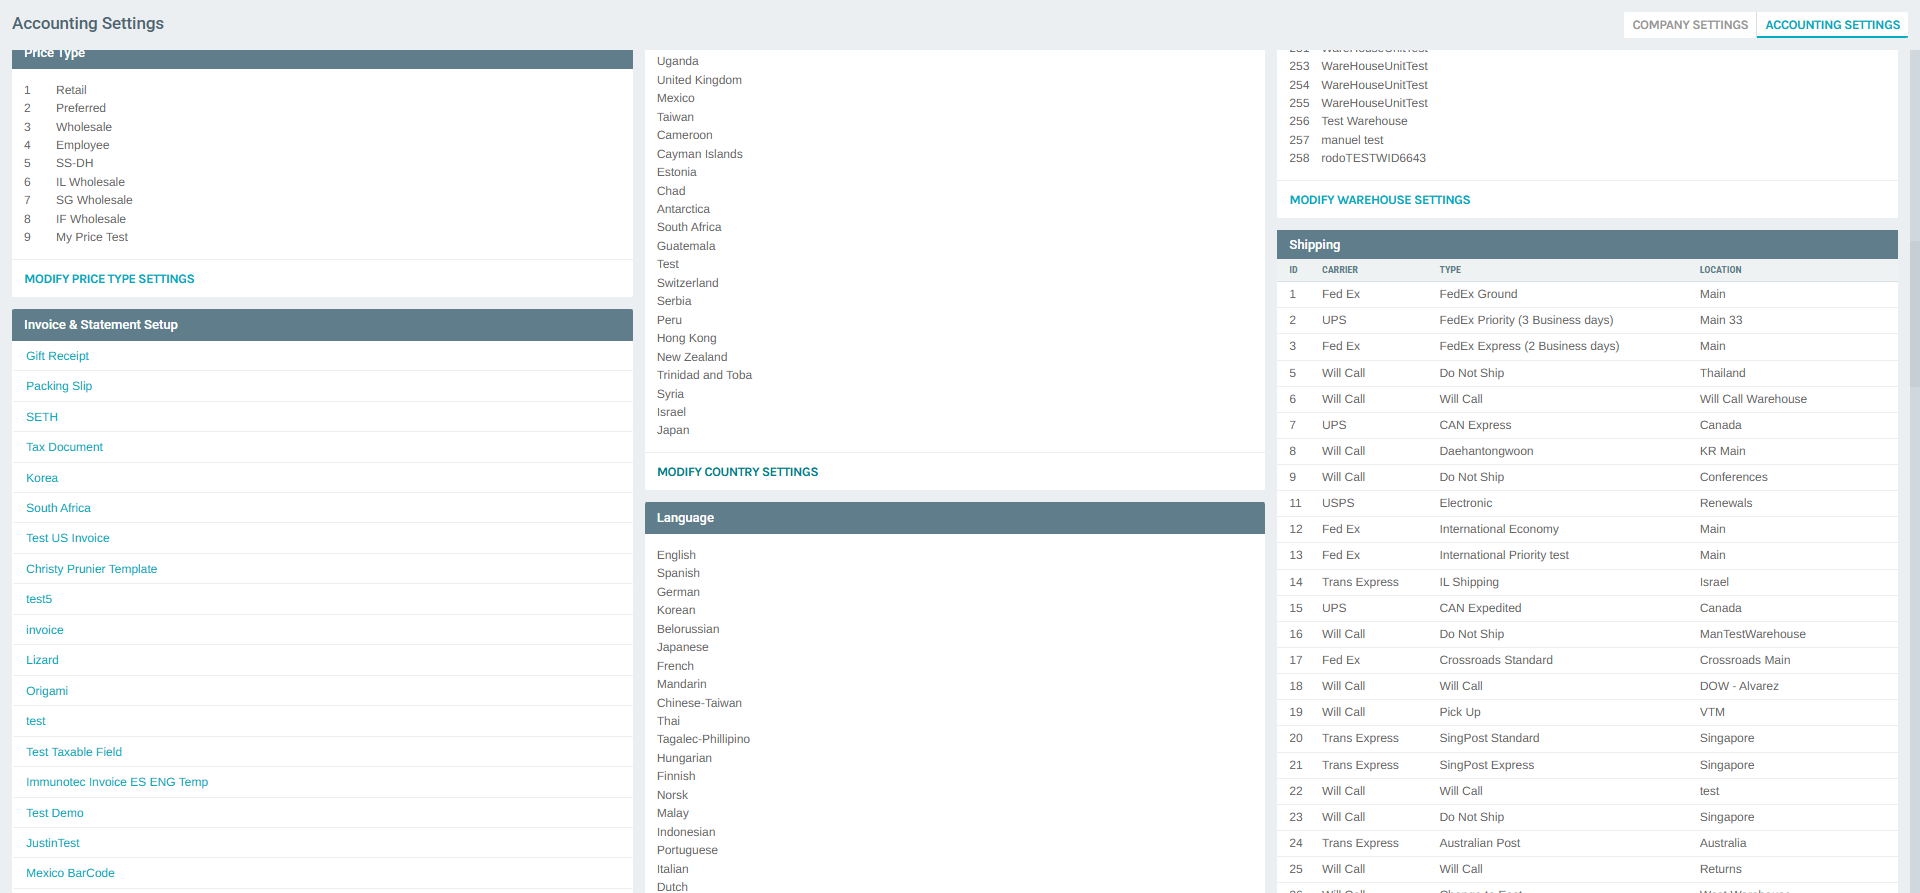
- Scroll down the Accounting Settings summary to find the Country section
- Click MODIFY COUNTRY SETTINGS
The Accounting Settings popup will open, defaulting to the Country tab.
Managing Supported Countries
Viewing the Country List
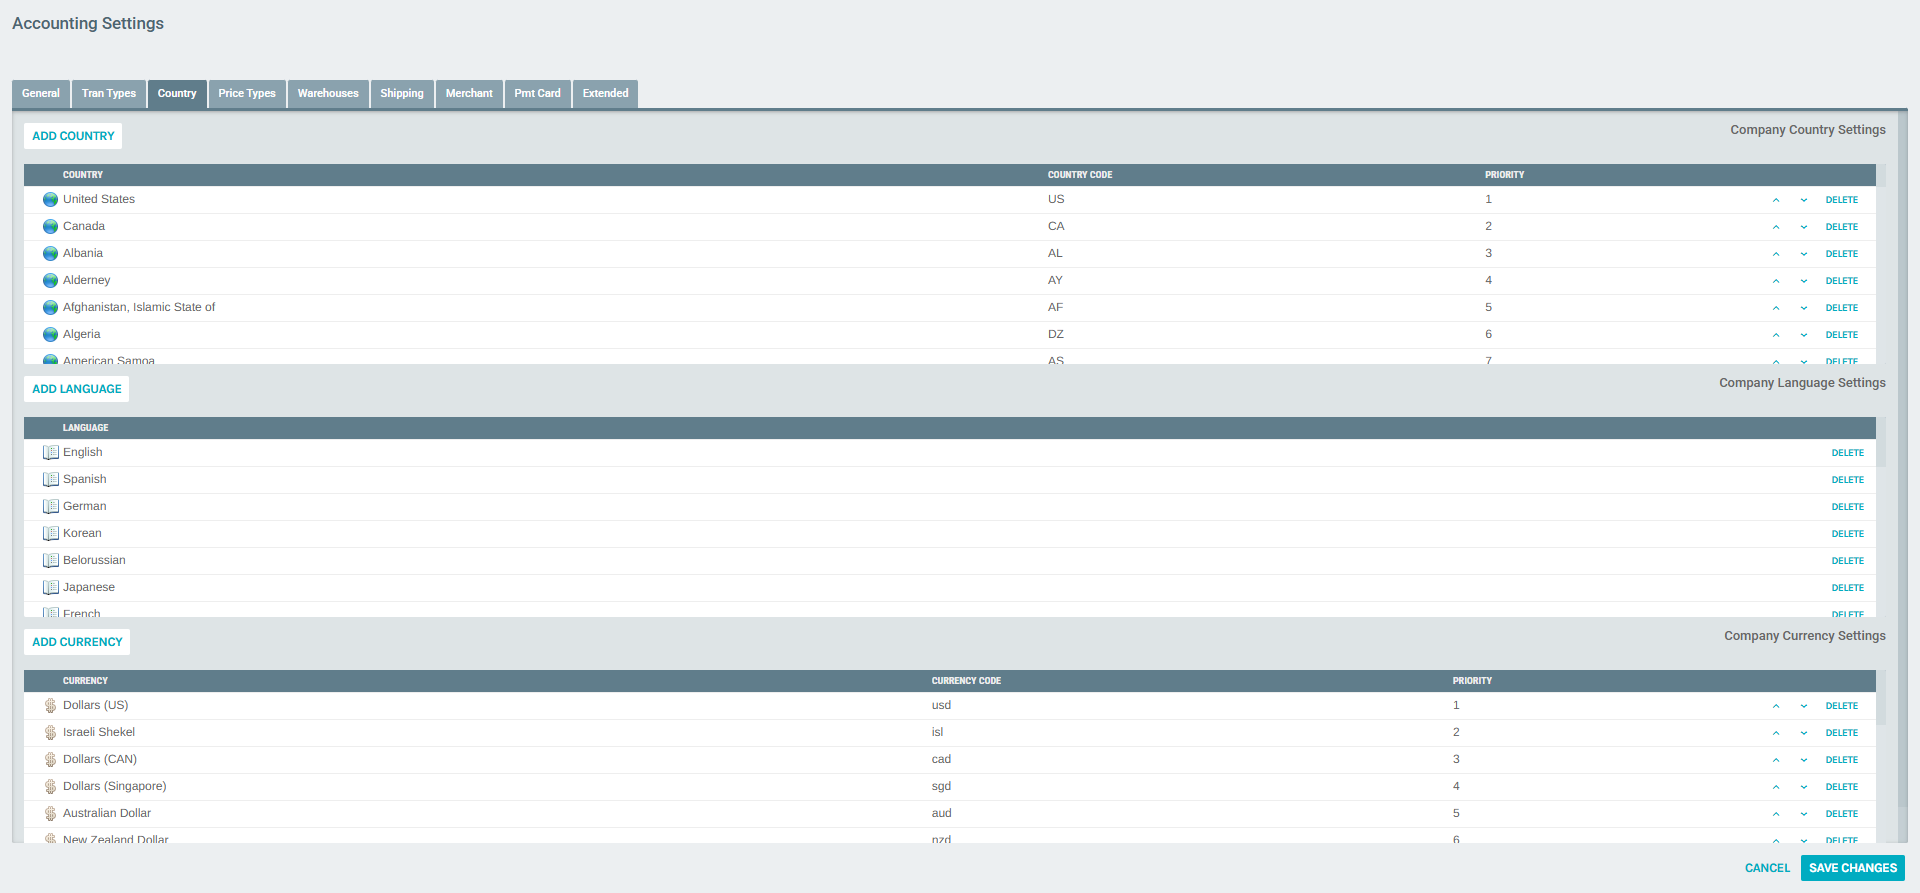
The Company Country Settings table shows all currently supported countries with three columns:
| Column | Description |
|---|---|
| Country | Full name of the country |
| Country Code | ISO 2-letter country code (e.g., US, CA, MX) |
| Priority | Display order in dropdowns (lower number = higher position) |

Countries are displayed in priority order. The top entries (e.g., United States = 1, Canada = 2) will appear at the top of country dropdown menus throughout the platform.
Adding a Country
- Click the ADD COUNTRY button above the country table
- A Company Country Setup dialog will appear
- Use the Country dropdown to select the country you want to add
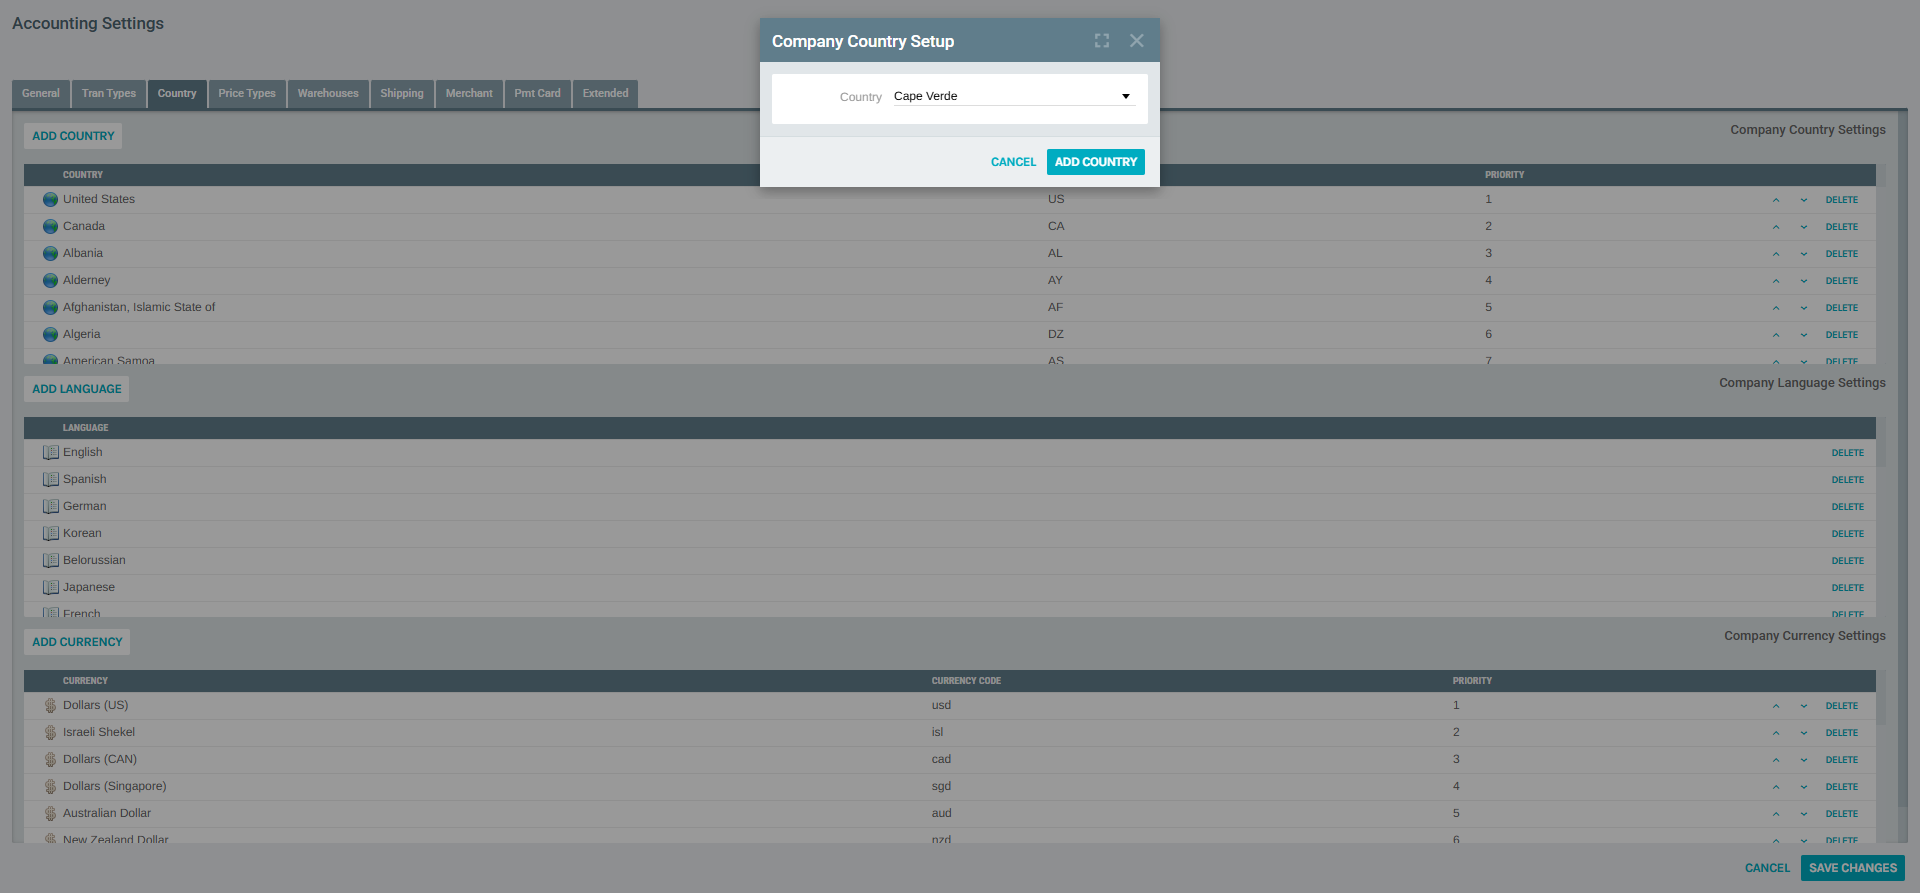
- Click ADD COUNTRY to confirm
- The new country will be added to the list with an automatically assigned priority number
Note: After adding countries, click SAVE CHANGES at the top of the Accounting Settings popup to persist your changes.
Reordering Countries
Each row in the country table has ▲ (expand_less) and ▼ (expand_more) arrow buttons on the right side. Use these to:
- Click ▲ to move a country up in priority (lower priority number)
- Click ▼ to move a country down in priority (higher priority number)
Countries with lower priority numbers appear first in dropdown menus across the platform.
Removing a Country
- Locate the country you want to remove in the table
- Click the DELETE button on the right side of the country row
- The country will be removed from the supported list
Warning: Removing a country may affect existing customer records that have that country set in their profile.
Managing Supported Languages
The Company Language Settings section is located below the country table on the same Country tab. It allows you to define which languages are available in your Exigo back office.

Adding a Language
- Click the ADD LANGUAGE button above the language table
- Select the desired language from the dropdown
- Click ADD LANGUAGE to confirm
- Click SAVE CHANGES to persist the addition
Removing a Language
- Locate the language in the Company Language Settings table
- Click the DELETE button next to the language
- Click SAVE CHANGES to persist the change
Managing Supported Currencies
The Company Currency Settings section is located below the language table. It defines which currencies are available for transactions across the platform.

The currency table contains:
| Column | Description |
|---|---|
| Currency | Full currency name (e.g., Dollars (US), Euro) |
| Currency Code | Short code used in the system (e.g., usd, eur, cad) |
| Priority | Display order in dropdowns |
Adding a Currency
- Click the ADD CURRENCY button above the currency table
- Fill in the currency name and code in the dialog
- Click ADD CURRENCY to confirm
- Click SAVE CHANGES to persist
Reordering Currencies
Use the ▲ and ▼ arrow buttons on each currency row to adjust the display order. The currency with priority 1 will appear as the default selection in currency dropdowns.
Removing a Currency
- Click the DELETE button next to the currency you want to remove
- Click SAVE CHANGES to persist the change
Warning: Removing a currency may impact existing orders, invoices, and customer accounts configured to use that currency.
Saving Changes
All modifications in the Country tab (countries, languages, and currencies) are applied only after clicking the SAVE CHANGES button at the top of the Accounting Settings popup.
- To discard changes, click CANCEL instead of SAVE CHANGES
- Changes take effect immediately after saving